Welcome to our comprehensive guide on how to draw a bush! Whether you’re just starting your artistic journey or have some experience under your belt, mastering the art of drawing a bush can significantly enhance the natural beauty of your artwork. Bushes, with their lush foliage and varied textures, can add depth and interest to any landscape, providing that essential touch of nature.
In this tutorial, we’ll take you through a step-by-step process that simplifies the drawing of a bush into manageable parts. With a focus on basic shapes and shading techniques, you’ll learn how to create a lifelike representation that captures the essence of these vibrant plants. So, gather your drawing materials and prepare to unleash your creativity!
Are you ready to transform a blank piece of paper into a stunning depiction of a bush? Let’s dive in and explore the joy of drawing this delightful natural element together!
Materials Required
Before we dive into the drawing process, let’s gather all the materials you’ll need. Here’s a list of what you’ll need to create your own bush drawing:
- Drawing paper or sketchbook
- Pencils (preferably HB and 2B)
- Eraser
- Pencil sharpener
- Blending stump or cotton swabs
- Reference image of a bush (optional)
Now that we have everything we need, let’s move on to the step-by-step instructions for drawing a bush.
Step 1: Outline the Shape of the Bush
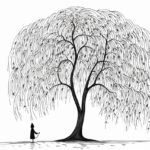
Start by lightly sketching the basic outline of the bush on your drawing paper. Use simple shapes such as circles or ovals to represent the overall shape of the bush. Keep your lines loose and light, as they will be erased later on.
Step 2: Add Branches and Twigs
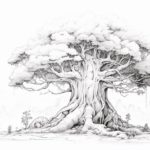
Within the outline, add branches and twigs to give your bush its structure. Start by drawing larger branches that divide into smaller ones. Vary the thickness and direction of the branches to create a natural and organic look. Remember to keep your lines loose and sketchy to capture the organic feel of a bush.
Step 3: Define the Leaves
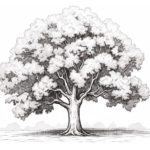
Now it’s time to add the leaves to your bush drawing. Start by lightly sketching the general shape of the leaves using small ovals or curved lines. Pay attention to the patterns and direction in which the leaves grow. Remember, we are aiming for a realistic representation, so take your time and observe the references if you have any.
Step 4: Shade the Bush
To add depth and dimension to your drawing, start shading the bush. Use the side of your pencil to create soft, even tones. Start by shading the areas where shadows would naturally fall, such as the inner parts of the bush and underneath the leaves. Gradually build up the shading, layering lighter and darker values to create a three-dimensional effect.
Step 5: Add Texture and Details
To make your bush drawing more realistic, add texture and details to the leaves and branches. Use your pencil to create tiny strokes or dots to represent the texture and veins on the leaves. Pay attention to the direction of these marks, as they should follow the natural growth pattern of the leaves. Add subtle lines and squiggles on the branches to represent the bark and add depth.
Step 6: Blend the Shading
To achieve a smooth and seamless look, blend the shading using a blending stump or a cotton swab. Gently rub the blended tool over the shaded areas, softening any harsh lines or transitions. This will give your bush drawing a more realistic and polished appearance.
Step 7: Refine and Erase
Take a step back and assess your drawing. Look for any areas that need refinement or adjustment. You can use your eraser to lighten or clean up any lines that are too heavy or out of place. Pay attention to the overall shape and proportions of the bush, making any necessary changes before moving on.
Step 8: Final Touches
Lastly, add any final touches and details to complete your bush drawing. Darken the shadows and add highlights to create more depth and contrast. You can also use a kneaded eraser to lift off some graphite in areas where you want to create highlights or add texture. Take your time and make small adjustments until you are satisfied with the final result.
And there you have it! You have successfully drawn a realistic bush. Remember, practice makes perfect, so don’t be discouraged if your first attempt doesn’t turn out exactly as you imagined. The more you practice, the better you will become at capturing the essence of nature in your artwork.
Conclusion
Drawing a bush can be a fun and rewarding experience that adds a touch of nature to your artwork. By following these step-by-step instructions and using basic shading techniques, you can create a realistic and vibrant bush drawing. Remember to gather all the required materials, sketch the basic outline, add branches and leaves, shade and add texture, and make any necessary refinements. With practice and patience, you’ll be able to create stunning bush drawings that enhance your artwork. So grab your pencils and start drawing!
Fun Facts About Bushes
- Bushes, also known as shrubs, are typically woody plants that are smaller than trees, often with multiple stems arising at or near the ground.
- They play a crucial role in ecosystem diversity, providing shelter and food for many animal species.
- Some types of bushes produce fruits, such as blueberries and huckleberries, which are popular for both wildlife and human consumption.
- The world’s largest bush maze is located at the Longleat Hedge Maze in Wiltshire, England, covering 1.48 acres with 1.69 miles of pathways.
- Bushes can survive in various climates, from deserts to temperate forests, adapting their foliage to suit their environment.
- Certain bush species, like lavender and rosemary, are used for culinary and medicinal purposes due to their aromatic properties.
- Bonsai is the art of growing ornamental, artificially dwarfed varieties of shrubs and trees in pots, a practice that originated in China and Japan.
- Some bushes, like the hydrangea, can change the color of their flowers based on the pH level of the soil they are planted in.
- Bushes are often used in landscaping not only for their beauty but also for creating privacy screens, barriers, and windbreaks.
- Many traditional and modern gardens feature beautifully clipped bushes in topiary designs, reflecting art and creativity through horticulture.
Suggestions for Scenes and Settings for Bush Drawings
- Enchanted Garden: Draw a magical setting with whimsical bushes twisting into fantastic shapes with glowing flowers and tiny sprites.
- Forest Edge: Illustrate a scene where a dense line of bushes marks the edge of a mysterious forest, teeming with birds and small animals.
- Desert Oasis: Picture a collection of hardy bushes thriving around a desert water hole, providing shade and sustenance for local wildlife.
- Urban Park: Design a bustling city park with manicured bushes providing a calm retreat amid tall skyscrapers.
- Seaside Cliffs: Paint a coastal scene where rugged bushes cling to windswept cliffs, overlooking a vast ocean.
- Animal Hide and Seek: Create a playful scene of animals peeking out from behind bushes, engaged in a game of hide and seek.
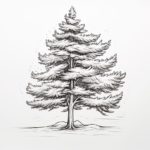
- Winter Wonderland: Imagine bushes dusted with snow, sparkling in frosty sunlight with icicles hanging from their branches.
- Garden Labyrinth: Draw a scene featuring an intricate hedge maze with towering bushes forming winding paths and hidden alcoves.
- Night Watch: Illustrate a moonlit scene where shadowy bushes cast long silhouettes as night creatures scurry about.
- Fairytale Village: Depict a charming village where cottages are nestled among blooming bushes, with tiny paths winding through.