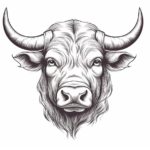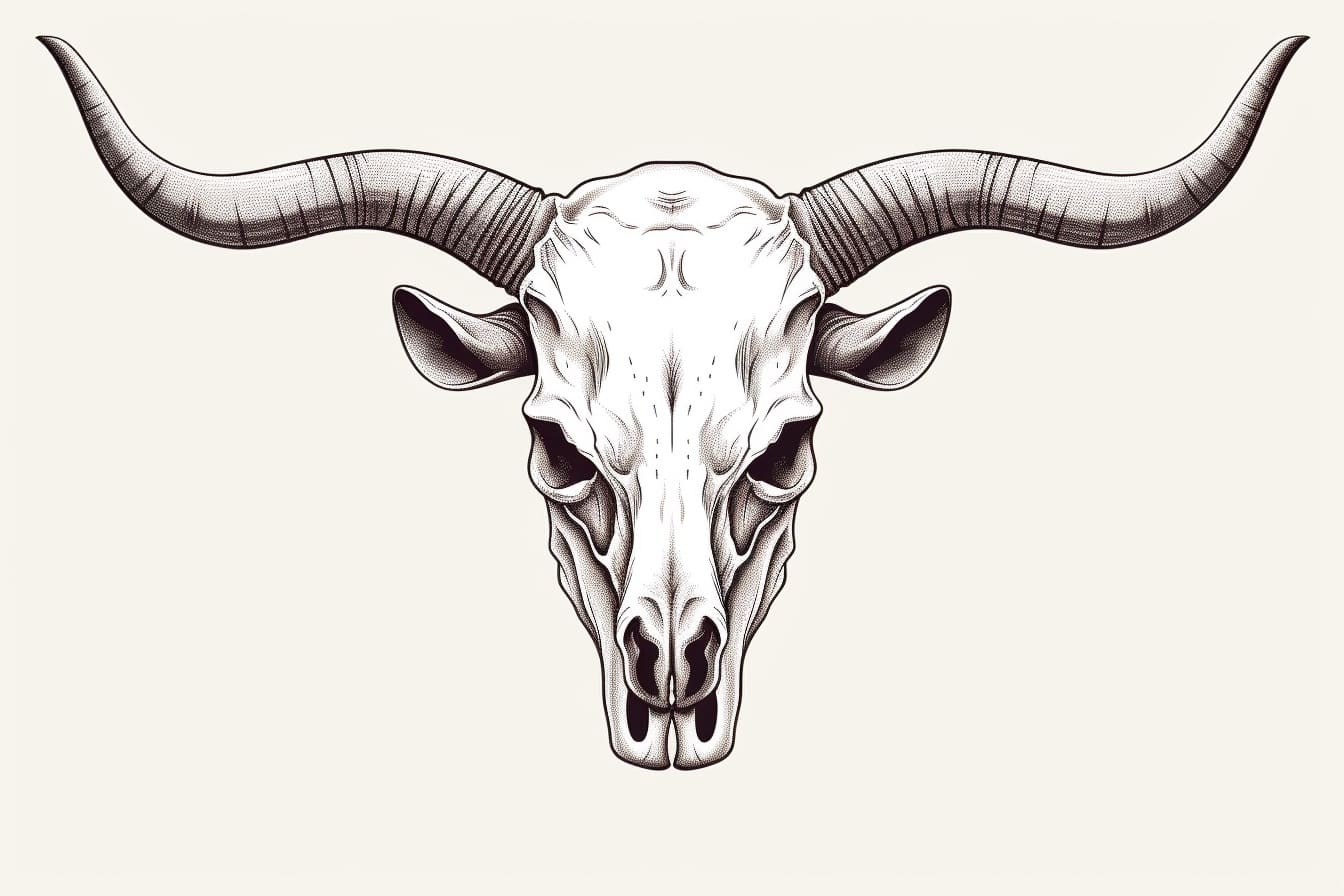
Welcome to this step-by-step tutorial on how to draw a bull skull. As an expert artist and drawing instructor, I will guide you through the process of creating a realistic and detailed bull skull drawing. Whether you are a beginner or an experienced artist, this tutorial will provide you with the necessary instructions to create a stunning bull skull artwork. So, grab your pencils and let’s get started!
Materials Required
Before we begin, make sure you have the following materials handy:
- A sheet of paper or a sketchbook
- Pencils of different hardness (HB, 2B, 4B, and 6B)
- Eraser
- Blending stump or cotton swabs
- Reference image of a bull skull (optional, but recommended)
Now that you have your materials ready, let’s dive into the step-by-step process of drawing a bull skull.
Step 1: Sketching the Basic Shapes
Start by lightly sketching the basic shapes of the bull skull. Begin with an oval shape for the skull’s top, tilted slightly to the side. Then, draw a curved line below the oval to outline the lower jaw. Keep these initial lines faint, as they will be refined and adjusted as we proceed.
Step 2: Adding Details to the Skull
Next, we will add more details to the skull. Using your reference image as a guide, start sketching the eye sockets, nasal cavity, and other prominent features of the skull. Pay attention to the curves, angles, and subtle variations in shape. Remember to keep your pencil strokes light and loose at this stage, as we will refine them later.
Step 3: Refining the Skull Shape
In this step, we will refine the shape of the skull. Use your various pencils of different hardness to darken and define the outlines of the skull. Start with a softer pencil (4B or 6B) to add more depth and shadows, gradually building up the tonal values. Pay attention to the areas where the light hits the skull and the areas in shadow, as this will help give your drawing a three-dimensional appearance.
Step 4: Working on the Horns
Now, let’s focus on the horns of the bull skull. Begin by sketching the basic shape of the horns, taking into account their length, thickness, and curvature. You can use light, curved lines to indicate the direction of the horns. Keep in mind that the horns may differ in size and shape, so study your reference image closely.
Step 5: Adding Texture and Detail
To make your bull skull drawing more realistic, we need to add texture and detail. Use a variety of pencils to create different lines and strokes to depict the texture of the skull and horns. Pay attention to the bony ridges, cracks, and imperfections in the skull, as well as the rough and uneven surface of the horns. Use cross-hatching, stippling, or hatching techniques to create the desired texture.
Step 6: Final Touches and Refinements
In this step, take a step back and evaluate your drawing as a whole. Look for any areas that need further refinement or adjustment. Use an eraser to clean up any stray lines or mistakes. You can also use a blending stump or cotton swabs to blend and soften the shading, creating a smoother transition between light and dark areas. Take your time with this step to ensure the final result is exactly as you envision it.
Conclusion
Congratulations! You have successfully completed your bull skull drawing. By following these step-by-step instructions and using your creativity, you have created a realistic and detailed artwork. Remember, practice makes perfect, so don’t be afraid to try this tutorial multiple times to refine your skills. I hope you enjoyed this tutorial and found it helpful in honing your drawing abilities. Now go ahead and showcase your masterpiece to the world!