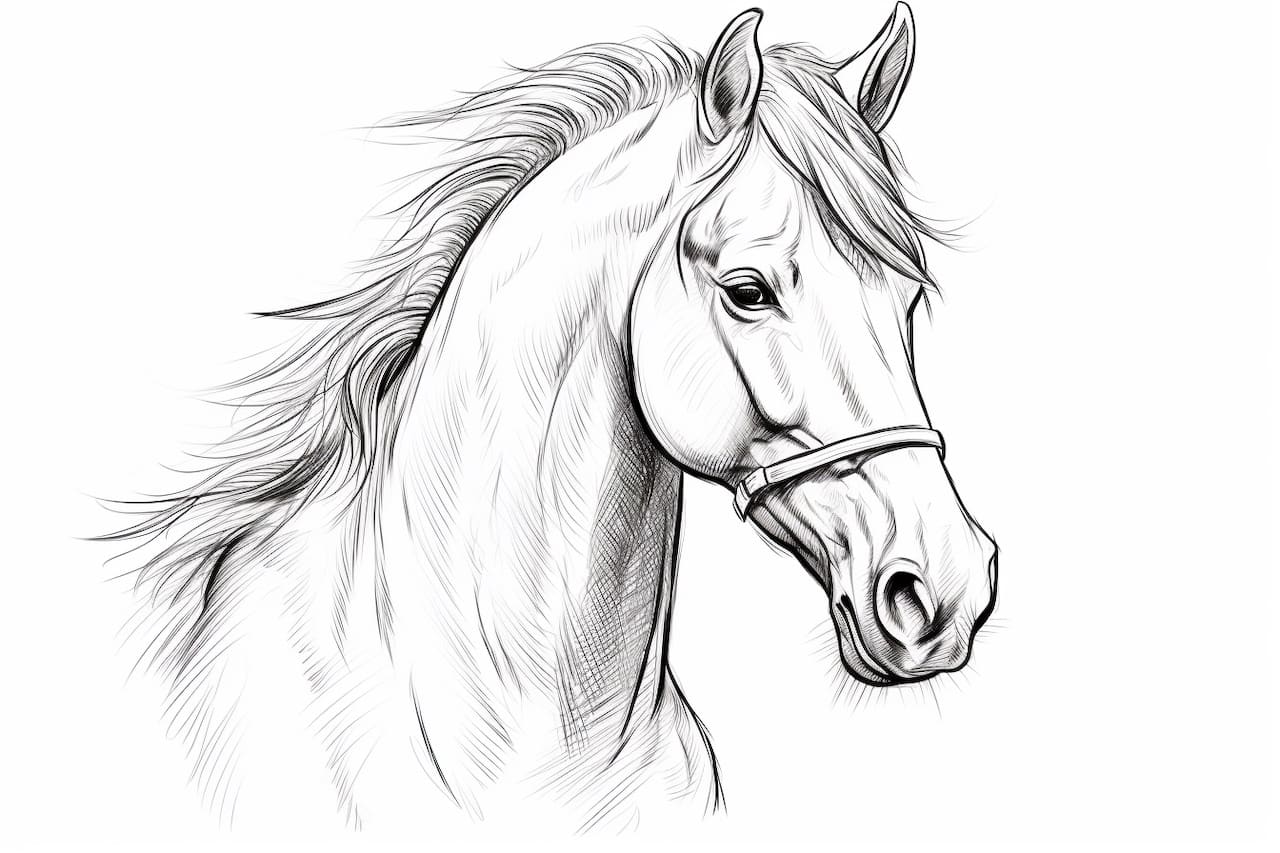
Welcome to this step-by-step guide on how to draw a horse’s head! As an expert artist and drawing instructor, I will walk you through the process in a clear, clean, and concise style. Drawing horses can be a challenging yet rewarding experience, and with the right techniques, you’ll be able to capture the beauty and grace of these magnificent creatures. So, let’s grab our materials and get started!
Materials Required:
To begin your horse drawing journey, you’ll need the following materials:
- Pencil: Start with a medium-soft graphite pencil, which will allow you to create a range of light and dark values.
- Paper: Opt for a smooth, heavyweight paper that can withstand erasing and shading.
- Eraser: A kneaded eraser is ideal for lifting off excess graphite and creating highlights.
- Blending Tools: You can use a blending stump or a tortillon to smudge and blend the graphite for a softer look.
- Reference Image: Find a clear and detailed reference photo of a horse’s head to guide you throughout the drawing process.
Now that you have your materials ready, let’s begin!
Step 1: Basic Shapes and Proportions
Start by lightly sketching a circle to represent the horse’s skull. Then, draw a smaller oval shape attached to the circle to outline the muzzle. This will help establish the basic proportions of the head.
Step 2: Eye and Nostril Placement
Place two small circles within the skull circle to represent the horse’s eyes. Position them slightly to the side and towards the top of the skull. Next, draw a small oval shape below the eye line for the nostril.
Step 3: Ear Placement
Ears play a crucial role in capturing a horse’s character. Draw two long, curved lines that emerge from the top of the skull circle, angling slightly toward each other. The base of the ears should be wider and gradually taper towards the tip.
Step 4: Face Outline and Jawline
Use light, curved lines to gently connect the muzzle to the skull circle, forming the outline of the horse’s face. Add a curved line below the muzzle to indicate the jawline, slightly narrower than the skull circle.
Step 5: Shading the Head
Now it’s time to add some depth and dimension to your drawing. Start by shading the darker areas of the head, such as the eye sockets, nostrils, and around the jawline. Use light, hatching strokes to build up the value gradually.
Step 6: Eye and Nostril Details
Refine the shape of the eyes by adding the iris, pupil, and eyelashes. Remember to observe your reference photo for accurate details. Darken the nostril and add shading to create depth and realism.
Step 7: Shading the Ears
To add depth and texture to the ears, use gentle, curved strokes to indicate the direction of the fur. Pay attention to the highlights and shadows within the ear structure.
Step 8: Mane and Forelock
Draw the flowing strands of the mane and forelock using fluid, curved lines. Vary the thickness and length of the lines to create a sense of movement and realism.
Step 9: Refining and Blending
Take a step back and evaluate your drawing so far. Make any necessary adjustments to the proportions or details. Once you’re satisfied, use a blending tool to softly blend and smudge the graphite, creating a smoother appearance.
Step 10: Final Details and Texture
Add the final details and textures to your horse’s head. Pay attention to the subtle variations in the coat’s texture and the play of light and shadow on the face. Use your eraser to lift off small highlights and create a more realistic look.
Conclusion
Congratulations on completing your horse’s head drawing! By breaking down the process into simple steps, you’ve successfully captured the essence of these majestic creatures. Remember, practice is key, and the more you draw, the better you’ll become. So keep exploring different angles and capturing the beauty of horses in your artwork. Happy drawing!