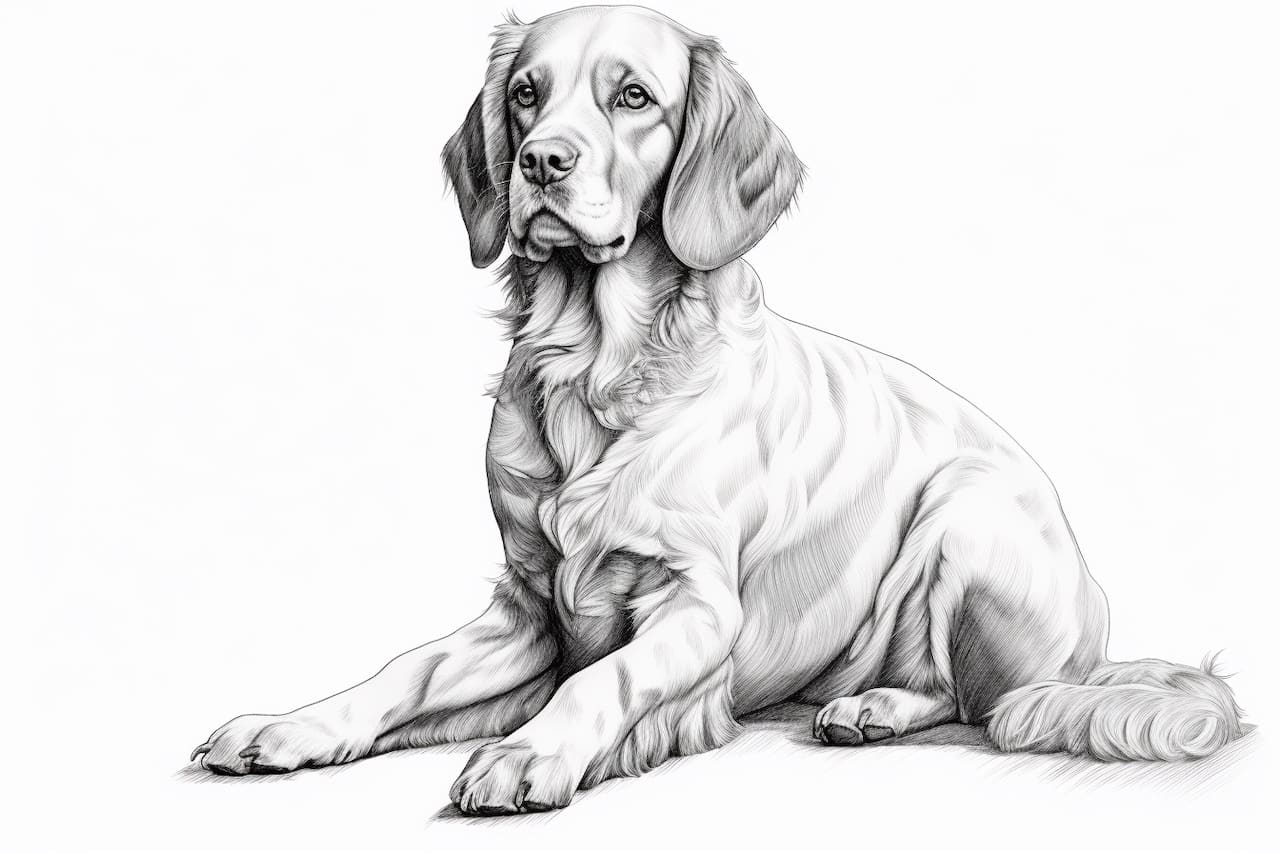
Welcome to this step-by-step guide on how to draw a Brittany. Whether you’re a beginner or an experienced artist, this tutorial will provide you with clear and concise instructions to help you create a beautiful, realistic drawing of this beloved dog breed.
Before we get started, let’s gather the materials you’ll need for this drawing:
Materials:
- Drawing paper
- Pencil (preferably HB or 2B)
- Eraser
- Fine tip black pen or marker (optional)
- Colored pencils or markers (optional)
Now that you have everything you need, let’s dive into the step-by-step process of drawing a Brittany.
Step 1: Sketch Basic Shapes
Start by sketching the basic shapes of the Brittany. Begin with an oval shape for the head, followed by a slightly curved line below it for the neck. Add a larger oval shape below the neck to form the body. Don’t worry about details at this stage, as we’ll refine them later.
Step 2: Outline the Body
Using the basic shapes as a guide, outline the body of the Brittany. Define the curves and contours of the head, neck, and body, paying attention to the proportions. Use light, gentle strokes to create the outline, making sure to leave space for the legs.
Step 3: Add Facial Features
Now let’s add the facial features of the Brittany. Start with two almond-shaped eyes, slightly tilted upwards. Then, draw a small, triangular shape for the nose in the middle of the face. Add a smiling mouth below the nose, extending towards the sides of the face. Don’t forget to include the characteristic long, floppy ears on the sides of the head.
Step 4: Detail the Face
Refine the facial features by adding more detail. Draw a circle inside each eye to represent the iris, and add a small dot within each circle to depict the reflection. Shade the area around the eyes slightly to give depth. Define the shape of the nose with some curved lines and add a few small dots for texture. Add some fur-like strokes around the mouth to bring out the smile.
Step 5: Draw the Legs and Paws
Moving on to the body, sketch the legs and paws of the Brittany. Start by adding four cylindrical shapes for the legs, positioning them correctly in relation to the body. Then, add smaller ovals at the end of each leg to represent the paws. Pay attention to the angles and proportions, ensuring that the legs are sturdy and well-balanced.
Step 6: Outline the Tail
Draw a curved line extending from the back of the Brittany to represent the tail. The tail should be thick at the base and gradually taper towards the tip. Add some texture by lightly sketching a few lines along the length of the tail.
Step 7: Refine the Body
Now it’s time to refine the body of the Brittany. Go over the initial outline, adding more definition and detail. Pay attention to the contours of the body, emphasizing the muscles and curves of this athletic breed. Add some texture to the fur by using short, overlapping strokes with your pencil.
Step 8: Erase Guidelines
Carefully erase any unnecessary guidelines and construction lines, making sure to leave only the final drawing. Use an eraser or a kneaded eraser for more precise results. Take your time with this step to create a clean and polished drawing.
Step 9: Add Final Details
For a more finished look, add some final details to your Brittany drawing. Define the features of the face by adding more depth and shading. Highlight areas of light by using lighter pencil strokes or a white colored pencil. You can also use a fine tip black pen or marker to outline the drawing and make certain elements stand out. Experiment with different techniques and find your own artistic style.
Conclusion
Congratulations! You have successfully completed your drawing of a Brittany. By following these step-by-step instructions, you’ve created a beautiful representation of this wonderful dog breed. Remember, practice makes perfect, so don’t hesitate to try drawing other subjects and experiment with different techniques. Happy drawing!