Do you have a passion for drawing and want to create a beautiful depiction of a Bible? Whether you’re an experienced artist or just starting out, this step-by-step guide will help you bring your artistic vision to life. Drawing a Bible requires attention to detail and precision, but with the right techniques and a little practice, you can create a stunning artwork that captures the essence of this sacred book. So grab your drawing materials and let’s get started!
Materials Required
Before we begin, make sure you have the following materials handy:
- A sketchbook or drawing paper
- Pencils of varying hardness (e.g., HB, 2B, 4B)
- An eraser
- Fine-tip black pens or markers
- Ruler
- Compass (optional)
- Colored pencils or markers (optional)
Having these materials will make the process smoother and allow you to add more depth and color to your drawing if desired. Now, let’s dive into the step-by-step instructions!
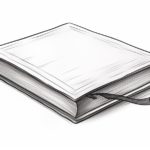
Step 1: Outline the Basic Shape of the Bible
Start by drawing a rectangular shape on your sketchbook or drawing paper. The dimensions of the rectangle will depend on how big you want your Bible to be in relation to the page. Use light pencil strokes to create the outline, as you will be refining and adding details later.
Step 2: Add Thickness and Detail
Next, add thickness to the sides of the rectangle to give it a three-dimensional look. Draw two parallel lines alongside each vertical side of the rectangle, slightly offset from the original outline. Connect the top and bottom of these lines with short horizontal lines, creating a border around the Bible cover.
Step 3: Draw the Spine of the Bible
Moving on to the spine, draw a vertical line down the middle of the rectangle. This line should be slightly thinner than the borders you drew in the previous step. To give the spine a more realistic appearance, add a few vertical lines at regular intervals along its length. These lines represent the pages of the Bible.
Step 4: Add Details to the Cover
Now it’s time to add some intricate details to the cover of the Bible. Using your ruler, draw two diagonal lines connecting the corners of the rectangle. This will create a triangular shape at the top and bottom of the cover. Within these triangles, draw smaller triangles to represent ornamental designs or patterns typically found on a Bible cover. Feel free to get creative with these designs, incorporating symbols or motifs that hold personal significance.
Step 5: Define the Pages
To give a more realistic look to the pages, draw horizontal lines across the spine of the Bible, extending onto the covers as well. These lines represent the edges of the individual pages. You can use a ruler to keep the lines straight and evenly spaced.
Step 6: Add Book Title and Details
Now it’s time to add the title of the Bible and any other relevant details. In the center of the cover, write the word “Bible” in a decorative font. You can use a reference image or experiment with different styles to find the one that resonates with you. If desired, you can also add additional text, such as the name of a specific version or translation.
Step 7: Refine and Ink the Drawing
With the basic structure and details in place, it’s time to refine your drawing. Go over the pencil lines with a fine-tip black pen or marker, using short, precise strokes to capture the intricate details. Take your time during this step to ensure that your lines are clean and well-defined.
Step 8: Erase the Pencil Guidelines
Once the ink has dried, carefully erase any remaining pencil guidelines. Be gentle to avoid smudging the ink or damaging the paper. Use a soft eraser and take your time to remove all the pencil marks, leaving behind only the clean, finished lines of your artwork.
Step 9: Add Color (Optional)
If you want to add an extra touch of vibrancy to your drawing, you can use colored pencils or markers to add some color to the cover or to highlight certain details. Use light pressure when applying the colors to ensure that the pen or marker lines underneath are not smudged or obscured.
Conclusion
Congratulations! You have successfully learned how to draw a Bible using step-by-step instructions. With patience and practice, you can create stunning artistic renditions of this sacred book. Remember to use the materials listed, pay attention to details, and let your creativity shine through. Happy drawing!