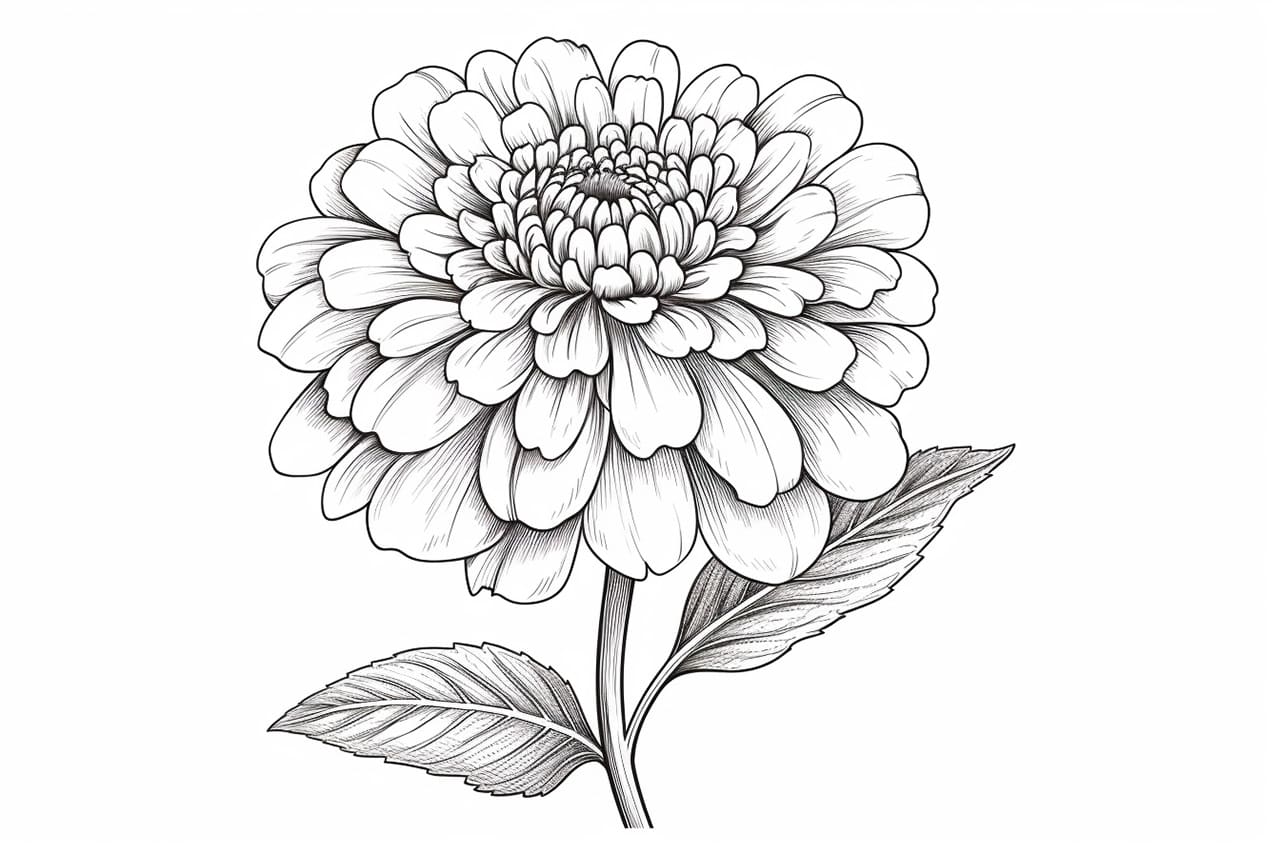
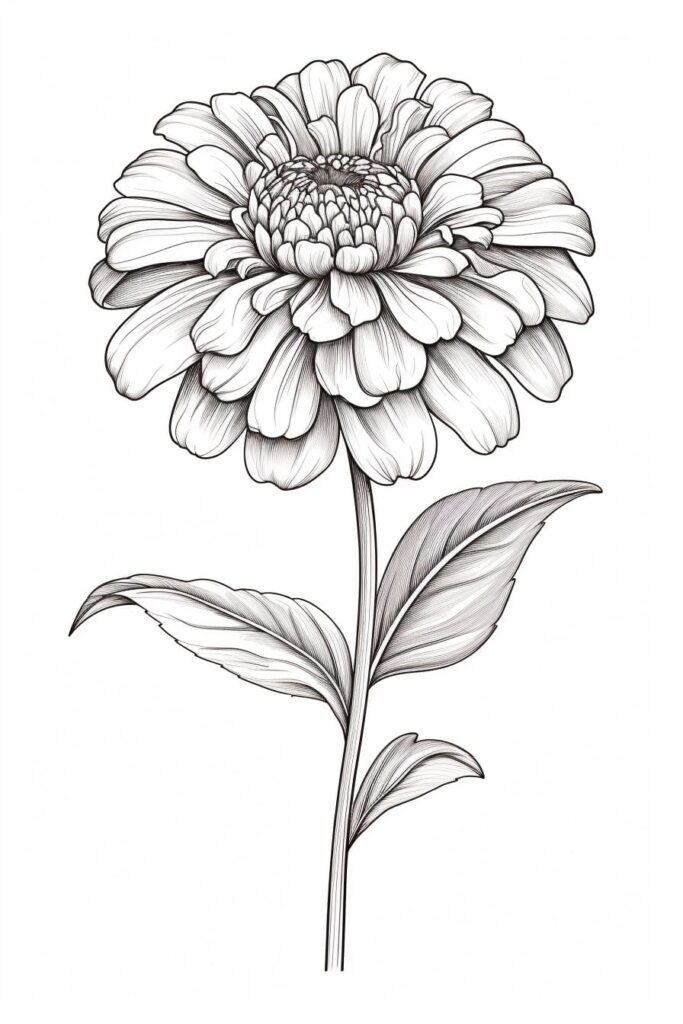
Welcome to this step-by-step tutorial on how to draw a zinnia flower, one of the most vibrant and cheerful blooms in the garden. Zinnias are celebrated for their intricate layers of petals and bold colors, making them a perfect subject for artists looking to experiment with detail and texture.
In this guide, we’ll teach you how to create a stunning zinnia drawing, breaking the process down into manageable steps. Whether you’re a seasoned artist or new to drawing, you’ll find the techniques and tips in this tutorial easy to follow. So, gather your materials and let’s bring the lively beauty of zinnias to life on paper!
Materials Required:
- Drawing paper
- Pencil
- Eraser
- Fine-tip markers or colored pencils
- Reference photo of a zinnia (optional)
Now that we have our materials ready, let’s begin creating our zinnia masterpiece!
How to Draw a Zinnia Flower Step-by-Step
Step 1: Sketch the Basic Shape
To begin, lightly sketch a large oval or circular shape in the center of your paper. This will act as the foundation for the zinnia flower. Zinnias are known for their full, layered blooms, so this initial shape will help keep your petals balanced and well-structured.
- Use light, soft strokes to allow for easy adjustments later.
- Keep your shape loose—flowers are naturally asymmetrical, so perfection isn’t necessary at this stage.
Step 2: Outline the Petals
Zinnias have multiple layers of petals, creating a dense, full bloom.
- Start by sketching the outermost layer of petals—these will be the largest and most open.
- Draw small, curved lines radiating outward from the center, creating overlapping petal shapes.
- Keep the petal edges slightly irregular to give them a natural look.
Once you’ve outlined the outer petals, move inward and draw a second layer of slightly smaller petals, making them overlap with the outer layer.
Step 3: Define the Petal Shapes
Now, let’s refine the shape and structure of each petal.
- Using the outlines as a guide, softly curve the petals inward toward the center to create a realistic, natural look.
- Adjust the length and curvature of the petals—zinnias are slightly rounded at the tips rather than pointed.
- Add gentle folds or slight bends in some petals to make them appear more lifelike.
Step 4: Draw the Inner Petals
As you move toward the center of the flower, the petals become shorter and more compact.
- Inside the bloom, draw small, slightly curled petals that overlap more closely than the outer layers.
- Keep these inner petals rounded and tightly arranged to give the zinnia its signature dense, layered look.
- Use light, sketchy lines so you can adjust and refine later.
Step 5: Add Details to the Petals
Now that the petals are in place, let’s enhance their texture and depth.
- Add subtle lines along each petal, following its natural curve. These lines suggest delicate veins and will help with shading later.
- Slightly darken the base of each petal where it meets the center to create a sense of depth.
- Some petals may curl slightly at the tips—add these details to bring realism to your drawing.
Step 6: Draw the Center of the Zinnia
The center of a zinnia is textured and slightly raised, giving the flower its signature look.
- Sketch a small, circular shape in the middle of the petals—this will act as the core disk.
- Fill the center with tiny oval or circular shapes, representing the clustered seeds within the flower’s disk.
- Around the center, add short, radiating lines to enhance texture and create a natural look.
Step 7: Refine the Outline
Now that you have all the major elements in place, take a moment to refine your drawing:
- Darken and sharpen the final outline of the petals, adjusting any proportions if needed.
- Carefully go over the center details to make sure they’re well-defined.
- Check for any overlapping petals that need extra depth or detail.
Step 8: Erase Guidelines
At this stage, your zinnia should have strong, well-defined shapes. Now, it’s time to erase any unnecessary guidelines:
- Gently erase the original construction lines while keeping your main structure intact.
- Be careful not to erase important details like veins, shading, or texture.
- If needed, redefine edges with a fine-tip pencil or pen.
Step 9: Add Shading for Depth
Shading adds realism and dimension to your drawing:
- Identify your light source (where the light is coming from) and shade accordingly.
- Shade along the base of each petal where they overlap—this creates depth and contrast.
- Use hatching and cross-hatching techniques for a more refined, textured appearance.
- The center of the flower should be slightly darker than the petals, as it sits lower than the outer layers.
Step 10: Bring Your Zinnia to Life with Color (Optional)
If you want to add color, choose vibrant hues such as pink, purple, red, orange, or yellow, which are common for zinnias.
- Start with a light base layer of color for the petals.
- Gradually build darker shades at the base of the petals to enhance the depth.
- Use smooth blending techniques to create a soft, natural transition of color.
- The center of the zinnia should be rich in yellows, oranges, or even deep reds to create contrast.
If using colored pencils, blend using gentle circular strokes. For watercolors, let each layer dry before applying another to avoid muddiness.
Step 11: Final Touches
Take a step back and analyze your drawing:
- Darken necessary areas to make certain elements pop.
- Adjust any shading or texture that needs refinement.
- Add extra highlights with an eraser or white colored pencil to enhance realism.
At this stage, your zinnia should look vibrant, full, and lifelike! 
Conclusion: Mastering the Art of Drawing a Zinnia
Congratulations! You’ve successfully drawn a stunning and realistic zinnia by following these step-by-step techniques.
Zinnias are gorgeous, intricate flowers that provide a great opportunity to practice petal layering, shading, and fine details. Keep experimenting with different petal shapes, colors, and lighting techniques to develop your unique artistic style.
Remember, the more you practice, the better your flower drawings will become. So keep sketching, keep creating, and let your artistic garden bloom! 


Related posts:
 How to Draw a Flower Petal in 6 Simple Steps
 How to Draw a Cute Flower in 6 Simple Steps
 How to Draw a Tulip in 7 Simple Steps
 How to Draw a Sunflower in 10 Simple Steps
 How to Draw a Lily in 7 Simple Steps
 How to Draw a Beautiful Flower in 9 Steps
 How to Draw a Lotus Flower in 10 Easy Steps
 How to Draw a Fairy in 8 Simple Steps