How to Draw a Lotus Flower in 10 Easy Steps
Learn how to draw with this step-by-step tutorial.
Materials You'll Need
- Drawing paper
- Pencil (HB or 2B)
- Eraser
- Colored pencils
- Markers
- Watercolor paints
Drawing a lotus flower is a captivating artistic journey that combines elegance, beauty, and symbolism. Revered for its association with purity, spirituality, and rebirth, the lotus flower has long been a favorite subject for artists across cultures. Its graceful petals and unique structure provide endless inspiration, making it a rewarding challenge for beginners and experienced artists alike.
In this step-by-step guide, we'll explore how to draw a lotus flower with simple yet detailed instructions that will bring your vision to life. Whether you're sketching for relaxation, practicing your drawing skills, or creating artwork with deeper meaning, this tutorial will help you capture the delicate essence of the lotus. So, gather your pencils, erasers, and a dash of creativity, and let's unfold the beauty of this iconic flower together!

Learn How to Draw Flowers Step-by-Step
This simple and straightforward guide teaches you how to draw many different kinds of flowers with step-by-step instructions. It's perfect both for total beginners and experienced artists who want to expand their skills.
Materials Required
Before we dive into drawing a lotus flower, make sure you have the following materials on hand:
-
Drawing paper: Choose a high-quality paper suitable for your preferred drawing medium, such as graphite or colored pencils.
-
Pencil: Use a range of pencils, including HB or 2B for sketching and lighter grades like 2H for light shading.
-
Eraser: Have a soft eraser handy to correct any mistakes or lighten areas of your drawing.
-
Fine-tipped pen: A pen with a fine point will be useful for adding intricate details.
-
Colored pencils or markers (optional): If you want to add color to your lotus flower drawing, gather your preferred coloring tools.
How to Draw a Lotus Flower Step-by-Step
Step 1: Lay the Foundation with Basic Shapes
Begin your lotus flower drawing by sketching the foundation shapes. Start with an oval in the center of your paper; this will serve as the seed pod at the heart of the flower. From the bottom of the oval, draw two slightly curved lines extending downward to represent the stem. Keep your lines light and easy to erase, as this is just the skeleton of your artwork.
Step 2: Build the Petals
Around the central oval, begin sketching the first layer of petals. Draw elongated teardrop shapes curving gently upward from the base. These petals should radiate outward, forming the iconic layered look of the lotus flower. Continue adding more petals, each slightly overlapping the previous one. Vary the size and angle of the petals to mimic the natural, organic arrangement of a real lotus flower.
Step 3: Enhance the Petal Shapes
Now, refine each petal by adding soft, flowing curves. Pay close attention to the edges, giving them subtle undulations to capture the delicate texture of the flower. You can also add faint lines at the base of each petal, extending slightly upward, to represent the natural grooves and folds found in lotus petals.
Step 4: Detail the Central Pod
Turn your attention to the oval center. Add a series of small, evenly spaced circles within the oval to represent the lotus's seed pod. These should be slightly irregular to maintain a natural appearance. Around the edge of the oval, draw small, subtle lines to suggest the textural details of the seed pod.
Step 5: Develop the Stem and Leaves
Move to the stem, refining its outline into a smooth, slightly curved line to convey a sense of flow. Add large, elongated oval shapes branching off from the stem to form the lotus leaves. Place the leaves at different angles, ensuring they overlap slightly for a realistic effect.
Step 6: Add Depth to Leaves and Stem
Now, enhance the details of the stem and leaves. On each leaf, draw a series of radiating veins starting from the base of the leaf and extending outward. Add small curves to the stem to suggest a subtle texture, and consider adding a few folds or imperfections to the leaves for an organic feel.
Step 7: Outline and Define
Once you are happy with the overall shape of your drawing, go over the outlines with a fine-tipped pen or dark pencil. Be confident and deliberate with your strokes, tracing over the petals, leaves, stem, and center pod. This step will give your drawing a clean and professional look, making the details stand out.
Step 8: Erase Guidelines
Gently erase any remaining construction lines or guidelines, being careful not to smudge your drawing. Use a soft eraser and light pressure to ensure your work remains crisp and tidy.
Step 9: Add Shadows and Texture for Realism
To give your lotus flower drawing a three-dimensional appearance, incorporate shading and texture. Identify a light source and shade the petals where shadows would naturally fall, such as near their base or where they overlap. Use light, curved pencil strokes to blend the shading seamlessly. Add similar shading to the leaves and stem, focusing on the areas that recede or curve away from the light.
Step 10: Bring Your Lotus to Life with Color (Optional)
If you'd like to add color, choose hues that reflect the natural beauty of a lotus. Use soft pinks, whites, or yellows for the petals, gradually deepening the color near the base for a gradient effect. For the leaves, experiment with shades of green, adding hints of blue or yellow for variation. Blend your colors smoothly, and don't forget to add subtle highlights for a polished and vibrant finish.
Tip: To effectively capture the delicate beauty of a lotus flower, start with a light pencil sketch to map out the overall shape and proportions of the petals and leaves. Focus on the unique layering of the petals, which often overlap, giving the flower its characteristic depth and dimension. Use smooth, flowing lines to outline each petal, and remember to vary the width of your lines to suggest softness and curvature. Once you're satisfied with the outline, switch to colored pencils or watercolors for a gentle wash, layering colors to create a soft gradient that mimics the natural hues of a lotus. Finally, don't hesitate to use an eraser to refine edges and highlight areas where light would naturally hit, enhancing the three-dimensional look of your drawing.
Flourishing Finale: Admiring Your Lotus Masterpiece
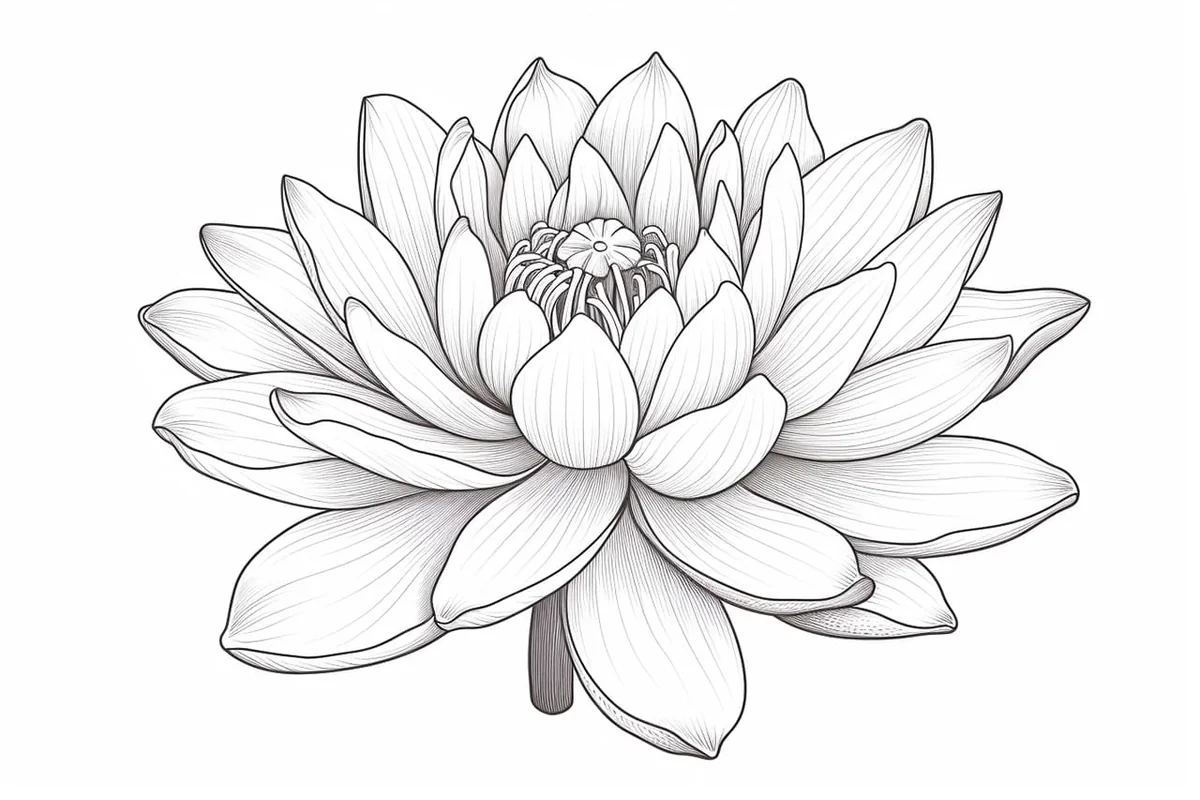
Congratulations! You've successfully drawn a stunning lotus flower. From the elegant petals to the intricate details of the seed pod and leaves, your artwork captures the grace and beauty of this symbolic bloom.
Drawing a lotus flower is not just about creating a beautiful image—it's about embracing patience, precision, and creativity. With each practice sketch, you'll find your skills blossoming like the flower itself. Whether you keep your drawing monochromatic or adorn it with vibrant colors, your lotus reflects your unique artistic journey.
Now, frame your creation, share it with friends, or use it as inspiration for future floral projects. Remember, every artist grows with practice, so keep sketching, exploring, and letting your creativity bloom!