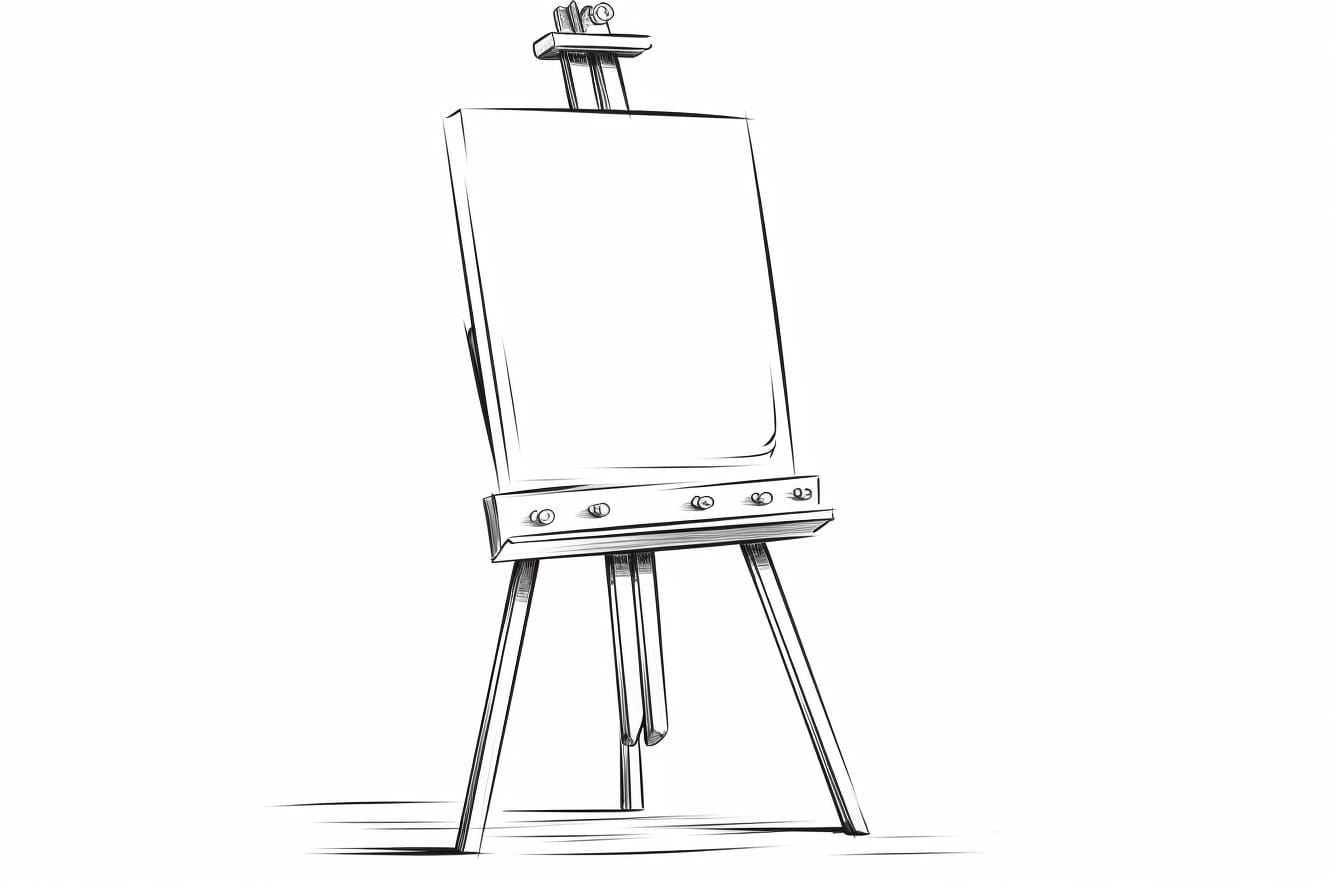
The easel is a fundamental tool in the world of art, serving as a sturdy support for artists to create their masterpieces. Its simple yet essential design allows artists to comfortably position their canvas at an ideal angle for drawing or painting. The easel not only provides a practical solution for working on artwork, but it also plays a crucial role in enhancing the creative process by offering a dedicated space for artistic expression. Join me as we explore the importance of the easel in the realm of art and discover how this humble yet indispensable tool has influenced artists throughout history.
Materials Required
To draw a realistic image of an easel, you will need the following materials:
- Drawing paper or sketchbook
- Pencil (preferably a range of graphite pencils for different shades)
- Eraser (both a kneaded eraser and a regular eraser)
- Sharpener
- Ruler (for measuring proportions and angles)
- Reference image of an easel (optional but helpful for accuracy)
- Blending tools (such as blending stumps or tortillons for smooth shading)
- Pen or fine liner (for adding details or outlines)
- Colored pencils or markers (optional for adding color)
- Fixative spray (optional, to protect the finished drawing)
With these
How to Draw an Easel: a Step-by-step Guide
Step 1: Sketch the Basic Shape
Start by drawing a vertical rectangle for the easel’s main body. This rectangle will be the outline of the easel’s frame. Make sure to leave some space at the top for the canvas holder.
Step 2: Add the Legs
Below the rectangle, draw two diagonal lines that converge at a point to create the front legs of the easel. Repeat this on the other side to create the back legs. The legs should be slightly angled outward for stability.
Step 3: Draw the Canvas Holder
On top of the main rectangle, draw a horizontal line that connects the top corners. Then, draw two vertical lines from the ends of this horizontal line to the top of the easel. This will form the canvas holder where the artwork will rest.
Step 4: Add Details
Enhance the look of the easel by adding small details such as knobs or adjusting screws on the canvas holder. You can also add a shelf below the canvas holder for holding art supplies.
Step 5: Refine and Erase
Go over your sketch, refining any lines and shapes to make them cleaner. Erase any unnecessary guidelines and overlapping lines to make the drawing clearer.
Step 6: Add Shadows and Texture
To give your easel a more realistic look, add shading to create shadows where needed. You can also add texture to the wood by lightly sketching in some wood grain lines.
Step 7: Finalize
Once you are satisfied with the overall look of your easel, go over your drawing with a pen or darker pencil to outline and define the shapes. Add any final touches or details to complete your drawing.
Step 8: Optional Coloring
If you prefer, you can also add color to your drawing using colored pencils, markers, or paint. Consider using different shades of brown for the wood and gray for the metal parts to add depth and realism to your artwork.
Step 9: Sign and Date
Finally, sign your artwork in the corner with your name and date to mark its completion. Display your drawing proudly or use it as a reference for future art projects.
Conclusion
In conclusion, mastering the art of drawing an easel requires practice, patience, and attention to detail. By following the step-by-step instructions outlined in this article and honing your observational skills, you can create a realistic and lifelike representation of an easel. Remember to experiment with different techniques and materials to further enhance your drawing skills and bring your artwork to life. With dedication and perseverance, you can achieve stunning results and take your artistic abilities to new heights.
Fun Facts About Easels
- Easels have been used by artists for centuries, with some of the earliest known examples dating back to ancient Egypt.
- The word “easel” comes from the Dutch word “ezel,” which means “donkey.” This is because easels traditionally have a shape that resembles a donkey’s hind legs.
- Easels come in a variety of styles and sizes, including tabletop easels, H-frame easels, A-frame easels, and convertible easels that can be adjusted for different working heights and angles.
- Some easels are designed specifically for outdoor use, with features like ground spikes or adjustable legs to accommodate uneven terrain.
- French Impressionist painters like Claude Monet and Edgar Degas were known for using portable easels called “plein air easels” to paint outdoors en plein air.
- Easels can be made from a variety of materials, including wood, metal, plastic, and even cardboard. Some artists even make their own easels from found objects or repurposed materials.
- In addition to painting, easels are also commonly used for holding canvases for drawing, sketching, and even displaying finished artworks.
- Easels are not just for artists – they are also commonly used in classrooms, offices, and homes for holding presentation materials, signage, and posters.
- Some easels have built-in storage compartments or trays for holding art supplies like paintbrushes, palettes, and pencils.
- Easels are a versatile tool that can be used by artists of all skill levels, from beginners to professional painters.
Suggestions for Scenes and Settings for Easel Drawings
- A serene lakeside setting with a wooden easel set up on the grass, capturing the reflection of the surrounding trees on the water.
- An urban rooftop scene at sunset, with the easel positioned against a backdrop of city skyline and colorful clouds in the sky.
- A cozy corner in a bustling café, with the easel showcasing a portrait of a barista or a scene of customers enjoying their coffee.
- A windswept beach with the easel planted in the sand, capturing the crashing waves and seagulls in flight against a backdrop of a setting sun.
- A lush garden with the easel nestled among blooming flowers and buzzing bees, capturing the vibrant colors and textures of the flora.
- A snowy mountain peak with the easel standing against a backdrop of snow-capped peaks and a clear blue sky, capturing the majesty of the landscape.
- A bustling farmer’s market with the easel capturing the hustle and bustle of vendors and customers, showcasing the variety of produce and goods on display.
- A mystical forest with the easel positioned among ancient trees and moss-covered rocks, capturing the play of light and shadow in the enchanted woods.
- A vibrant street art scene with the easel set up against a colorful graffiti-covered wall, capturing the urban energy and creativity of the surroundings.
- A tranquil meadow at sunrise, with the easel capturing the soft light and dewy grass, showcasing the beauty and serenity of the natural landscape.

