How to Draw an Army Man
Learn how to draw an army man in a step-by-step guide. Explore the materials required, refining proportions, adding depth and shading, and fine-tuning details to create a realistic drawing.

Materials You'll Need
- Pencil
- Paper
- Eraser
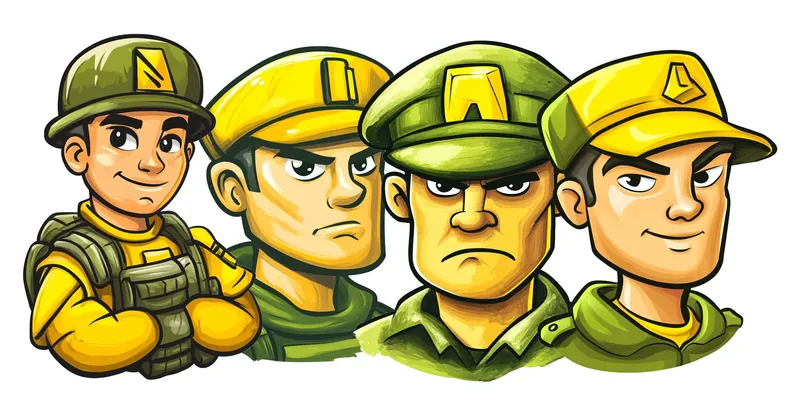
![]() Learning how to draw an army man is not just a creative outlet; it's an engaging way to celebrate the bravery and dedication of those who protect and serve. Whether you're an experienced artist or a beginner seeking a new hobby, this guide will walk you through the process step-by-step. With a little patience and practice, you'll discover how to capture the strength, valor, and intricate details that define military personnel.
Learning how to draw an army man is not just a creative outlet; it's an engaging way to celebrate the bravery and dedication of those who protect and serve. Whether you're an experienced artist or a beginner seeking a new hobby, this guide will walk you through the process step-by-step. With a little patience and practice, you'll discover how to capture the strength, valor, and intricate details that define military personnel.
As you embark on this artistic journey, you'll find that drawing allows you not just to create, but to express your admiration for the courage embodied by these soldiers. This guide goes beyond basic instructions; it encourages you to experiment with different styles and techniques while developing your unique approach to art. Each step will build on the last, allowing you to enhance your skills and truly make the drawing your own.
Get ready to dive into the world of artistic expression! Together, we'll gather the necessary materials and get set to create a stunning and realistic representation of an army man on paper. So sharpen your pencils, prepare your workspace, and let's transform a few simple lines and shapes into a compelling work of art.
Materials Required
Before we begin, let's gather the materials you'll need for this drawing:
- Drawing paper: Choose a high-quality paper that can withstand multiple layers of shading.
- Pencil: Use a mechanical pencil or a set of drawing pencils with various hardness levels for different tones.
- Eraser: Have a kneaded eraser for making corrections and a regular eraser for removing any pencil lines.
- Fine-tip black pen: This will be used for adding details and defining the outline of the drawing.
- Reference image: Find a clear picture of an army man that you can use as a reference throughout the drawing process.
Now that you have all the necessary materials, let's begin creating your army man drawing.
Step 1: Outline the Basic Shapes
Start by lightly sketching the basic shapes and proportions of the army man. Begin with an oval shape for the head, followed by a rectangular shape for the body. Add cylinders for the arms and legs, and connect them with lines to create a rough outline of the pose you want. Remember to keep the lines light and loose, as you will be refining them later.
Step 2: Refine the Proportions
Using more defined lines, refine the proportions of the army man. Pay close attention to the placement of the facial features, such as the eyes, nose, and mouth. Add the details of the uniform, such as the collar, epaulets, and pockets. Use reference images to help you capture the specific details of an army man's uniform accurately.
Step 3: Add Depth and Shading
Now it's time to add depth and shading to your drawing. Start by determining the direction of the light source. This will help you decide where the shadows will fall on the army man's body and uniform. Use various shading techniques, such as cross-hatching or stippling, to create the illusion of three-dimensional form. Pay attention to the values and tones in the reference image to achieve a realistic effect.
Step 4: Define the Outline
Once you are satisfied with the shading, use a fine-tip black pen to define the outline of the army man. Go over the main lines of the drawing, adding details and making the lines bolder. Be careful not to go overboard and make the drawing look too cartoonish. The goal is to create a balanced and realistic representation of an army man.
Step 5: Fine-Tune the Details
Now it's time to focus on the smaller details of your army man drawing. Pay attention to the facial features, such as the eyes, eyebrows, and lips. Add wrinkles and creases to the uniform to give it a more realistic appearance. Take your time with this step and make sure to capture the essence of an army man accurately.
Step 6: Add Final Touches
Lastly, take a step back and evaluate your drawing. Make any necessary adjustments or corrections. Erase any remaining pencil lines that are no longer needed. Add any additional details or highlights using a white gel pen to make certain areas pop. Remember, it's all about the small details that bring your drawing to life.
 Tip: To achieve a dynamic and realistic portrayal of an army man, start by using a reference image to understand the proportions and details of military uniforms. Begin your sketch with light pencil lines to outline the basic shapes—think of the soldier's posture and stance, as these convey strength and readiness. Utilize a combination of hard and soft pencils for different effects; hard pencils (like H or 2H) are great for fine details, whereas soft pencils (like 2B or 4B) can help create depth in shadows and folds of the fabric. As you develop your drawing, pay attention to small details such as insignias or equipment, which will add authenticity and character to your soldier. Finally, don't hesitate to use an eraser to refine your lines, allowing for a cleaner and more polished final piece—remember, it's all about patience and practice!
Conclusion
Congratulations! You have successfully completed your army man drawing. By following these step-by-step instructions and using the right materials, you have created a detailed and realistic representation of an army man. Take a moment to appreciate your work and the effort you put into it.
Remember, drawing is a journey of continuous improvement. Practice regularly, experiment with different techniques, and challenge yourself with new subjects. With time and dedication, your artistic skills will grow, and you will be able to create even more incredible artwork.
So grab your materials and start drawing! Have fun, and enjoy the process of bringing an army man to life on paper.