Welcome to the wonderful world of art! Today, we will delve into the captivating technique of drawing arcs. Arcs are graceful and dynamic curves that can bring life and movement to your artwork. Whether you are a beginner or a seasoned artist, mastering the art of drawing arcs can enhance your compositions and add a touch of elegance to your creations. Join me as we explore the beauty and versatility of arcs in drawing, and unlock the secrets to creating stunning and impactful artworks. Let’s dive in and unleash your creativity!
Materials Required
To draw an arc, you will need the following materials:
- Drawing paper or sketchbook
- Pencil
- Eraser
- Ruler or compass (optional, for creating a precise arc)
- Protractor (optional, for measuring angles of the arc)
- Drawing pen or fine liner (optional, for outlining the arc)
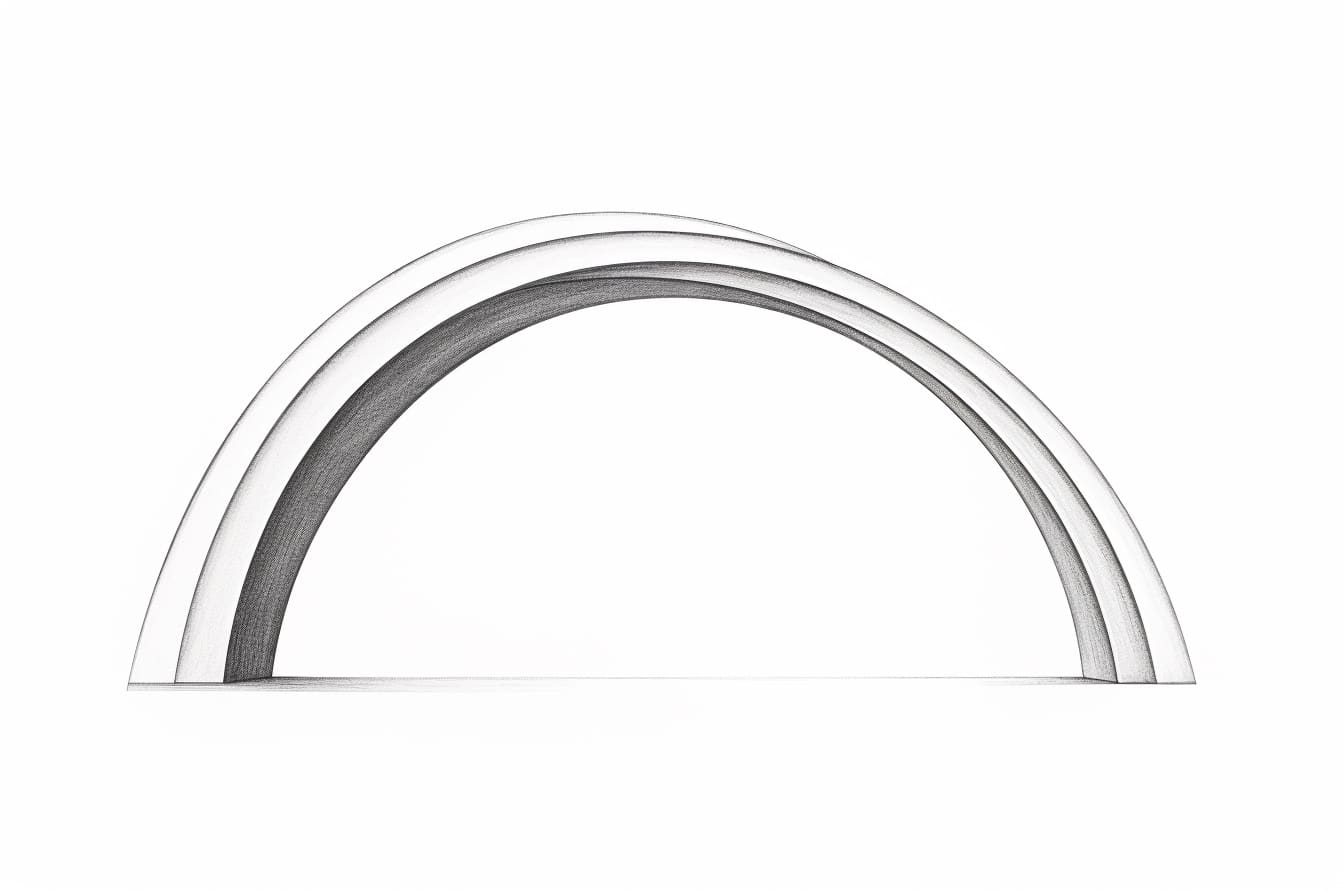
How to Draw an Arc: a Step-by-step Guide
Step 1: Gather Your Materials
Ensure you have all the necessary materials before starting to draw an arc. You will need a pencil, eraser, ruler, and paper. Choose a good quality paper to avoid smudging and achieve better results.
Step 2: Define the Arc’s Endpoints
Decide on the endpoints of your arc and mark them on the paper with small dots using your pencil. These points will determine the length and curvature of your arc.
Step 3: Draw the Baseline
Using a ruler, draw a straight line connecting the two endpoints of your arc. This line will act as the baseline for your arc and will help guide the curvature.
Step 4: Determine the Arc’s Height
Decide how high you want your arc to reach from the baseline. Mark this height with a dot above the baseline at the midpoint between the two endpoints.
Step 5: Create a Reference Point
To guide the curvature of the arc, mark a point on the baseline that is equidistant from both endpoints. This point will serve as a reference for drawing the arc.
Step 6: Start Drawing the Curve
Using your pencil, lightly sketch the curve of the arc by connecting the endpoint dots with the reference point on the baseline. Start with a gentle curve and adjust as needed to achieve the desired shape.
Step 7: Refine and Finalize
Once you are satisfied with the shape of your arc, go over the outline with firmer strokes to define it. Erase any unnecessary guidelines or marks to clean up the drawing and make the arc stand out.
Step 8: Add Details (Optional)
If desired, you can add shading, texture, or additional details to enhance the appearance of your arc. Experiment with different techniques to make your drawing more dynamic and visually appealing.
Step 9: Practice and Experiment
Drawing arcs may require practice to perfect your technique. Experiment with different sizes, curvatures, and styles to improve your skills and develop your own unique artistic approach.
Step 10: Share and Seek Feedback
Once you have completed your arc drawing, consider sharing it with others for feedback and constructive criticism. This can help you identify areas for improvement and gain valuable insights from others in the art community.
Conclusion
In conclusion, mastering the technique of drawing an arc is a valuable skill that can enhance your drawing abilities and add depth and dimension to your artwork. By practicing the fundamental steps outlined in this article and experimenting with different variations of arcs, you can achieve greater precision and control in your drawings. Remember, patience and practice are key to mastering any artistic skill, so keep honing your craft and exploring the possibilities of incorporating arcs into your artwork. With dedication and perseverance, you can elevate your drawing abilities and create captivating and dynamic compositions.
Fun Facts About Arcs
- Arcs are a fundamental geometric concept that plays a prominent role in mathematics, physics, and engineering.
- An arc is a portion of a curve, typically a segment of a circle or an ellipse.
- The length of an arc is given by the formula: arc length = radius x angle (in radians).
- Arcs are commonly used in trigonometry to calculate angles and distances in triangles and other shapes.
- The study of arcs and circles is an important part of geometry and is essential for understanding properties of shapes and angles.
- Arcs are also used in architecture and design to create aesthetically pleasing curves and shapes in buildings and structures.
- In computer graphics and animation, arcs are used to create smooth and natural movements in characters and objects.
- The concept of arcs is also found in storytelling and narrative structure, where characters undergo arcs of development and change throughout a story.
- Arcs are often used in sports, such as in archery and billiards, where players aim to hit specific targets or pockets with precision.
- The term “arc” is derived from the Latin word “arcus,” meaning bow or arch, reflecting the curved shape of an arc.