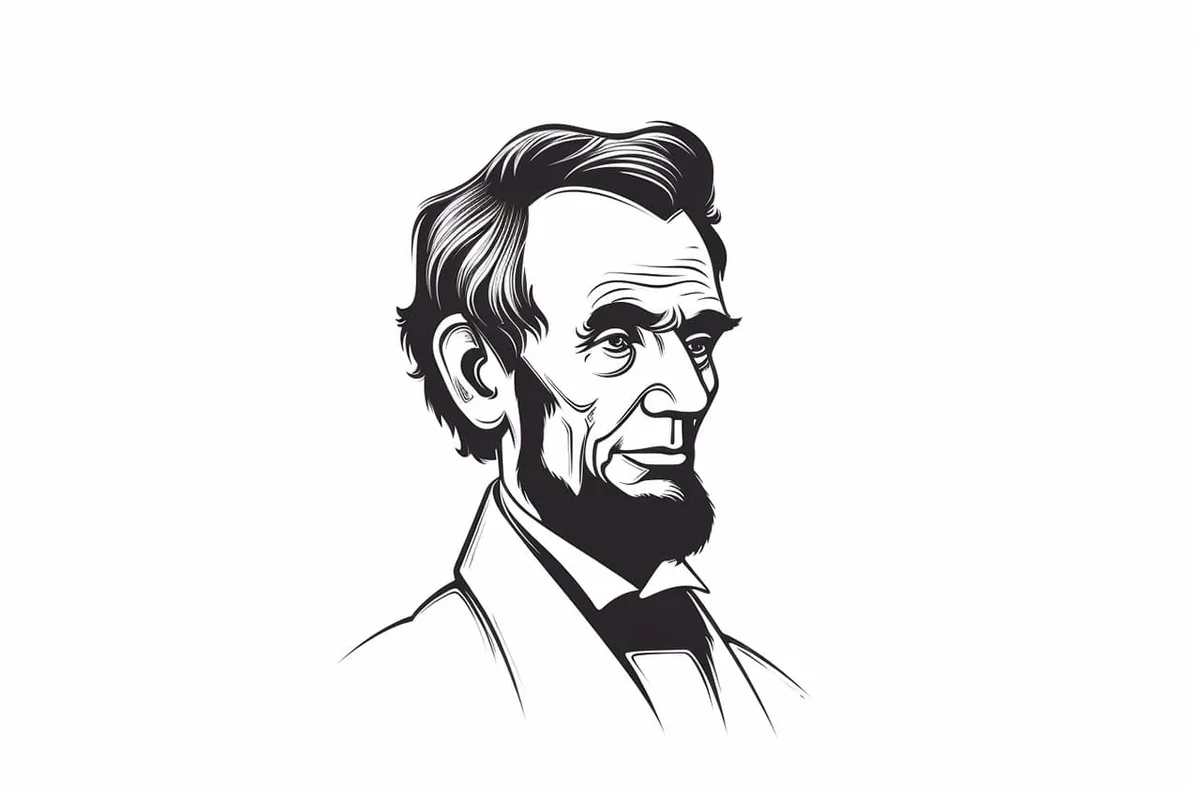
How to Draw Abraham Lincoln in 8 Easy Steps
Learn how to draw with this step-by-step tutorial.
Materials You'll Need
- Drawing paper
- Pencil (HB or 2B)
- Eraser
- Blending stump
Abraham Lincoln, the 16th President of the United States, is not just a towering figure in American history; he is also a symbol of wisdom and leadership during one of the country's most turbulent times. His profound impact on the nation, marked by his efforts to preserve the Union and abolish slavery, makes him an enduring subject of interest and admiration. Artists often find inspiration in Lincoln's distinct facial features—his tall forehead, deep-set eyes, and iconic beard—creating a rich tapestry for artistic exploration.
This how-to-draw article will serve as your guide to capturing Lincoln's likeness on paper. Whether you're a novice eager to hone your skills or a seasoned artist looking to enhance your portraiture techniques, you'll find valuable insights and techniques throughout this tutorial. We'll walk you through each stage, from sketching the initial outline of his face to adding intricate details and realistic shading that breathe life into your artwork.
In this step-by-step guide, you will not only develop your drawing abilities but also gain a deeper appreciation for Lincoln's character and historical significance. Gather your drawing materials, find a quiet space, and embark on this artistic journey that blends creativity with a touch of history. Get ready to bring the likeness of this remarkable leader to life! ✏️


Materials Required
Before we dive into the drawing process, let's gather the materials you'll need:
-
Paper: Choose a good quality drawing paper that is thick enough to handle pencil and eraser without tearing or smudging.
-
Pencils: Have a selection of graphite pencils in various grades (2H to 6B). These range from light to dark and will help you achieve different shades in your drawing.
-
Erasers: Include both a kneaded eraser for subtle corrections and a plastic eraser for more precise erasing.
-
Pencil Sharpener: Ensure that your pencils are sharpened to a fine point for detailed work.
-
Reference Image: Find a clear, high-resolution image of Abraham Lincoln to guide your drawing. You can use a printed photo or have it displayed on a digital device.
Now that you have everything you need, let's move on to the step-by-step instructions.
Step-by-Step Guide: How to Draw Abraham Lincoln ✏️
Abraham Lincoln, the 16th President of the United States, is one of the most recognizable historical figures, known for his tall features, thoughtful expression, distinctive beard, and deep-set eyes. Capturing his likeness in a drawing requires careful attention to proportions, shading, and facial structure.
Follow these detailed step-by-step instructions to bring Lincoln's wise and dignified presence to life on paper.
Step 1: Sketch the Basic Face Shape
To establish the foundation of Lincoln's face, begin with:
✅ A lightly sketched oval for the head shape. ✅ Slightly elongate the oval, as Lincoln had a long, defined face. ✅ Use smooth, light pencil strokes, so you can adjust the shape later.
To help with symmetry, draw a vertical guideline down the center of the face and a horizontal guideline across the middle, marking where the eyes, nose, and mouth will be placed.
Tip: Keep these guidelines light and soft, as they will be erased later.
Step 2: Outline the Facial Features
Now, begin placing the major facial features using your guidelines:
✅ Eyes – Draw two light ovals along the horizontal guideline, spaced evenly apart. ✅ Nose – Sketch a narrow triangle just below the eye line, marking where the nose bridge will extend downward. ✅ Mouth – Draw a horizontal line below the nose, ensuring it aligns proportionally with the eyes. ✅ Ears – Position the ears along the sides of the head, roughly aligned with the eyes and nose.
At this stage, the drawing will still be in its rough form, so don't worry about perfection yet.
Step 3: Draw the Eyes and Eyebrows
The eyes are crucial in capturing Lincoln's thoughtful expression.
✅ Outline the almond shape of each eye, ensuring they are evenly placed. ✅ Draw the irises and pupils, leaving a small white highlight for a more lifelike gaze. ✅ Sketch Lincoln's slightly furrowed eyebrows, following their natural curve above the eyes. ✅ Add subtle wrinkles and creases around the eyes to enhance realism.
Tip: Lincoln had deep-set eyes, so shading around them will help create a realistic, three-dimensional effect.
Step 4: Shape the Nose and Mouth
Now, let's refine Lincoln's nose and mouth:
✅ Nose – Lincoln had a long, prominent nose with a slight curve at the bridge. Use soft shading to define the nostrils and shadows beneath the nose. ✅ Mouth – His lips were thin and tightly set, often giving him a serious expression. Draw the top lip slightly darker and the bottom lip with softer shading to suggest volume. ✅ Add subtle creases around the mouth, as Lincoln had a weathered, expressive face.
Step 5: Draw the Beard and Hair
Lincoln's distinctive beard and hair are key features:
✅ Outline his wavy hair, which was parted to one side and slightly unkempt. ✅ Sketch curving lines for the beard, framing the lower half of his face. Lincoln's beard was full, but not overly bushy, so keep the strokes natural and slightly wavy. ✅ Use short, curved strokes to mimic the texture of the beard, making it denser along the chin and jawline while leaving the upper lip clean-shaven.
Tip: Use layered strokes to create a realistic hair effect, rather than drawing harsh lines.
Step 6: Add Fine Facial Details
To enhance the realism of your drawing, refine Lincoln's skin texture and defining features:
✅ Sketch fine lines and wrinkles around his forehead, eyes, and mouth. ✅ Add creases near the corners of his eyes to emphasize his aged and wise expression. ✅ Shade lightly along the cheekbones and jawline to give depth to his long, angular face.
Step 7: Refine Shadows and Contrast
Shading is essential for capturing depth and dimension:
✅ Identify the light source—shade the opposite side of the face for contrast. ✅ Add soft, gradual shading under the nose, chin, and along the cheekbones to create a lifelike, three-dimensional effect. ✅ Darken the hair and beard to enhance texture, while keeping some lighter strands visible for realism. ✅ Lightly shade the collar and clothing to add extra definition to his formal attire.
Tip: Use blending tools or a soft pencil (4B-6B) for smooth gradients in shaded areas.
Step 8: Final Refinements and Clean-Up
Now, step back and assess your drawing:
✅ Erase any unnecessary guidelines for a clean finish. ✅ Darken the main outlines and enhance contrast where needed. ✅ Refine facial features—adjust symmetry, expressions, and shading to perfect the likeness. ✅ If desired, use ink or fine-tipped pens to outline key features for a bold and polished look.
Your Abraham Lincoln drawing should now look strong, refined, and lifelike!
Final Thoughts on Drawing Abraham Lincoln
Congratulations! You've successfully drawn one of America's most iconic presidents by following structured steps.
Practice different expressions—try drawing Lincoln smiling slightly or looking more serious. Experiment with shading techniques—soft shading for realistic portraits, or cross-hatching for a historical engraving-style look. Challenge yourself by drawing a full bust or even a historical scene featuring Lincoln!
Each portrait you create refines your skills, helping you master facial proportions, shading, and capturing historical figures. So keep sketching, improving, and enjoying the art of portrait drawing!
If you'd like, you can also try drawing a picture of other U.S. Presidents, such as George Washington.
Remember, practice makes perfect, so continue to refine your drawing skills by attempting different subjects and styles. Enjoy the journey of artistic expression!
Fun Facts About Abraham Lincoln
-
Abraham Lincoln, the 16th President of the United States, was known for his top hat, which he often used to store important papers.
-
Lincoln was known for his tall stature, with Abraham himself standing at 6 feet 4 inches, making him one of the tallest U.S. presidents.
-
Abraham Lincoln was associated with honesty, earning the nickname "Honest Abe" due to his reputation for integrity.
-
Lincoln appeared on the U.S. penny since 1909, making it one of the longest-running coin designs in American history.
-
Interestingly, Lincoln had a practice of reading by the light of a fireplace in his younger years, showing his commitment to learning.
-
A little-known fact is that Lincoln shared a birthday with the National Association for the Advancement of Colored People (NAACP), which was founded on February 12, 1909.
-
Lincoln was competent in wrestling, with records stating Abraham Lincoln had only one recorded defeat among over 300 matches.
-
It's said that Lincoln loved cats and allowed them to sprawl over his work desk in the White House.
-
The image of Lincoln has featured in a variety of popular culture references, from movies to satirical portrayals.
-
Lincoln's leadership during the Civil War led to the abolition of slavery, commemorated with the Emancipation Proclamation of 1863.
Tip: To enhance your drawing of Abraham Lincoln, focus on the proportions of his facial features, which are crucial for capturing his likeness. Start by lightly sketching a vertical line down the center of your paper to establish symmetry, followed by a horizontal line for the eye level, ensuring that his eyes sit approximately halfway down the face. Pay special attention to the shape of his iconic beard and the distinctive lines of his forehead; using a soft pencil can help you create gentle curves and subtle shadows. As you progress, don't hesitate to use a kneaded eraser to refine the highlights, particularly around his eyes and cheekbones, which will add depth and realism to your portrait. Finally, keep your lines light until you're satisfied with the overall composition—this way, you can adjust as needed without overwhelming your artwork!
Suggestions for Scenes and Settings for Abraham Lincoln Drawings
-
Lincoln Memorial Reflection: Draw an ethereal scene in which Abraham Lincoln ponders his reflection at the iconic Lincoln Memorial.
-
Gettysburg Address Venue: Illustrate a historic setting where Lincoln is delivering a resonant speech to a crowd, documents in hand.
-
Cabin Satellite View: Show a birds-eye view of Lincoln emerging from a rustic cabin into a lush countryside landscape dotted with barns and streams.
-
Lincoln Debate Stage: Visualize Lincoln engaged in animated debate on a grand Victorian-era stage, filled with spectators dressed in historical attire.
-
Rail-splitting Scene: Capture a forest setting with Lincoln splitting rails, surrounded by towering trees and curious forest animals.
-
Theater Balcony Moment: Design a fateful theater scene where Lincoln observes a play from a high balcony, richly decorated and filled with audience members.
-
Presidential Train Journey: Illustrate Lincoln enjoying a scenic ride on a traditional steam locomotive, landscapes flashing by as clouds of steam puff by.
-
Chess with Lincoln: Picture Lincoln in a strategic chess match against historical figures in an ornate library filled with books and maps.
-
Lincoln's Law Office: Sketch a serene scene of Lincoln deep in thought amid piles of legal books and documents, a classic quill poised over parchment.
-
Time-jumping Lincolns: Create a dynamic scene where Lincoln leaps through time portals, experiencing various key moments in history.