Whether you’re an experienced artist or just starting, drawing a Christmas elf can be a fun and festive project. You can create your own holiday-themed artwork with a few simple steps. In this tutorial, I will guide you through the process of how to draw a Christmas elf from start to finish. Grab your materials and let’s get started!
Materials Required
To begin, gather the following materials:
- Pencil
- Eraser
- Paper
- Colored pencils or markers (optional)
- Ruler (optional)
Make sure you have all these materials within reach before you begin drawing. Once you have everything prepared, you can start creating your Christmas elf masterpiece.
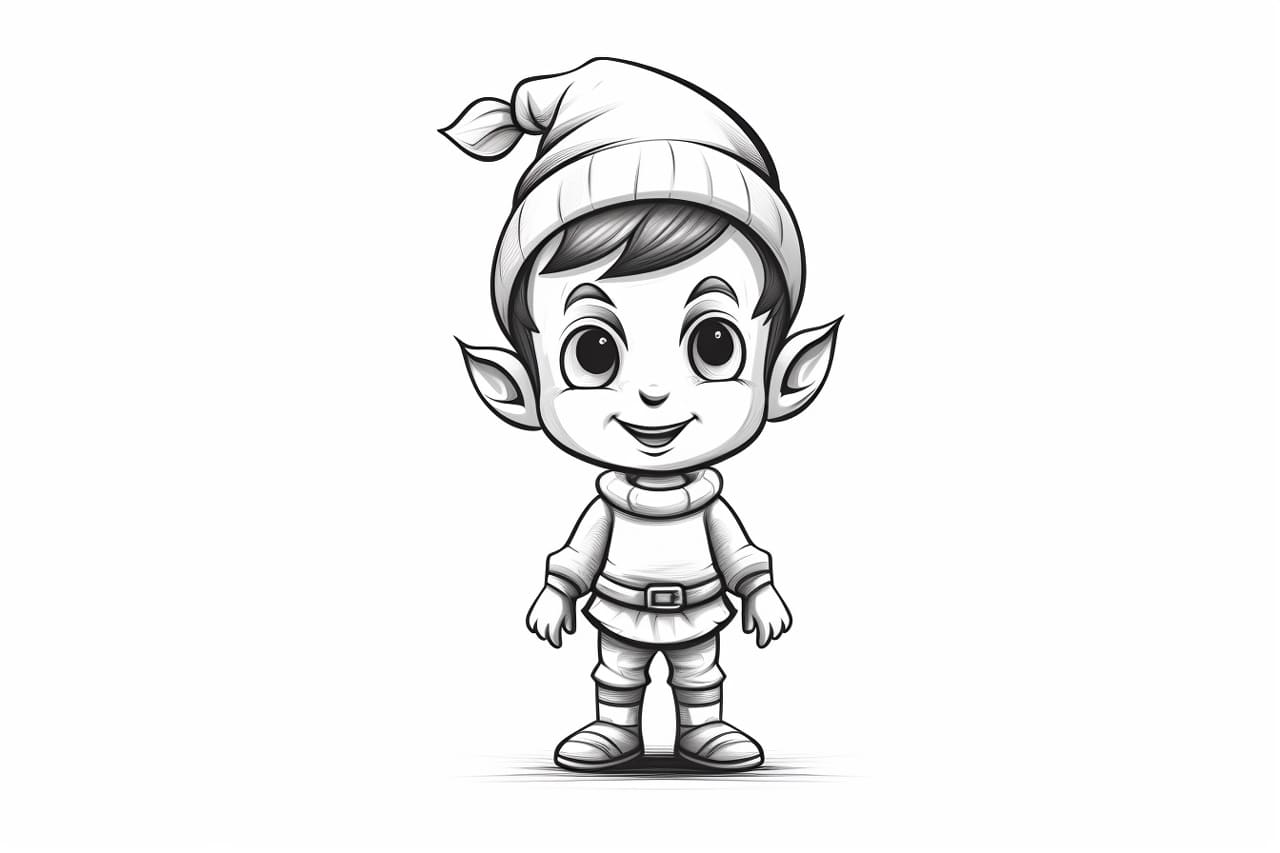
Step 1: Outline the Head and Body
To begin, draw a circle in the middle of your paper. This will serve as the elf’s head. Below the head, draw a larger oval shape for the body. Leave enough space between the head and body for the elf’s neck.
Step 2: Add Facial Features
Using the circle as a guide, add the elf’s facial features. Draw two large oval-shaped eyes near the top of the head. Add a slight curve below the eyes for the nose. Then, draw a smiling mouth beneath the nose. Add rosy cheeks by drawing two small circles on either side of the nose to give your elf some personality.
Step 3: Draw the Elf’s Hat
The elf’s hat is a distinct part of its appearance. Starting from the top of the head, draw a curved line that comes down to the side of the head, almost touching the shoulder. Then, draw another curved line from the other side of the head, mirroring the first line. Connect the two lines at the bottom using a curved line to complete the hat shape.
Step 4: Sketch the Elf’s Ears
Next, draw the elf’s ears on either side of the head. These should be pointy and slightly larger than average ears. Start by drawing a small curved line from the side of the head, extending outwards. Then, draw another curved line beneath it, mirroring the first line. Connect the two lines at the bottom with a slightly curved line to complete the ear shape.
Step 5: Add Details to the Face
Add some details to the face to make your elf look more expressive. Draw two small circles within the eyes to represent the pupils. Then, draw curved lines above each eye to indicate the eyebrows. Add some eyelashes above the eyes for a more feminine elf appearance. Finally, pull some hair strands peeking out from under the hat.
Step 6: Outline the Elf’s Body
Using the oval shape you drew earlier as a guide, outline the elf’s body. Start from the neck and draw curved lines that follow the oval shape, tapering slightly towards the bottom. This will form the elf’s torso. Then, draw two slightly curved lines extending downwards from the bottom of the torso to represent the legs.
Step 7: Draw the Elf’s Arms and Hands
Next, add the elf’s arms and hands. Start by drawing two lines extending outwards from the sides of the torso to represent the arms. Draw a small circle for the hands at the end of each line. Add a few curved lines within each hand to give your elf more dimension to represent fingers.
Step 8: Outline the Elf’s Feet
To complete the body, draw the elf’s feet. Start by drawing two slightly curved lines extending downwards from the bottom of the legs. Then, draw a curved line at the end of each line that curves upwards to form the elf’s shoes. Add small curves at each shoe’s front to represent the toes.
Step 9: Add Clothing Details
Now it’s time to add some clothing details to your elf. Draw a curved line across the torso to create a collar. Then, draw two vertical lines down the torso to represent buttons. For the hat, add some stripes or patterns using curved lines. You can also add a belt around the elf’s waist by drawing a rectangle and a buckle in the center.
Step 10: Finalize Your Drawing
At this stage, you have the basic structure of your Christmas elf. Take a moment to go over your drawing and make any necessary adjustments. If you’re happy with the outline, you can add color to your drawing using colored pencils or markers. Let your creativity shine as you bring your Christmas elf to life with vibrant colors.
Conclusion
Drawing a Christmas elf can be a delightful and rewarding experience. Following these step-by-step instructions, you can create your festive artwork to celebrate the holiday season. Remember to have fun and embrace your unique style as you bring your Christmas elf to life on paper. Happy drawing!