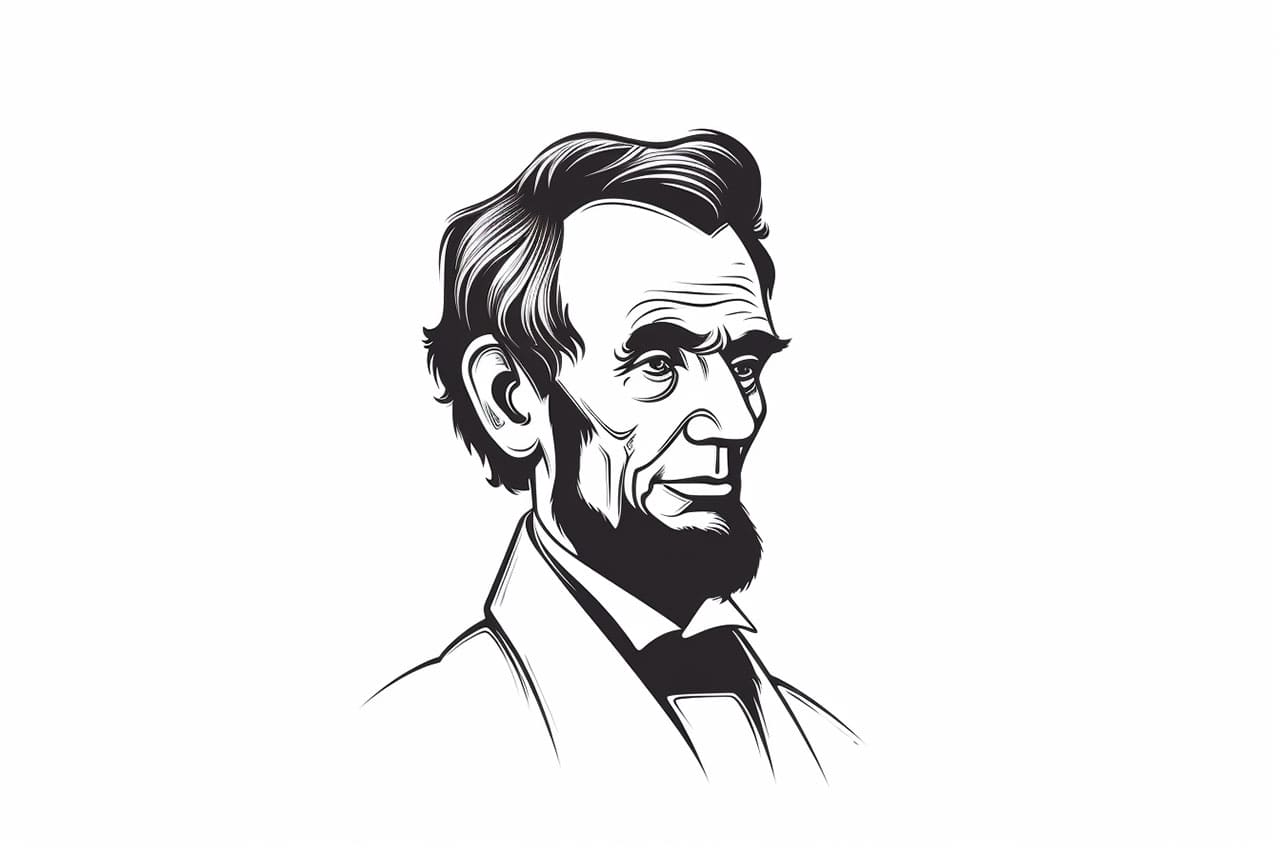
Welcome to this step-by-step guide on how to draw Abraham Lincoln, one of America’s most iconic and influential historical figures. Whether you’re a beginner or an experienced artist, this tutorial will provide you with easy-to-follow instructions to recreate the likeness of this great president. So grab your drawing materials, clear your workspace, and let’s get started!
Materials Required
Before we dive into the drawing process, let’s gather the materials you’ll need:
- Paper: Choose a good quality drawing paper that is thick enough to handle pencil and eraser without tearing or smudging.
- Pencils: Have a selection of graphite pencils in various grades (2H to 6B). These range from light to dark and will help you achieve different shades in your drawing.
- Erasers: Include both a kneaded eraser for subtle corrections and a plastic eraser for more precise erasing.
- Pencil Sharpener: Ensure that your pencils are sharpened to a fine point for detailed work.
- Reference Image: Find a clear, high-resolution image of Abraham Lincoln to guide your drawing. You can use a printed photo or have it displayed on a digital device.
Now that you have everything you need, let’s move on to the step-by-step instructions.
Step 1: Basic Face Shape
Start by lightly sketching an oval shape to represent the overall shape of Lincoln’s face. Use long, smooth strokes and keep your lines loose to allow for adjustments later on. Remember, it doesn’t have to be perfect at this stage.
Step 2: Facial Features
Next, focus on the placement of Lincoln’s facial features. Use reference points to help guide you. For example, you can draw a vertical line down the center of the face to divide it in half, which will act as a guide for placing the eyes, nose, and mouth. Sketch basic shapes for these features, keeping them simple and proportional to each other.
Step 3: Eyes and Eyebrows
Now let’s add more detail to Lincoln’s eyes. Begin by drawing the shape of the eyes, paying attention to their size and placement. Add the irises and pupils, making sure they are aligned. Then, carefully sketch the eyebrows, noting their shape and angle. Take your time to capture Lincoln’s distinctive, thoughtful expression.
Step 4: Nose and Mouth
Moving on, focus on the nose and mouth. Observe the reference image closely and replicate the shape of Lincoln’s nose. Pay attention to its proportions and any unique characteristics. Next, draw the mouth, carefully observing the size and shape of his lips. Take your time to capture his calm and determined expression.
Step 5: Beard and Hair
Now, let’s move on to Lincoln’s recognizable beard and hair. Use light lines to outline the shape of his beard, taking into account the way it frames his face. Then, add the texture and details of his hair, paying attention to its flow and direction. Use a combination of short, curved lines and shading techniques to achieve a realistic look.
Step 6: Fine Details
In this step, we’ll focus on refining the drawing and adding the finer details that will bring your portrait to life. Start by carefully observing the reference image for any distinctive facial features, such as wrinkles, lines, or textures. Use light, feathery strokes to capture these details, gradually building up the shading and texture as you go.
Step 7: Shading and Contrast
To create depth and dimension in your drawing, it’s essential to master shading techniques. Start by identifying the light source in the reference image, which will determine where the highlights and shadows fall on Lincoln’s face. Use your range of graphite pencils to gradually build up the shading, paying close attention to the values and contrast. Take your time to achieve a realistic three-dimensional effect.
Step 8: Final Touches
Finally, step back and take a good look at your drawing. Make any necessary adjustments to ensure that the proportions and likeness of Abraham Lincoln are captured accurately. Erase any stray lines or smudges and refine any areas that need more detail. Remember, drawing is a process, so don’t be afraid to make corrections and modifications until you’re satisfied with the result.
Conclusion
Congratulations on completing your drawing of Abraham Lincoln! By following these step-by-step instructions, you have learned how to capture the likeness and character of this iconic historical figure. If you’d like, you can also try drawing a picture of other U.S. Presidents, such as George Washington.
Remember, practice makes perfect, so continue to refine your drawing skills by attempting different subjects and styles. Enjoy the journey of artistic expression!