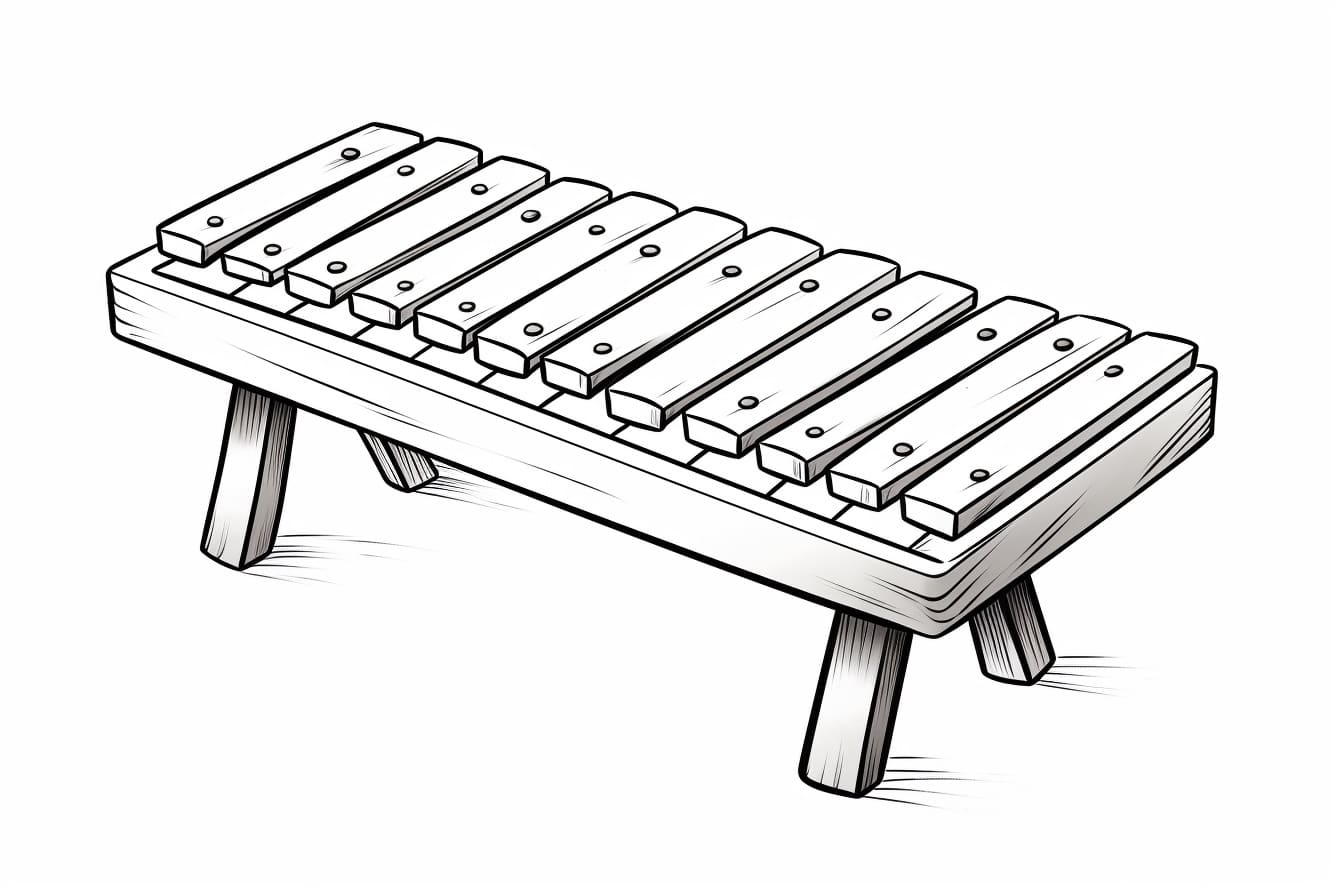
Welcome to this step-by-step guide on how to draw a xylophone! If you love music and enjoy exploring your artistic side, this tutorial is perfect for you. Drawing a xylophone allows you to combine your passion for music with your creativity in a fun and visually appealing way. By following these simple instructions, you’ll be able to create a beautiful illustration of a xylophone that you can proudly display or share with others. So, let’s get started!
Materials Required
Before we begin, let’s gather all the materials you’ll need to complete this drawing:
- A sheet of paper or a sketchpad
- Pencil or mechanical pencil
- Eraser
- Fine-tip black marker or pen
- Colored pencils or markers (optional)
Make sure you have these materials ready so you can fully immerse yourself in this drawing exercise.
Step 1: Start with the Basic Shape
To begin drawing a xylophone, let’s first outline the basic shape. Start by drawing a horizontal line slightly above the center of your paper. This line will serve as the base of the xylophone. Next, draw two vertical lines downward from the ends of the base line, creating the sides. Connect the bottom ends of these lines with another horizontal line parallel to the base. This completes the main body of the xylophone.
Step 2: Draw the Xylophone Keys
Now, let’s add the keys to our xylophone. These keys are the rectangular bars that produce different musical notes when struck. Starting from the left side of the xylophone, draw a series of evenly spaced horizontal lines extending from the top of the instrument to the bottom. These lines represent the keys. Leave a small gap between each key for a visually appealing look.
Step 3: Add Detail to the Keys
To make the keys more realistic, we’ll add some depth and dimension. Start by drawing short vertical lines within each key, parallel to the sides of the xylophone. These lines will help create the appearance of individual wooden bars. Next, draw a slightly curved line across the width of each key, near the top. This line represents the raised area where the keys are struck to produce sound.
Step 4: Enhance the Xylophone Body
Let’s now focus on adding some details to the main body of the xylophone. On each side of the xylophone, near the top, draw two small circular shapes. These will be the resonator tubes that amplify the sound produced by the keys. Connect each circular shape to the body of the xylophone by drawing straight lines. Next, draw a thin horizontal line just below the resonator tubes to give the xylophone a more realistic appearance.
Step 5: Add the Mallets
The xylophone is played using mallets, so let’s draw them next. Start by drawing a small oval shape near the right side of the xylophone. This will be the head of the mallet. From the top of the oval, draw a long, thin, and slightly curved line extending upward. This line represents the handle of the mallet. Repeat this step on the left side of the xylophone to draw the second mallet.
Step 6: Finalize the Drawing
Now it’s time to finalize your xylophone drawing. Grab your fine-tip black marker or pen and carefully trace over the main outlines of the drawing. Pay close attention to the details, such as the keys, resonator tubes, and mallets. Once you’ve outlined everything with ink, let it dry for a few minutes. Then, erase any pencil marks that are still visible.
Step 7: Add Color (Optional)
If you want to give your xylophone drawing a pop of color, feel free to use colored pencils or markers. You can choose any colors you like for the keys, resonator tubes, and mallets. Consider using bright and vibrant shades to make your xylophone look lively and appealing. Take your time and color each element carefully, ensuring the colors blend harmoniously.
Congratulations! You have successfully drawn a beautiful xylophone. Now you can admire your creation and showcase it to others who appreciate art and music.
Conclusion
Drawing a xylophone may seem challenging at first, but with these step-by-step instructions, you can create a stunning and realistic illustration. By following the guidelines provided and using your own creative touch, you’ll be able to draw a xylophone that captures the essence of this musical instrument. Remember to have fun throughout the process and let your imagination guide your hand. Enjoy the journey of bringing a xylophone to life on paper!


