How to Draw a Woolly Mammoth
Learn how to draw a woolly mammoth with this step-by-step tutorial. Create a realistic representation of this prehistoric creature and enhance your drawing skills.
Materials You'll Need
- Pencil
- Paper
- Eraser
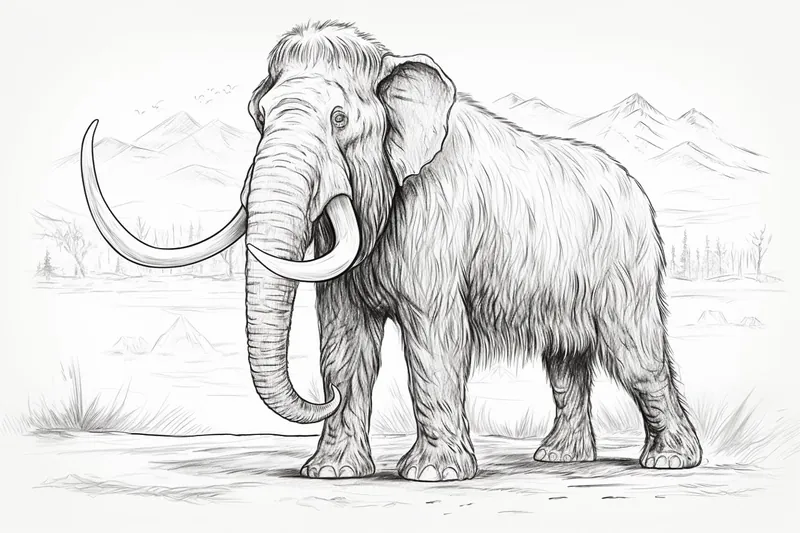
![]() Welcome to this exciting step-by-step guide on how to draw a woolly mammoth! This ancient creature, known for its enormous size and luxurious fur, has captured the imagination of many artists and enthusiasts alike. In this tutorial, we will simplify the drawing process into manageable stages, allowing you to create a stunningly realistic depiction of this fascinating prehistoric animal.
Welcome to this exciting step-by-step guide on how to draw a woolly mammoth! This ancient creature, known for its enormous size and luxurious fur, has captured the imagination of many artists and enthusiasts alike. In this tutorial, we will simplify the drawing process into manageable stages, allowing you to create a stunningly realistic depiction of this fascinating prehistoric animal.
Whether you're a beginner looking to enhance your skills or an experienced artist seeking a fun project, this guide will provide clear instructions and helpful tips. So, gather your drawing supplies—pencils, erasers, paper, and more—and prepare to embark on an artistic journey back in time, where woolly mammoths roamed the earth.
Let's jump into the steps that will lead you to your very own masterpiece! Follow along closely, and soon you'll be marveling at the woolly mammoth you've brought to life on your canvas.
Materials Required
Before we begin, make sure you have the following materials:
- Drawing paper or sketchbook
- Pencil
- Eraser
- Fine-tip black marker or pen
- Colored pencils or markers (optional)
Now that you have everything you need, let's dive into the step-by-step process.
Step 1: Basic Shapes
Begin by lightly sketching the basic shapes that will act as a framework for your woolly mammoth drawing. Start with an oval shape for the body and a smaller oval for the head. Add guidelines for the legs and trunk using simple straight lines.
Step 2: Outline the Body
Using your initial sketch as a guide, start outlining the body of the woolly mammoth. Pay attention to the proportions and shape of the different body parts. Use gentle curves to create the rounded form of its body.
Step 3: Head and Trunk Details
Now, let's focus on the head and trunk. Add the details of the woolly mammoth's face, including the eyes, ears, and tusks. The trunk should be long and slightly curved. Don't forget to add texture to the fur around the head and trunk.
Step 4: Legs and Feet
Moving on to the legs, carefully sketch the shapes and proportions of each leg. Woolly mammoths had large, sturdy legs to support their massive bodies. Add the feet, making sure to capture the shape of their wide, rounded hooves.
Step 5: Fine-Tuning the Body
Take a moment to review your overall drawing and make any necessary adjustments. Refine the shape of the body, ensuring it looks balanced and proportionate. Erase any unwanted lines and smoothen out the contours.
Step 6: Texture and Fur
One of the defining features of a woolly mammoth is its shaggy fur. Begin adding texture to the body by sketching short, parallel lines across its surface. Pay attention to the flow of the fur and vary the lengths and directions of the strokes to create a realistic effect.
Step 7: Details and Shading
To make your woolly mammoth drawing come to life, add details and shading. Darken the eyes and create shadows in areas that would naturally be darker, such as under the body and around the legs. Use your pencil or colored pencils to add depth and dimension.
Step 8: Finalize Your Drawing
Now that you've added all the necessary details, take a moment to evaluate your drawing. Make any final adjustments and add any finishing touches that you feel will enhance your artwork. Once you're satisfied with the result, you can go over the lines with a fine-tip black marker or pen to make your drawing stand out.
Tip: To effectively capture the essence of a woolly mammoth, focus on layering textures to convey its thick, shaggy fur. Begin with a light pencil sketch to outline the mammoth's basic shapes—its large body, tusks, and distinctive hump. Next, switch to a softer pencil (like 4B or 6B) to add depth by creating short, quick strokes that mimic the direction of the fur. Use a blending stump or your fingers to gently smudge these strokes, giving a more realistic appearance to the fur. Finally, enhance the highlights and shadows with an eraser and a darker pencil, ensuring the mammoth looks three-dimensional and alive. Remember, patience is key—take your time to build up the texture gradually!
Conclusion
Congratulations on completing your woolly mammoth drawing! By following these step-by-step instructions, you have learned how to create a realistic representation of this fascinating prehistoric creature. Remember to practice and experiment with different styles to further develop your artistic skills. Have fun and keep drawing!
❄️ Fun Facts About Woolly Mammoths
- Ice Age IconsWoolly mammoths lived during the Ice Age and were well-adapted to freezing climates with their thick fur, fatty hump, and small ears (to conserve heat).
- Not DinosaursDespite their ancient status, woolly mammoths aren't dinosaurs—they're more closely related to modern elephants.
- Giant but GracefulAdult males could grow up to 13 feet tall and weigh up to 6–8 tons, yet their padded feet helped them walk silently across snow.
- Curly Hair, Don't CareTheir fur came in shades from dark brown to blond and was made of two layers—a dense undercoat and a long, shaggy outer layer.
- Spiraling TusksMammoth tusks could grow over 15 feet long and sometimes curved into dramatic spirals. They were used for defense, digging through snow, and even fighting rivals.
- Frozen in TimeMany mammoth bodies have been found preserved in Siberian permafrost, with hair, organs, and even stomach contents intact.
- Mammoth Family LifeLike modern elephants, mammoths likely lived in matriarchal herds and had strong social bonds.
- They Coexisted with HumansEarly humans hunted woolly mammoths and used their bones and tusks to build shelters and tools—and even painted them in prehistoric cave art.
- Extinction MysteryThey went extinct about 4,000 years ago, possibly due to climate change, human hunting, or a combination of both.
- **Resurrection Science?**Scientists are working on de-extinction projects using mammoth DNA, aiming to bring back a hybrid woolly mammoth-elephant species.
Suggested Scenes for Woolly Mammoth Drawings
- Snowstorm StandoffA woolly mammoth facing into a swirling blizzard, with its fur whipping in the wind and tusks gleaming with frost.
- Mammoth Herd MigrationA family of mammoths trudging across a frozen tundra under northern lights, leaving deep footprints in the snow.
- Cave Art EncounterA prehistoric human painting mammoths on a cave wall while one watches curiously from a distance.
- Springtime ThawA mammoth calf splashing in a half-frozen stream as the first wildflowers bloom around them.
- Mammoth vs. Saber-Toothed CatA dramatic moment of confrontation between a lone mammoth and a stalking saber-toothed predator.
- Mammoths at RestA peaceful scene of a mammoth herd dozing near a frozen lake, surrounded by snow-covered pine trees.
- Mammoth TracksA view from above, following a trail of massive footprints through untouched snow, leading to a woolly mammoth in the distance.
- Ice Age FestivalA fantasy-style scene where Ice Age animals gather for a moonlit gathering, with mammoths adorned in natural decorations like vines and feathers.
- Frozen DiscoveryScientists in modern winter gear uncovering a perfectly preserved mammoth in the Siberian ice.
- Mammoth on a HilltopA solitary woolly mammoth silhouetted on a snowy ridge at sunrise, surveying the icy expanse below.