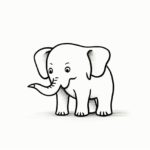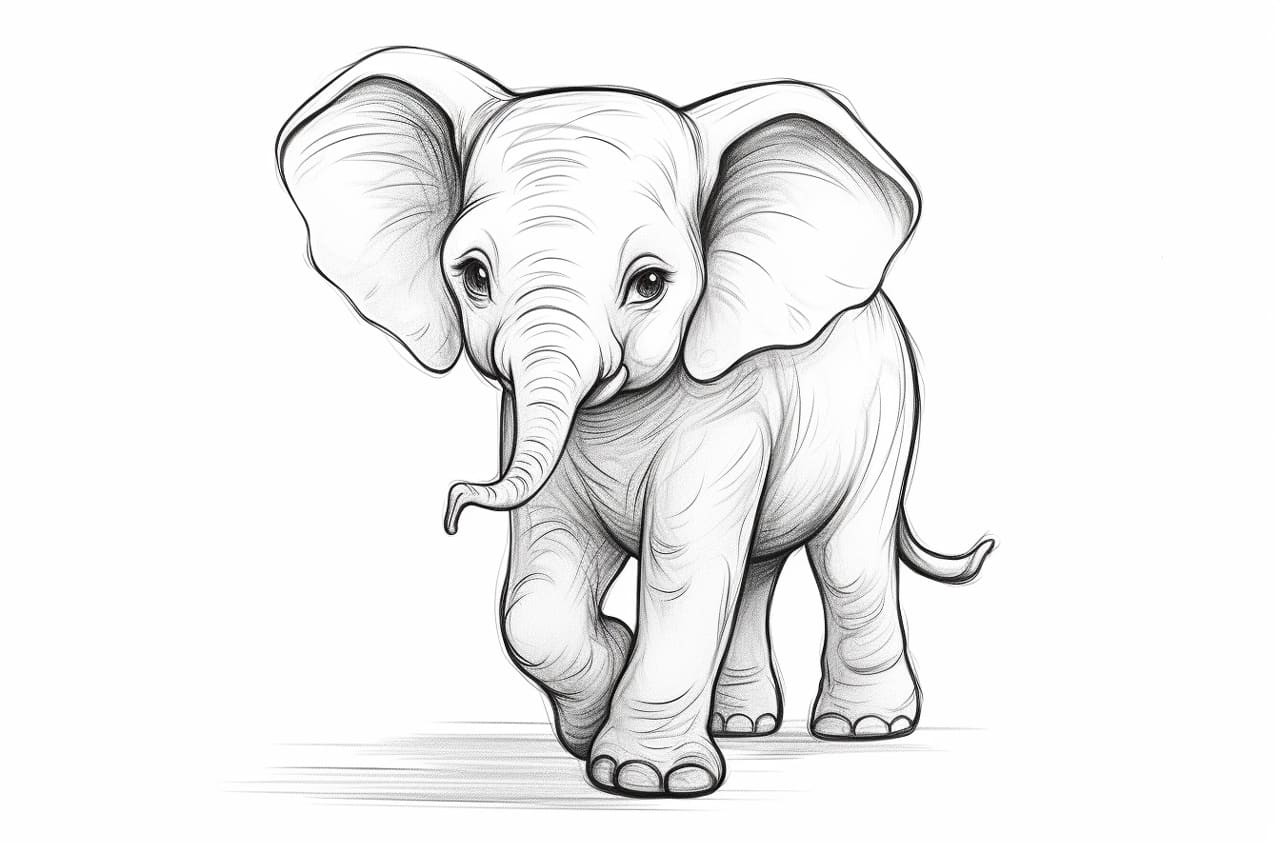
Welcome to this step-by-step guide on how to draw a baby elephant. Drawing these gentle giants may seem challenging at first, but by following these easy instructions, you’ll be able to create your very own adorable baby elephant in no time. So grab your pencil and let’s get started!
Materials Required:
- A blank sheet of paper
- Pencils of different grades (2B, 4B, 6B)
- Eraser
- Sharpener
- Fine-tipped black marker or pen
- Colored pencils or markers (optional)
Step 1: Outline the Body Shape
Start by drawing a large oval shape in the center of your paper. This will be the body of the baby elephant. Make sure it’s proportionate to the size of the head you want to achieve. Don’t worry about getting it perfect on the first try; you can always make adjustments later.
Step 2: Sketch the Head
At the top of the oval, draw a smaller oval shape to represent the head. This oval should be slightly tilted and overlapping the larger oval. Leave some space for the trunk and the ears later on.
Step 3: Add the Ears
On either side of the head, draw two large, floppy ears. Baby elephants have relatively big ears, so make sure they are proportionate to the head. Bring the ears slightly outside the outline of the head to make them more prominent.
Step 4: Outline the Trunk
Beneath the head, draw a long, curved line extending from the left side of the head. This line will form the trunk of the baby elephant. Make sure the line is smooth and graceful, as the trunk is a distinctive feature of these animals.
Step 5: Define the Eyes
Within the head, draw two small circles to represent the eyes. These circles should be placed towards the front of the head and slightly towards the center. Add a small dot inside each circle to represent the pupils. Leave some space above the eyes for the eyebrows later on.
Step 6: Add the Eyebrows
Above each eye, draw a curved line to form the eyebrows. These lines should be slightly above the eyes and follow the curve of the head. The eyebrows will give your baby elephant a more expressive and adorable look.
Step 7: Sketch the Tusks
Beneath the trunk, on either side, draw two long, curved lines to represent the tusks. These lines should curve upwards and towards the trunk. Baby elephants have smaller tusks compared to adult elephants, so keep that in mind while sketching them.
Step 8: Detail the Body
Now it’s time to add some details to the body of the baby elephant. Starting from the top of the head, draw a series of curved lines that flow down the back and connect to the body. These lines represent the texture and folds of the skin. Add some smaller lines here and there to add more depth and dimension.
Step 9: Draw the Legs
At the bottom of the body, draw four slightly curved lines to represent the legs. Baby elephants have shorter legs compared to their adult counterparts, so adjust the length accordingly. Make sure the legs are evenly spaced and proportionate to the body.
Step 10: Add the Feet
On the end of each leg, draw a shape similar to an upside-down “U” to represent the feet. Baby elephants have rounder feet compared to adult elephants. You can also add a few lines to suggest wrinkles on the feet, adding more realism to your drawing.
Step 11: Refine the Features
Take a closer look at your overall drawing so far. Make any necessary adjustments to the proportions and shapes. Use an eraser to remove any unwanted lines or smudges. This is your chance to refine the features and make your baby elephant even cuter.
Step 12: Ink the Drawing
Once you’re happy with your pencil sketch, go over the final lines with a fine-tipped black marker or pen. This will make your drawing more defined and bold. Allow the ink to dry completely before erasing any remaining pencil lines.
Step 13: Color your Baby Elephant (optional)
If you prefer, you can add some color to your drawing using colored pencils or markers. Baby elephants are usually gray, so start by using different shades of gray to color the body. Add some highlights and shading to create a more realistic effect. You can also experiment with other colors for a more imaginative interpretation.
Conclusion
Congratulations on completing your drawing of a baby elephant! By following these step-by-step instructions, you were able to create a charming illustration of one of nature’s most adorable creatures. Remember, practice makes perfect, so keep drawing and exploring your artistic skills. With time and dedication, you’ll be able to create even more stunning drawings of animals. Enjoy the process, and happy drawing!