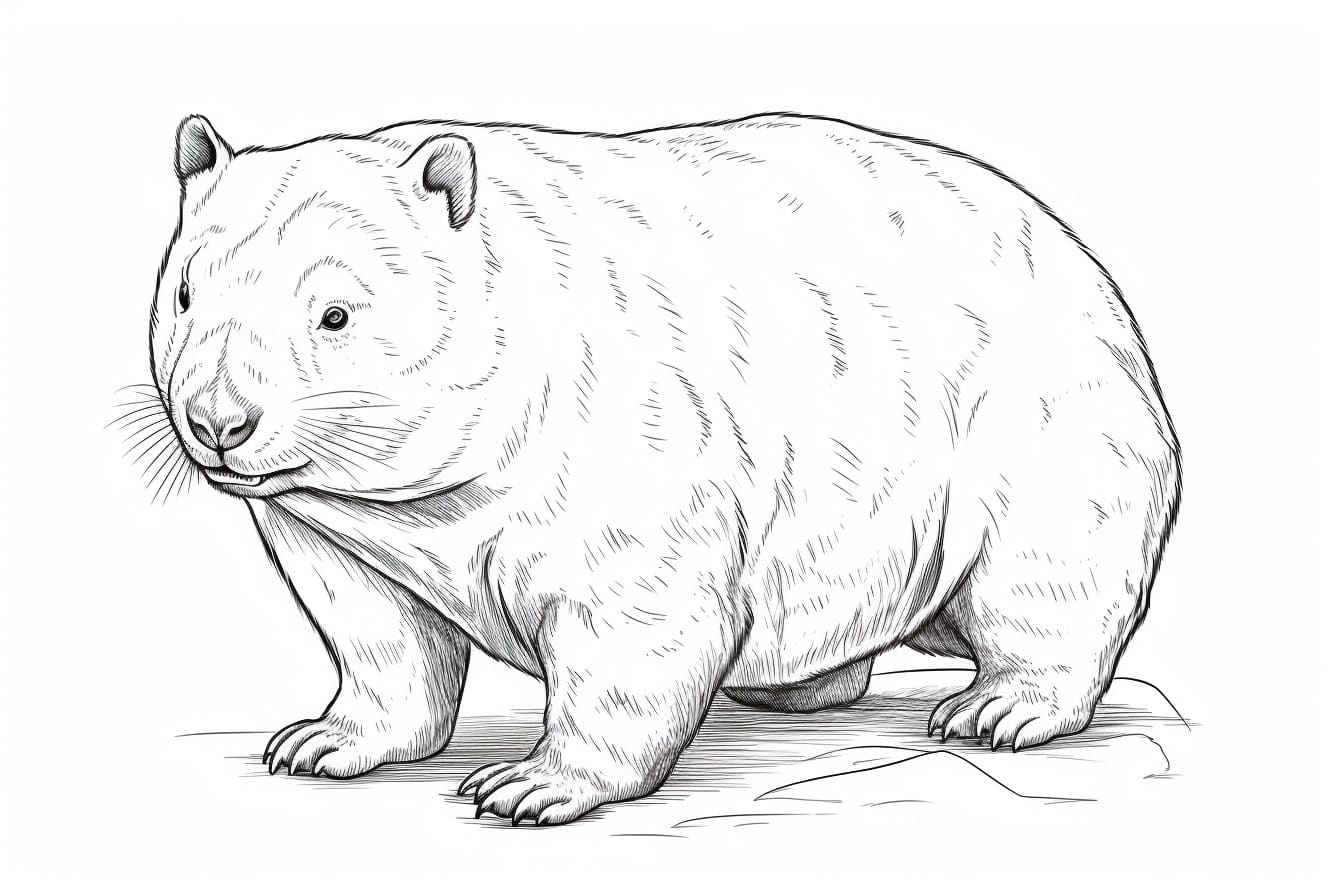
Welcome to this step-by-step guide on how to draw a wombat! Whether you’re a beginner or an experienced artist, I’m here to help you create a cute and realistic representation of this unique Australian marsupial. So grab your art supplies and let’s get started!
Materials Required:
To begin with, you’ll need the following materials:
- Drawing paper
- Pencil
- Eraser
- Fine-tip pen or marker
- Colored pencils or markers (optional)
Now that you have your materials ready, let’s dive into the process of drawing a wombat!
Step 1: Define the Basic Shape
Start by drawing a circular shape for the head. Wombats have a relatively large, rounded head in proportion to their bodies.
Step 2: Outline the Body
Extend a curved line from the head to create the back of the wombat. Then, add a smaller curved line beneath it for the belly.
Step 3: Sketch the Legs
Draw four short, stubby legs coming out from the bottom of the body. Wombats have strong legs, so make sure to emphasize their sturdy appearance.
Step 4: Add the Ears and Eyes
On top of the head, sketch two rounded ears, one on each side. Wombats have small ears compared to their body size. Just below the ears, draw two small oval shapes for the eyes. Leave a small space for the nose between the eyes.
Step 5: Outline the Nose and Mouth
Draw a small, upside-down triangle for the nose, slightly overlapping the eyes. Then, add a short, curved line beneath the nose to indicate the mouth.
Step 6: Define the Facial Features
Add two small, curved lines above each eye to represent the eyebrows. This will give your wombat a curious and expressive look. You can also add two tiny circles within the eyes to represent the pupils.
Step 7: Detail the Ears and Face
Within each ear, draw some curved lines to show the inner ear structure. Then, add some short, curved lines around the eyes and mouth to indicate fur.
Step 8: Refine the Body Shape
Go back to the body and adjust the shape if needed. Make sure it looks chubby and rounded, just like a real wombat. Erase any unnecessary lines from the initial sketch.
Step 9: Add Paw Details
On each leg, draw three small ovals to represent the wombat’s toes. Wombats have strong claws, so make sure to emphasize them.
Step 10: Finalize the Outline
Trace over your pencil lines with a pen or marker to finalize the wombat’s shape and features. Remember to leave some areas open for coloring, if desired.
Step 11: Add Texture and Fur
Use short, curved lines to add texture and fur to your wombat’s body. Pay attention to the direction of the fur, which usually follows the contour of the body.
Step 12: Color Your Wombat (Optional)
If you prefer a colored drawing, now is the time to bring it to life! Use colored pencils or markers to add shades of brown or gray to the fur, and add some pink to the nose and ears for a realistic touch. You can also experiment with different color schemes if you want to get creative.
Conclusion
Congratulations on completing your wombat drawing! I hope you enjoyed this step-by-step guide and that it helped you create a beautiful and accurate representation of this adorable Australian marsupial. Remember, practice makes perfect, so keep drawing and exploring your artistic skills. Don’t forget to have fun along the way! If you enjoyed this guide on how to draw a wombat, stay tuned for more exciting drawing tutorials.