How to Draw a Vulture
Learn how to draw a realistic vulture with this step-by-step tutorial. Create a detailed and accurate representation of this fascinating bird using basic drawing techniques.
Materials You'll Need
- Pencil
- Paper
- Eraser
Vultures are among nature's most intriguing birds, often recognized by their bald heads, large wingspans, and commanding presence as they soar high above landscapes in search of food. As scavengers, they play a vital role in the ecosystem by cleaning up carrion, and their distinctive features make them a captivating subject for artists. If you've ever admired their unique silhouette circling in the sky or been fascinated by their role in various cultures and mythologies, learning how to draw a vulture is a wonderful way to appreciate and understand these remarkable creatures even more deeply.
Many artists are drawn to vultures because of their dramatic contrasts—wrinkled skin, hooked beaks, and feather textures make for an interesting blend of shapes and details. Whether you're adding a vulture to a wildlife scene, illustrating a story, or simply practicing your skills, this subject offers the perfect opportunity to explore shading, texture, and anatomy. This step-by-step tutorial on how to draw a vulture is suitable for beginners and intermediate artists alike, guiding you through each stage from basic shapes to refined details using simple techniques and accessible materials.
Don't worry if you're new to drawing birds or wildlife—this guide is designed to break the process down into manageable steps, helping you build confidence as you go. By the end, you'll have not only a completed vulture drawing but also a better understanding of bird anatomy and texture. So gather your pencils and paper, and let's embark on this creative journey together. Remember, every artist improves with practice, and every drawing is a step forward—let's discover the satisfaction of bringing a vulture to life on your page!
Materials Required
Before we begin, make sure you have the following materials on hand:
- Pencil: A good quality pencil will allow you to easily create light and dark shades as needed.
- Eraser: An eraser will come in handy for correcting any mistakes or making small adjustments.
- Paper: Choose a smooth and sturdy paper that can handle the shading techniques we'll be using.
- Fine tip pens: These will be used for adding finer details and outlines to your drawing.
- Colored pencils (optional): If you want to add color to your vulture drawing, having some colored pencils available can be helpful.
- A reference image of a vulture.
Now that you have your materials ready, let's dive into the step-by-step process of drawing a vulture!
Step 1: Basic Framework
Start by lightly sketching a circle for the vulture's head. Then, draw a large oval shape underneath the head, which will be the body. Don't worry about making it perfect at this stage, as you can always refine the shapes later.
Step 2: Outline the Wings
Extend two long, curved lines from the body to create the vulture's wings. Remember that vultures have broad wings, so make sure to capture that shape. Don't forget to add smaller feathers along the edges of the wings.
Step 3: Define the Tail
Sketch a long triangular shape for the tail of the vulture, extending from the lower part of the body. The tail should be slightly spread out, with some feathers overlapping each other.
Step 4: Add Legs and Feet
Draw two straight lines extending down from the body to form the vulture's legs. At the bottom, sketch long, curved lines for the feet, with sharp claws at the ends. Vultures have large and powerful feet, so make sure to capture that aspect in your drawing.
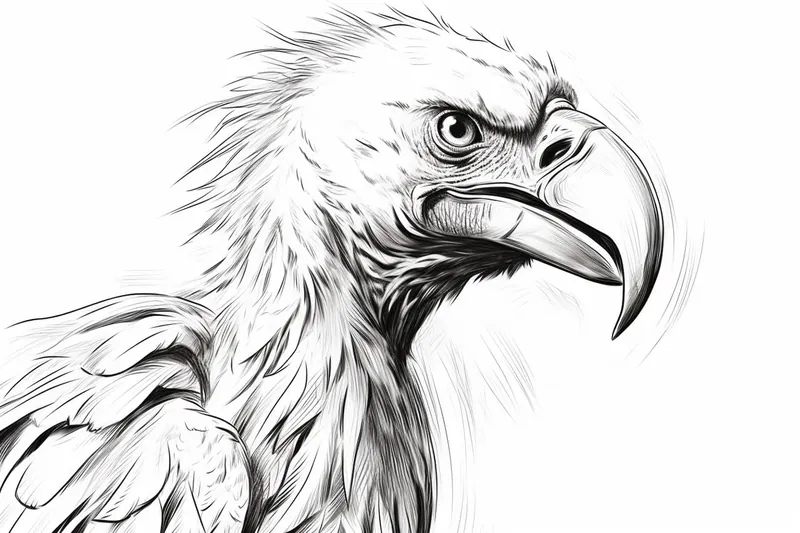
Step 5: Refine the Head
Now it's time to add some details to the vulture's head. Draw a long, curved beak extending from the circle you sketched earlier for the head. Vultures have a hooked beak, which is perfect for scavenging. Next, add the eyes on either side of the head, using small circular shapes. Don't forget to add a small nostril at the base of the beak.
Step 6: Draw the Feathers
One of the most defining features of a vulture is its feathers. Start by adding feather shapes along the wings, tail, and body. Pay attention to the direction of the feathers and their arrangement. Vultures' feathers are generally arranged in a neat and orderly manner.
Step 7: Refine the Details
Take a step back and evaluate your drawing so far. This is the perfect time to refine any areas that need adjustment. Erase any unnecessary lines and make any necessary changes to ensure that the proportions and shapes look accurate.
Step 8: Shading
Now, let's bring your vulture drawing to life by adding shading. Start by identifying the light source in your drawing. This will help you determine where the shadows will fall. Use your pencil to gently shade the areas that are farther away from the light source. Gradually build up the shading, using different pressure on your pencil to create depth and dimension.
Step 9: Add Texture
To make your vulture drawing even more realistic, add texture to the feathers. Using short, curved lines, create a feathery texture on the wings, body, and tail. Take your time and observe reference images to accurately represent the details of the vulture's feathers.
Step 10: Finishing Touches
Lastly, use a fine tip pen to outline the important features of your vulture drawing. Define the beak, eyes, feet, and feathers with clean and confident lines. This will make your drawing stand out and give it a polished look. Feel free to add any additional details or highlights using your pen or colored pencils if desired.
Congratulations! You've successfully learned how to draw a vulture. By following these step-by-step instructions and adding your personal touch, you've created a beautiful representation of this majestic bird.
Did You Know?: Vultures have bald heads for a fascinating and practical reason: it helps them stay clean while feeding on carrion. Feathers would trap bacteria and debris from decaying flesh, so their bare skin makes it much easier to keep hygienic—an essential adaptation for a bird that regularly sticks its head inside carcasses! Plus, their strong stomach acids can neutralize dangerous pathogens, protecting both the vulture and the wider ecosystem from disease. While drawing, notice how the wrinkled skin and unique head shape are not just for show, but are key to their survival and ecological role. Adding these details to your artwork gives your vulture more character and authenticity, reflecting just how perfectly adapted these birds are to their vital cleanup job in nature.
Tip: To capture the unique features of a vulture, start by using a light pencil to sketch its basic shapes, focusing on the large, rounded body and the angular wings. Pay special attention to the proportions, as vultures have a distinct silhouette that emphasizes their broad wings compared to their slender necks. Once you're satisfied with the outline, use a darker pencil or pen to define the details like the hooked beak and the texture of the skin on the head. For shading, consider using a blending stump or your fingers to create smooth transitions between light and shadow on the feathers, especially around the wing tips and the neck area, where the texture shifts. Lastly, don't hesitate to reference real-life images or videos of vultures in flight to understand how their wings move and how light interacts with their bodies—this will greatly enhance the realism of your drawing!
Conclusion
In this tutorial, we went through the process of drawing a vulture from start to finish. We began by creating a basic framework and gradually added detail and shading to bring our vulture drawing to life. Remember to practice regularly and observe real-life vultures or reference images to improve your skills.
Drawing animals can be a great way to explore different shapes, proportions, and textures. So, grab your art supplies and start drawing! The more you practice, the better you'll become. Enjoy the process and have fun creating your own vulture masterpiece!

Fun Facts About Vulture
- Vultures have incredibly strong stomach acid that allows them to safely digest rotting meat that would be deadly to most animals.
- There are 23 species of vultures worldwide, divided into Old World and New World vultures.
- Vultures play a crucial role in ecosystems by cleaning up carcasses and preventing the spread of disease.
- Unlike most birds, vultures have bald heads, which helps keep them clean while feeding on carrion.
- Some vulture species, like the turkey vulture, have an excellent sense of smell to locate food.
- Vultures can soar for hours with minimal effort, using thermal updrafts to glide across vast distances.
- The bearded vulture is known for eating bones and can digest them thanks to powerful stomach acids.
- Vultures are often misunderstood and have been featured in myths and folklore around the world.
Suggestions for Scenes and Settings for Vulture Drawings
- A vulture soaring high above a canyon at sunset, its wide wings silhouetted against the glowing sky.
- A close-up portrait of a vulture's wrinkled head and hooked beak, showing off its textured skin and intense gaze.
- A group of vultures gathered around a desert watering hole, interacting with other wildlife.
- A vulture perched atop an ancient tree branch, surveying the landscape far below.
- An epic scene of a vulture circling above a herd of wildebeest on the African savanna.
- A dramatic illustration of a vulture in flight, wings spread, catching the wind over a mountain ridge.
- A mystical or mythological setting, with a vulture depicted as a guardian spirit or symbol of transformation.
- A vulture chick in its nest, with an adult vulture looming protectively nearby.
- A vulture cleaning up a forest floor, surrounded by fallen leaves and branches, highlighting its role as nature's recycler.
- A scene inspired by ancient art, with a vulture featured in an Egyptian or Native American motif.