Welcome to this step-by-step guide on how to draw a heron! In this tutorial, we will explore the techniques and skills needed to create a beautiful representation of this elegant bird. Whether you are a beginner or an experienced artist looking to enhance your drawing skills, this article is here to help you. So grab your drawing materials and let’s get started!
Materials Required
To begin drawing a heron, you will need the following materials:
- Drawing paper
- Pencils (HB, 2B, and 4B)
- Eraser
- Fine-tipped black pen or marker
- Colored pencils or watercolor paints (optional)
- Reference photo or picture of a heron
Now that you have gathered your materials, let’s dive into the step-by-step process of drawing a heron.
Step 1: Basic Shapes
Start by drawing a large oval shape for the body of the heron. This oval will serve as a foundation for the body, and it can be slightly elongated to represent the elegant form of a heron. Next, draw a smaller oval shape towards the bottom of the first oval, representing the head of the heron.
Step 2: Long Neck and Beak
Extend a long, curved line from the head oval to represent the neck of the heron. The neck of a heron is usually long and slender, so ensure that your line reflects this characteristic. Once the neck is drawn, add a triangle shape at the end of it to represent the beak. The beak should be pointed and slightly curved downwards.
Step 3: Body and Tail Feathers
Using the initial oval shape as a guide, start adding volume to the heron’s body. Add a series of curved lines along the sides of the oval to create a feathery texture. Remember, herons have long, graceful bodies, so make sure the lines follow this shape. Extend a few lines from the bottom of the body to indicate the tail feathers.
Step 4: Legs and Feet
Draw two long, thin lines extending downwards from the body to create the heron’s legs. Herons have long legs, so make sure these lines are proportionate to the body. At the end of each leg, add curved lines to represent the feet. Heron feet typically have long, thin toes, so pay attention to the shape and size.
Step 5: Eye and Facial Details
Within the head oval, draw a small circle for the eye. Add a smaller circle within the eye to represent the iris. Shade the iris, leaving a small white area for the reflection. Next, draw a curved line above the eye to create the forehead of the heron. Add a few lines around the beak to indicate the texture of the feathers.
Step 6: Feathers and Wing Details
Pay close attention to the reference photo or picture of the heron, and add more detail to the body and wing feathers. Herons have distinct feathers that overlap in a layered pattern, giving them a unique texture. Use short, curved lines to represent the overlapping feathers and add depth to your drawing.
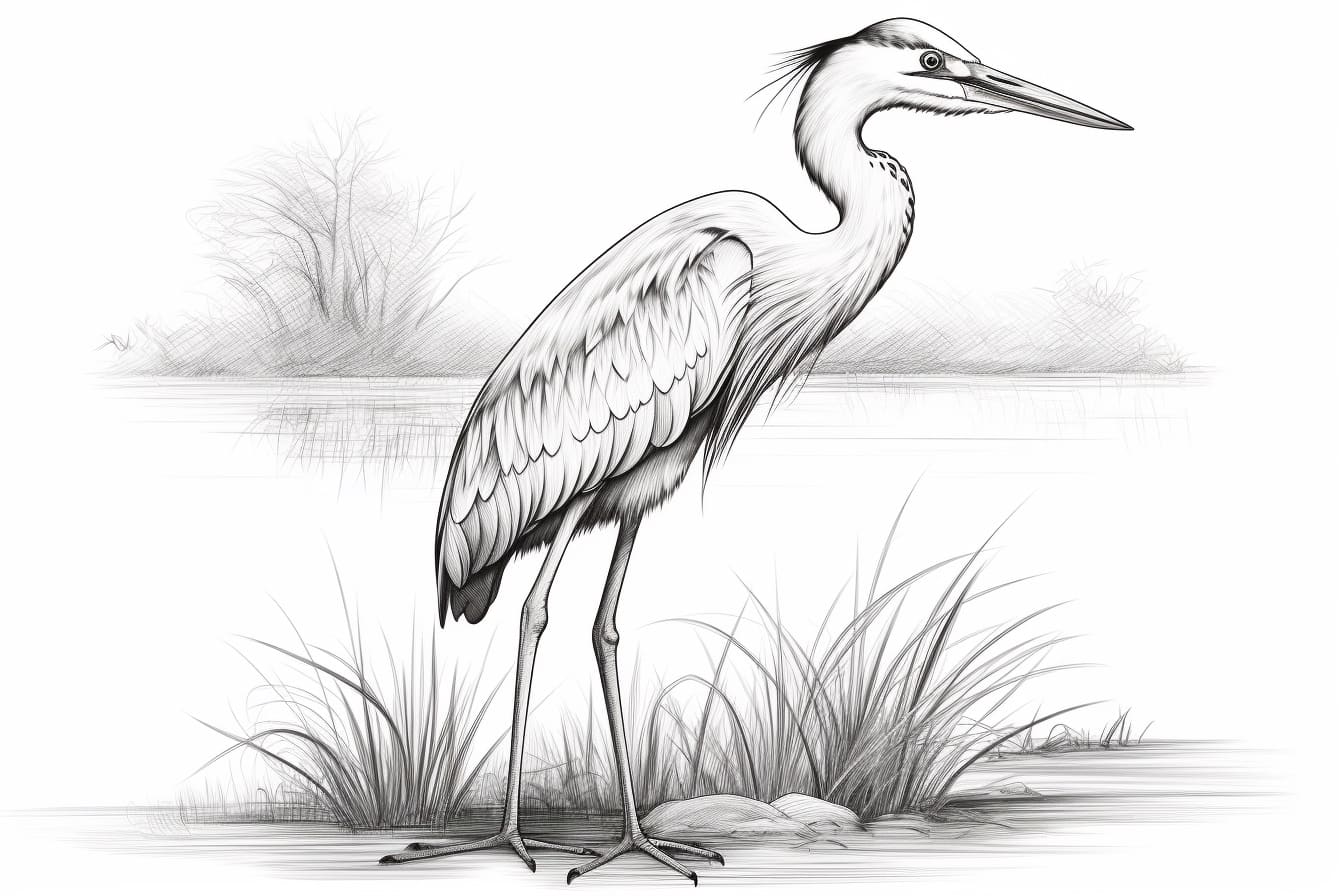
Step 7: Background and Final Details
Now that you have drawn the main features of the heron, it’s time to add a background to make your drawing complete. You can create a simple background using lines or shapes to suggest water, trees, or any other environment that complements the heron. Once you are satisfied with the background, use a fine-tipped black pen or marker to outline the main features of your heron and erase any unnecessary pencil marks.
Step 8: Optional Coloring
If you wish to add color to your drawing, you can use colored pencils or watercolor paints to bring your heron to life. Study the colors of the specific heron species you are drawing and use a light touch to layer colors for a realistic effect. Pay attention to shading and highlights to create depth and dimension.
Congratulations! You have successfully learned how to draw a heron. By following these step-by-step instructions and practicing regularly, you will improve your drawing skills and create stunning representations of various subjects, including birds. Remember, drawing is a journey, so keep experimenting and pushing your boundaries.
Conclusion
In this tutorial, we have explored the step-by-step process of drawing a heron. From basic shapes to intricate details, each step has contributed to the creation of a beautiful representation of this elegant bird. By following these instructions and practicing regularly, you will be able to capture the grace and beauty of a heron in your own drawings. So grab your drawing materials and start creating your masterpiece!