Have you ever wanted to create a stunning drawing of a majestic Harpy Eagle? In this step-by-step guide, I’ll help you bring this beautiful bird to life on paper. With a few simple techniques and a bit of patience, you’ll be able to capture the essence of this incredible creature. So grab your pencils and get ready to embark on an artistic journey!
Materials Required
Before we begin, make sure you have the following materials ready:
- Drawing paper
- Pencils (HB, 2B, 4B, and 6B)
- Sketching eraser
- Blending stump
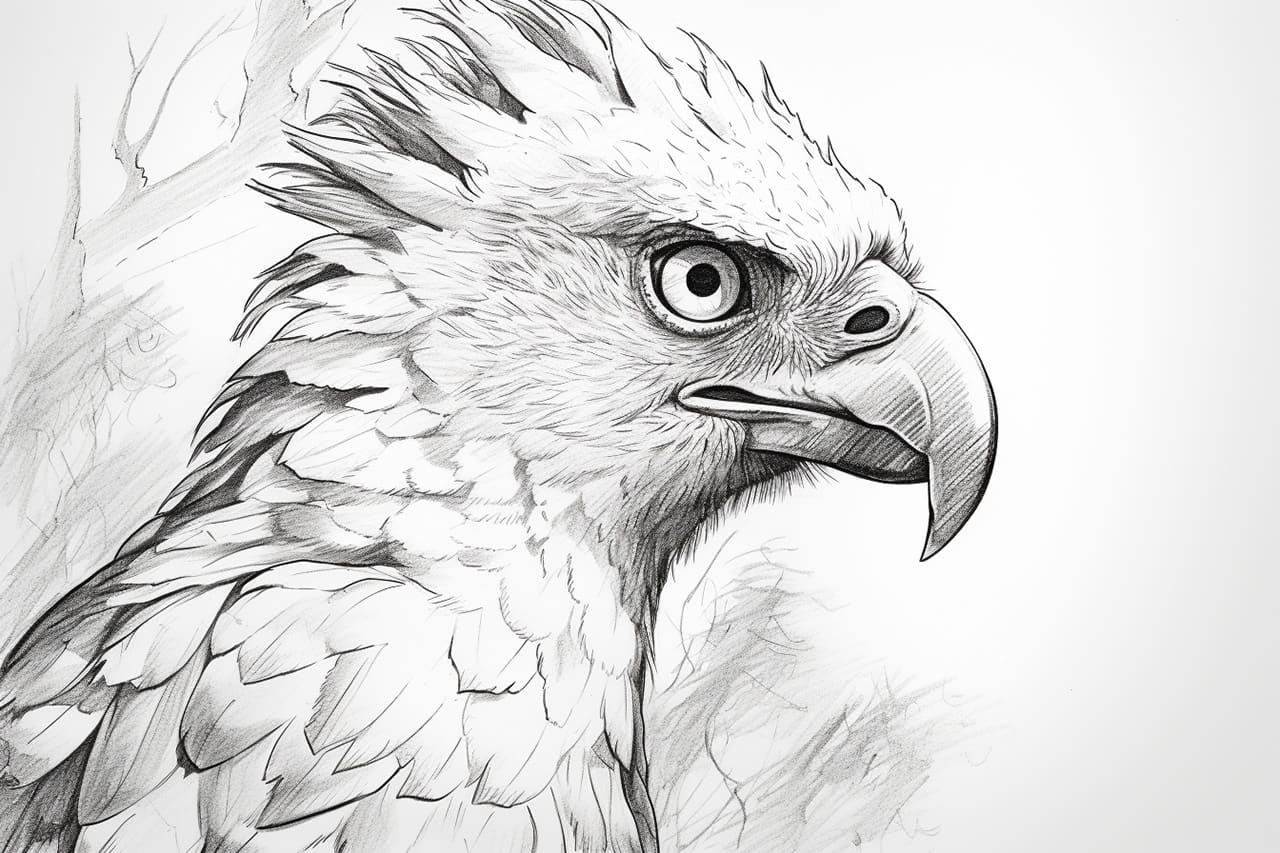
- Reference image of a Harpy Eagle
- Colored pencils or markers (optional, for adding color to your drawing)
Now that you have everything you need, let’s dive into the step-by-step process of drawing a Harpy Eagle.
Step 1: Basic Shape
Start by lightly sketching a large oval shape towards the center of your paper. This will be the body of the Harpy Eagle. Next, add a smaller oval on top of the larger one to represent the head. Make sure to leave some space in between for the neck.
Step 2: Outline the Head
Using more defined lines, outline the shape of the head. Pay attention to the curves and angles of a Harpy Eagle’s head as you sketch. Add a curved line for the beak and two small circles for the eyes. Remember to keep your lines light, as they will be refined later.
Step 3: Draw the Beak
Refine the shape of the beak by adding more detail. Harpy Eagles have a sharp, hooked beak, so make sure to emphasize that characteristic. Add a small triangular shape at the base of the beak to indicate the nostrils.
Step 4: Sketch the Eyes
Add detail to the eyes by drawing the iris and pupil. Harpy Eagles have piercing eyes that are essential to their hunting abilities. Make the pupil slightly elongated to give the drawing a more realistic look. Shade the area around the eyes lightly to create depth.
Step 5: Outline the Body
Extend the outline of the body, making sure to capture the Harpy Eagle’s distinctive shape. These birds have broad, powerful wings and a sturdy body, so emphasize those features as you sketch. Don’t forget to add the tail feathers, which are long and wide.
Step 6: Add Feathers
Start adding texture to your drawing by sketching in the feather details. Harpy Eagles have dense, layered feathers, so take your time to replicate that effect. Use short, curved lines to create a sense of depth and volume. Focus on the wings, chest, and tail feathers.
Step 7: Refine the Details
Now it’s time to refine the details of your drawing. Take a closer look at your reference image and pay attention to the intricate patterns on the feathers. Add small lines and curves to represent the texture and direction of the feathers. Don’t forget to include the claws on the feet as well.
Step 8: Shade and Add Depth
To bring your drawing to life, it’s important to add shading and depth. Start by identifying the light source in your reference image. Shade the areas that are away from the light, creating shadows and contrast. Use a range of pencils (HB, 2B, 4B, and 6B) to achieve different shades of gray.
Step 9: Blend and Soften
Using a blending stump, gently blend the shaded areas to create a smoother and more realistic appearance. This technique helps to soften harsh lines and transitions between light and dark areas. Remember to be careful not to smudge areas that should remain crisp, such as the edges of feathers.
Step 10: Final Touches
Take a step back and assess your drawing. Are there any areas that need refinement? Make any necessary adjustments or additional shading to enhance the overall look. If you wish to add color to your drawing, now is the time to do so. Colored pencils or markers can be used to bring a vibrant touch to your artwork.
Congratulations, you’ve successfully drawn a Harpy Eagle! With practice, your drawings will continue to improve, allowing you to capture the beauty of nature’s creatures with precision and skill.
Conclusion
Drawing a Harpy Eagle can be a challenging but rewarding experience. By following these step-by-step instructions, you’ve learned how to create a realistic and detailed representation of this magnificent bird. Remember to be patient and take your time, as practice is key to developing your artistic abilities. So grab your art supplies and let your creativity soar as you embark on more artistic adventures!