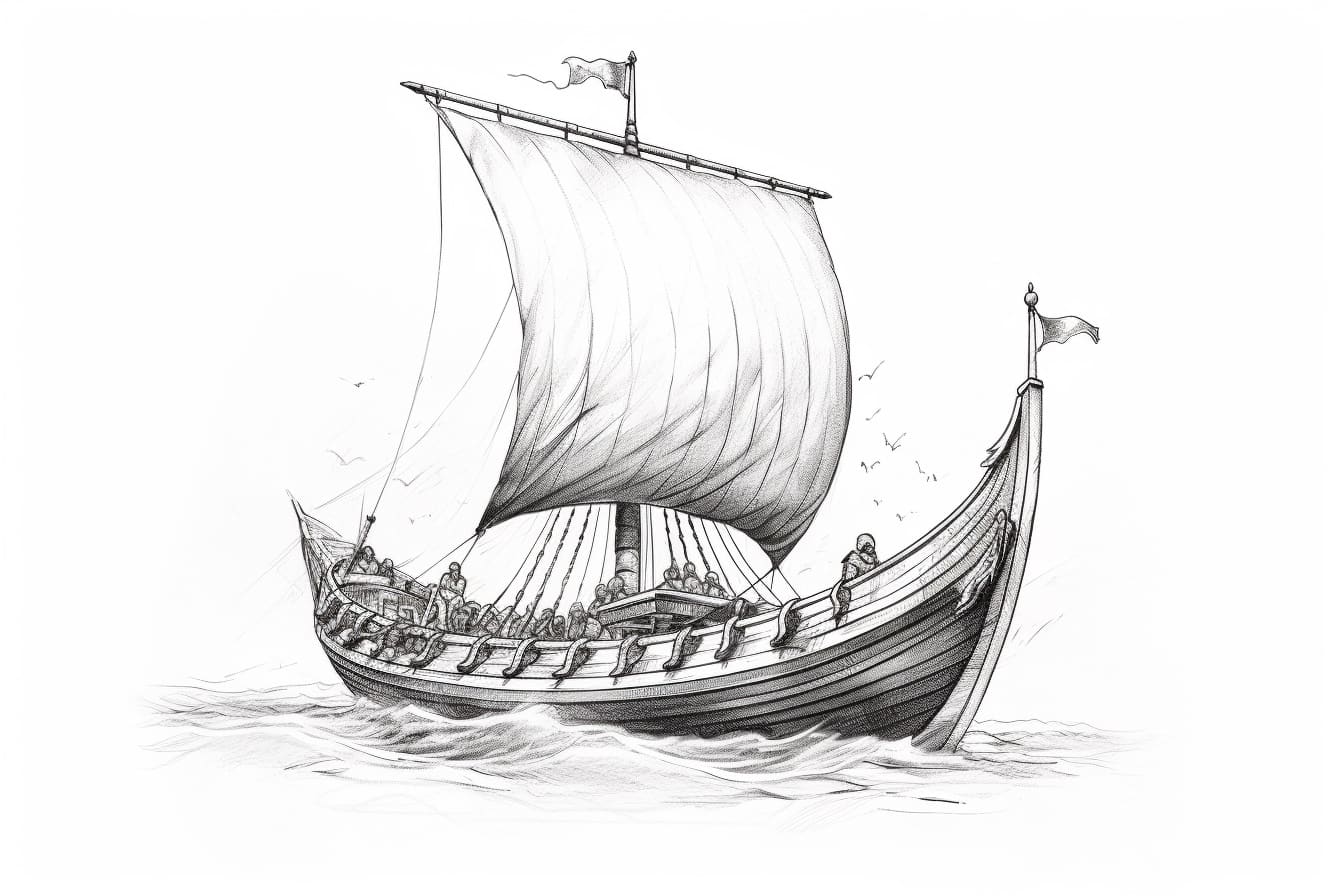
Welcome to this step-by-step guide on how to draw a Viking ship. Viking ships were a crucial part of Norse culture and played a significant role in their history. Drawing a Viking ship can be a fun and educational activity that allows you to explore the art and craftsmanship of this ancient civilization. So, let’s dive in and learn how to bring a Viking ship to life on paper!
Materials Required
To begin with, gather the following materials before you start drawing your Viking ship:
- Pencil
- Eraser
- Paper
- Ruler or straight edge
- Compass
- Colored pencils or markers (optional)
With these materials in hand, you’re ready to embark on your artistic journey!
Step 1: Basic Outline
Start by drawing a horizontal line near the center of your paper. This line will act as the waterline for your Viking ship. Next, draw a long, narrow shape above the waterline to represent the main body of the ship. Ensure that the front of the ship is more pointed while the back is broader. Leave some space at the front for the distinctive dragon head characteristic of Viking ships.
Step 2: Dragon Head
Now, let’s add the iconic dragon head to the front of the ship. Begin by sketching a triangular shape extending from the front of the ship and curving slightly upward. Next, draw the dragon’s open mouth by adding jagged teeth along the top and bottom of the triangle. Add eyes and nostrils to give the dragon head a fierce appearance.
Step 3: Stern and Tail
Moving to the back of the ship, draw a curved line that slopes downwards from the back of the ship’s body. This line represents the stern. At the end of the stern, draw a large, rectangular shape as the ship’s tail. The tail can be adorned with intricate carvings if you prefer a more detailed depiction.
Step 4: Sails
Viking ships were known for their large, rectangular sails. Draw two vertical lines extending upward from the body of the ship, starting near the middle of the ship’s length. Connect these lines with a horizontal line at the top to complete the sails. For extra detail, you can draw smaller lines within the sails to represent the fabric’s folds.
Step 5: Shields and Oars
Viking ships were often adorned with shields along their sides, both for protection and aesthetic appeal. Draw several small, circular shapes along the sides of your ship to represent the shields. Additionally, add vertical lines coming out from the sides of the ship to indicate the oars. Position them evenly along the length of the ship.
Step 6: Details and Finishing Touches
To make your Viking ship come to life, add some details and finishing touches. Draw lines on the dragon head to create texture and depth. Add wooden planks to the sides of the ship by drawing horizontal lines across the body. You can also draw waves around the ship to enhance the sense of motion and give it a more dynamic appearance.
Conclusion
Congratulations! You have successfully learned how to draw a Viking ship. By following these step-by-step instructions, you’ve created a beautiful representation of this historical vessel. Feel free to experiment with colors and additional details to make your drawing unique. Drawing Viking ships can be a great way to explore Norse culture and history while honing your artistic skills. So, grab your pencil and start drawing your very own Viking ship today!