How to Draw a Tulip in 7 Simple Steps
Learn how to draw with this step-by-step tutorial.
Materials You'll Need
- Drawing paper
- Pencil (HB or 2B)
- Eraser
- Colored pencils
- Blending stump
- Watercolor paints
Drawing flowers is a timeless and cherished art form that allows us to capture the beauty of nature on paper. Among the many flowers that inspire artists, the tulip stands out as a symbol of elegance, simplicity, and vibrant charm. Known for its smooth, graceful petals and tall, slender stem, the tulip has been celebrated in art for centuries.
Whether you're a budding artist or an experienced creator looking for a new challenge, learning how to draw a tulip can be both a rewarding and relaxing experience. Its unique shape and vibrant colors provide endless opportunities to explore techniques like shading, texture, and composition. In this tutorial, we'll guide you step-by-step through the process of bringing of how to draw a tulip, starting with basic shapes and building up to intricate details that make your drawing bloom with realism.
So, gather your drawing materials, find a comfortable spot, and let's dive into the art of drawing this iconic flower. Get ready to add a splash of floral beauty to your artistic repertoire!


Materials Required
Before we begin, gather the following materials:
-
Pencil: Choose a medium-soft graphite pencil for sketching and shading.
-
Paper: Use a high-quality drawing paper that can handle pencil marks and erasing.
-
Eraser: Purchase a kneaded eraser for easy and precise erasing.
-
Colored Pencils (optional): If you'd like to add color to your tulip drawing, have a set of colored pencils ready.
How to Draw a Tulip: A Step-by-Step Guide
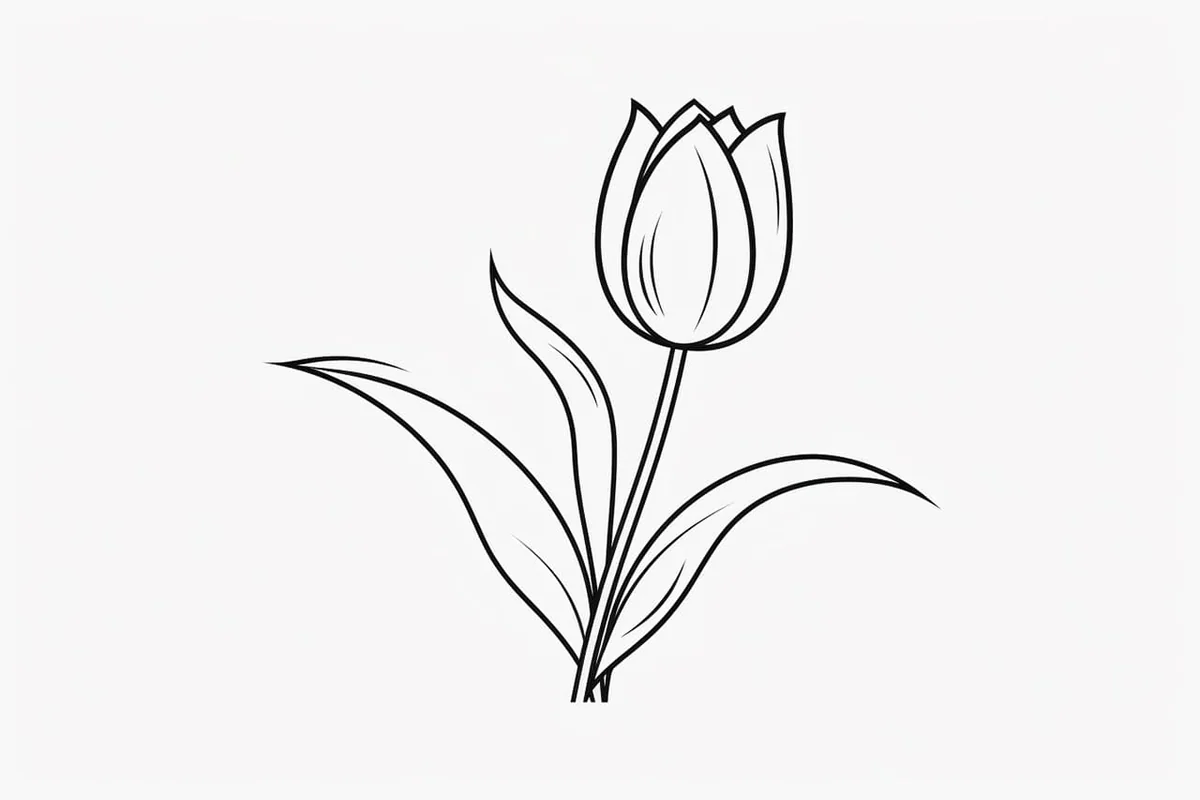
Step 1: Sketch the Stem
Begin by drawing the elegant stem of the tulip. Lightly sketch a vertical line down the center of your paper to serve as a guide. On either side of this central line, draw two slightly curved, parallel lines to form the stem's structure. Tulip stems are sleek and slender, so aim for a natural, gentle curve. Don't worry about perfection—this is just the foundation to refine later.
Step 2: Add the Graceful Leaves
Tulip leaves are long, elegant, and slightly curved. Draw two elongated ovals extending outward from the sides of the stem, positioning one leaf higher than the other for a dynamic, natural look. Let the tips of the leaves taper to soft points, and curve them slightly to suggest movement, as if swaying in a light breeze.
Step 3: Outline the Outer Petals
At the top of the stem, start shaping the tulip's petals. Begin with a large, U-shaped curve to form the central petal. Then, draw two additional curved shapes on either side, overlapping slightly with the central petal. These outlines will form the first layer of your tulip's outer petals. Keep the lines smooth and flowing, like the natural contours of a blooming flower.
Step 4: Refine the Petals for Realism
Now, refine the petals by softening their edges and adding gentle, wavy curves to give them a more natural appearance. Observe how tulip petals often fold or overlap slightly—capture this detail to add depth. For extra realism, add subtle creases or folds near the edges, giving the petals a delicate, organic texture.
Step 5: Draw the Inner Petals
Tulips have inner petals that peek out from behind the outer layer, adding complexity to the bloom. Sketch smaller petal shapes nestled within the outer petals, making sure they follow the curves and flow of the flower. At the very center of the bloom, add a small oval to represent the stamen or pistil, surrounded by tiny, radiating lines to complete the inner details.
Step 6: Add Texture and Details
Enhance the realism of your tulip by adding fine details. Lightly draw lines along the petals to suggest their subtle veining, following the natural contours of each petal. Add gentle, vertical lines on the stem to indicate texture, and consider creating slight shadows where the leaves overlap the stem or each other. These touches will bring your drawing to life.
Step 7: Shade for Depth (Optional)
To give your tulip drawing depth and dimension, add shading. First, decide where your light source is coming from. Use a soft pencil or colored pencils to darken the areas opposite the light source, such as the base of the petals or the underside of the leaves. Blend the shading gradually for a smooth, natural effect. Highlights on the petals can make them appear dewy and fresh.
Tip: To capture the delicate beauty of a tulip, start by using a light pencil to sketch the basic shapes first—think of an elongated oval for the flower's top and a narrow cylinder for the stem. This approach helps you maintain proportion and allows for easy adjustments. Once you're satisfied with the outline, switch to a slightly darker pencil or pen to define the petal edges and add subtle details like the veins. For coloring, consider using colored pencils or watercolors to layer shades, starting with lighter hues and gradually building up to deeper colors for depth and dimension. Don't forget to incorporate soft shadows beneath the petals and along the stem to enhance the three-dimensional effect; a gentle touch with a blending tool can create a smooth transition between colors. Keep practicing, and soon your tulips will bloom beautifully on the page!
Blooming Finish: Your Tulip is Complete!
Congratulations! You've successfully drawn a beautiful tulip, from its slender stem to its layered, lifelike petals. Through these step-by-step instructions, you've learned how to capture the delicate elegance of this timeless flower.
Don't stop here—use this tutorial as a springboard for further creativity. Experiment with different tulip colors, like vibrant reds, soft pinks, or sunny yellows. Add a background, such as a grassy field or a soft sky, to enhance your scene.
Drawing flowers like tulips can be both relaxing and rewarding, offering endless opportunities to refine your technique and express your creativity. Remember, practice is the key to growth. With every tulip you draw, your skills will blossom. Happy drawing, and may your artistic garden continue to flourish! ✨