How to Draw a Tree Stump
Learn how to draw a tree stump in this step-by-step drawing tutorial. Perfect for artists of all levels, this guide will help you capture the texture and details of a tree stump.
Materials You'll Need
- Pencil
- Paper
- Eraser
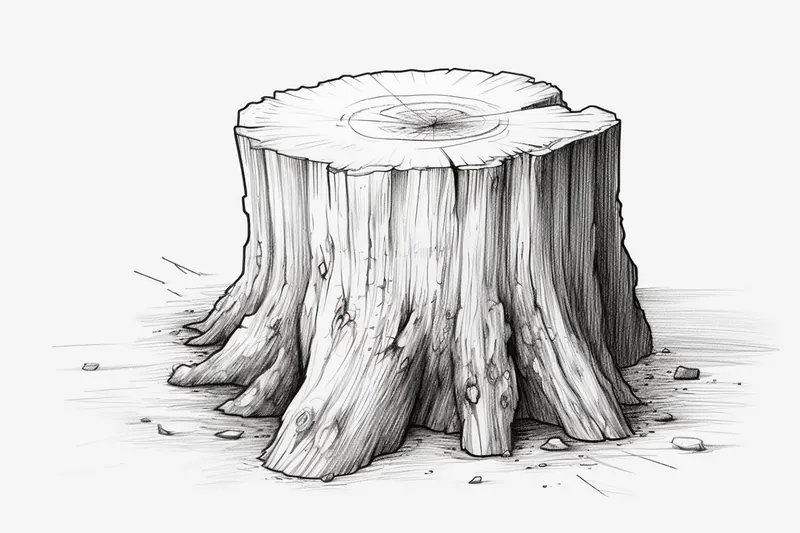
![]() Welcome to this comprehensive step-by-step guide on how to draw a tree stump! Drawing can be a rewarding and creative outlet, whether you're an experienced artist aiming to enhance your techniques or a beginner eager to explore a new artistic endeavor. In this tutorial, we will delve into the fascinating world of tree stumps, providing you with clear instructions and tips that will help you create a lifelike representation.
Welcome to this comprehensive step-by-step guide on how to draw a tree stump! Drawing can be a rewarding and creative outlet, whether you're an experienced artist aiming to enhance your techniques or a beginner eager to explore a new artistic endeavor. In this tutorial, we will delve into the fascinating world of tree stumps, providing you with clear instructions and tips that will help you create a lifelike representation.
As we embark on this artistic journey together, you'll discover the intricacies involved in capturing the unique textures and details of a tree stump. From the rough bark and the distinctive knots to the subtle shading that conveys depth, every element is essential in producing a stunning drawing. So, gather your drawing materials, find a comfortable space, and let's channel your inner artist as we work towards mastering this skill!
Are you ready? Grab your pencils and let's jump right into it! The world of drawing is filled with possibilities, and today, we will pave the way for creating a beautiful piece that showcases not just a tree stump, but also your developing artistic flair. Let's get started!
Materials Required
Before we begin, let's gather the materials you will need for this drawing tutorial:
- Drawing paper (preferably a heavier weight paper)
- Pencils (a range of graphite pencils, such as HB, 2B, 4B, and 6B)
- Eraser (a kneaded eraser is recommended for easy shaping)
- Blending stump or tortillon (optional, but can be useful for blending)
Now that you have all the necessary materials, let's move on to the steps involved in drawing a tree stump.
Step 1: Outline the Basic Shape
Start by lightly sketching the basic shape of the tree stump using a pencil. Keep in mind that tree stumps can come in various sizes and shapes, so you have the flexibility to be creative. Begin with a rough outline of the stump, considering the overall form and any visible irregularities.
Step 2: Add Texture and Detail
Once you have the basic shape outlined, it's time to add texture and detail to your drawing. Pay attention to the surface of the tree stump, as it often contains cracks, ridges, and other distinctive features. Use varying pencil pressures to create different shades and tones, capturing the rough texture of the wood.
Step 3: Create Depth with Shading
To give your tree stump drawing a three-dimensional appearance, focus on adding shading. Observe the light source in your reference image (or imagine one) and determine where the shadows would fall. Use lighter pencil strokes for the highlights and gradually build up darker tones for the shadows. This will help create depth and bring your drawing to life.
Step 4: Refine the Details
Now that you have established the basic shape and added shading, it's time to refine the details. Pay attention to any smaller features on the tree stump, such as knots, bark texture, or moss. Use your reference image as a guide and gently add these details to your drawing, ensuring that they are in proportion to the overall composition.
Step 5: Blend for a Smooth Finish (Optional)
If you prefer a smoother finish to your drawing, consider using a blending stump or tortillon to blend the pencil strokes together. This can help create a more polished and realistic appearance, particularly in areas where the wood grain should be smoother.
Step 6: Finalize Your Drawing
Take a step back and assess your drawing. Make any necessary adjustments or additions to ensure accuracy and balance. Pay attention to the overall composition, and feel free to add any additional details or elements that you think would enhance your drawing. Once you are satisfied with the result, you can consider your tree stump drawing complete.
Tip: When drawing a tree stump, focus on layering your pencil strokes to capture the texture effectively. Start with a light sketch of the stump's basic shape and outline any knots or cracks you observe. Use a variety of pencils, such as a softer pencil (like 4B) for deeper shadows and a harder pencil (like HB) for lighter areas. To mimic the rough bark texture, employ short, quick strokes in the direction of the grain, and don't hesitate to blend using a tortillon or your finger for softer transitions. Lastly, remember to observe real tree stumps if possible; this will give you insight into the unique characteristics and intricacies that make your drawing more realistic and engaging!
Conclusion
Congratulations on completing your realistic tree stump drawing! By following the steps outlined in this tutorial, you have learned how to capture the texture, shading, and details that make a tree stump come to life on paper. Remember, practice is key to improving your drawing skills, so don't hesitate to experiment with different techniques and subjects.
If you enjoyed this tutorial on how to draw a tree stump, continue exploring your artistic abilities by tackling other natural elements, such as rocks, leaves, or trees. With each drawing, you will gain more confidence and refine your skills as an artist. So keep creating and enjoy the process!