Welcome to this step-by-step guide on how to draw a zucchini! Whether you are a beginner or an experienced artist looking to expand your skills, this tutorial will help you create a realistic and vibrant zucchini drawing. We will cover everything from the basic shape to shading and adding details. So grab your sketchbook and let’s get started!
Materials Required
Before we begin, gather the following materials:
- Drawing paper
- Pencil
- Eraser
- Sharpener
- Drawing pens or fine liner markers
- Colored pencils or watercolor paints (optional)
Now that you have your materials ready, let’s begin our zucchini drawing!
Step 1: Basic Shape
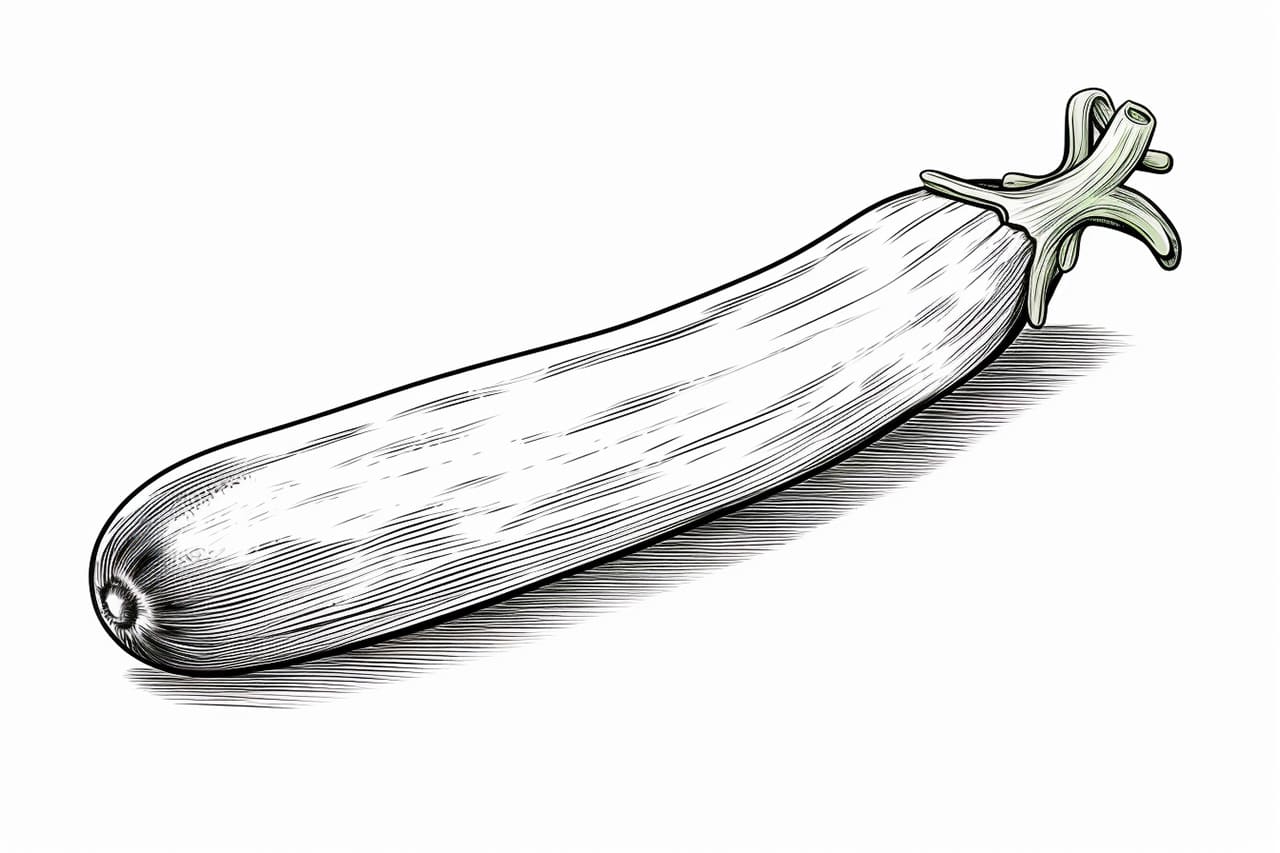
Start by sketching an oval shape for the body of the zucchini. This will serve as the base for your drawing. Take your time to ensure the proportions are accurate. Keep your pencil light and loose, as we will be refining the shape in the following steps.
Step 2: Adding Details
Next, add the stem and the blossom end to your zucchini. The stem is a curved line that extends from the top of the oval shape, while the blossom end is a smaller oval shape at the bottom. These details will give your zucchini drawing a more realistic appearance.
Step 3: Refining the Shape
Now it’s time to refine the shape of your zucchini. Use your pencil to carefully smooth out any rough lines and adjust the proportions as needed. Pay close attention to the curves and contours of the vegetable, as this will make your drawing more lifelike.
Step 4: Outlining
Once you are satisfied with the shape, it’s time to outline your zucchini drawing. Go over your pencil sketch with a pen or fine liner marker, making bold, confident lines. Start with the main outline of the zucchini body, then add the stem and blossom end. This will give your drawing a more defined and finished look.
Step 5: Shading
To add depth and dimension to your zucchini drawing, let’s move on to shading. Start by determining the direction of the light source. This will help you create realistic shadows and highlights. Shade the sides of the zucchini, making the areas closer to the light source lighter and the areas farther away darker.
Step 6: Adding Texture
Zucchinis have a unique texture with subtle bumps and ridges. To capture this texture in your drawing, lightly sketch lines or small curves along the surface of the zucchini. Pay attention to the natural curves and contours, and use a light touch to avoid making the texture too harsh.
Step 7: Refining the Details
Now it’s time to refine the details of your zucchini drawing. Use your pen or fine liner marker to outline the texture lines you sketched in the previous step. Be careful not to make the lines too thick or heavy, as we want to maintain a level of realism. Add any additional details, such as creases or small imperfections, to make your drawing more authentic.
Step 8: Color (Optional)
If you would like to add color to your zucchini drawing, now is the time to do so. You can use colored pencils or watercolor paints to bring your zucchini to life. Start by applying a light base color and gradually build up the layers to create depth and variation. Pay attention to the natural color of a zucchini, which is a vibrant green with hints of yellow.
Conclusion
Congratulations on completing your zucchini drawing! By following these step-by-step instructions, you have learned how to create a realistic and detailed representation of a zucchini. Remember to take your time, practice, and enjoy the process of drawing. With each drawing you create, your skills will continue to grow. So keep exploring different subjects and techniques, and don’t be afraid to experiment. Happy drawing!