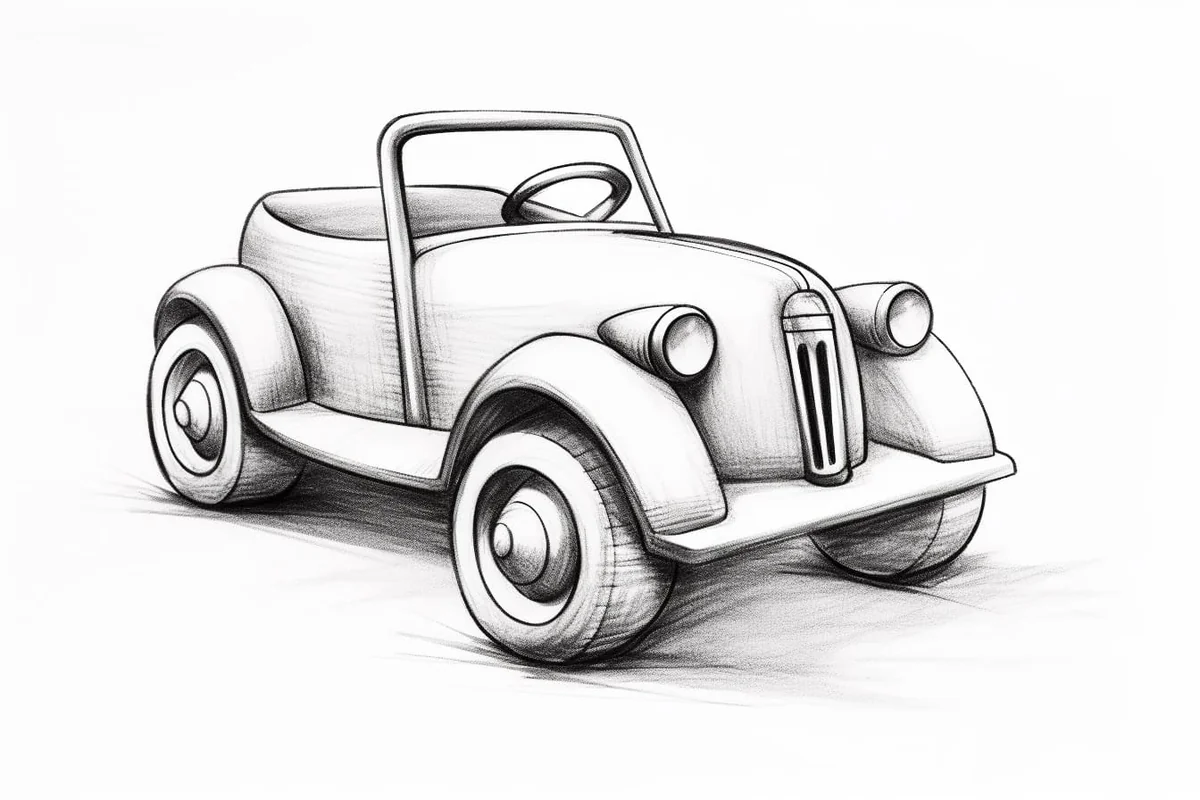
How to Draw a Toy Car
Learn how to draw with this step-by-step tutorial.
Materials You'll Need
- Drawing paper
- Pencil (HB or 2B)
- Eraser
- Colored pencils
- Markers
- Ruler
- Compass
- Blending stump
Learning how to draw a toy car is not just an enjoyable pastime, but also a fantastic way to unleash your creativity and develop your artistic skills. Whether you're a budding artist or someone simply looking for a fun activity, this guide will help you navigate the process, ensuring a satisfying drawing experience. There's something special about transforming a blank sheet of paper into a colorful and imaginative vehicle that sparks joy.
In this step-by-step tutorial, we'll break down the drawing process into manageable stages, starting from the very basics and gradually adding details that will bring your toy car to life. You don't need to be a master artist to succeed; just a little patience and enthusiasm will go a long way. So gather your drawing materials and get ready to embark on an artistic adventure that will leave you proud of your creation!
From sketching the foundational shapes to incorporating vibrant colors, this guide will take you through each crucial step. With each addition, your toy car will transform, reflecting your unique style and creativity. Let's dive in and start sketching your very own toy car masterpiece!
Materials Required:
Before we begin, make sure you have the following materials at hand:
-
Eraser
-
Ruler
-
Colored pencils or markers (optional)
Now that you have your materials ready, let's dive into the steps of drawing a toy car.
Step-by-Step Guide: How to Draw a Toy Car ✏️
Drawing a toy car is a fun and creative exercise that allows you to practice shapes, proportions, and details in a simple yet effective way. Whether you're sketching a classic model, a race car, or a playful cartoon-style car, these steps will help you build a solid foundation and refine your details.
Grab your pencils, erasers, and markers, and let's bring your toy car to life!
Step 1: Sketch the Basic Shape of the Car
Begin by lightly sketching a rectangle on your paper using a 2B pencil. This will serve as the main body of the toy car.
-
Keep your strokes light so you can adjust the shape later.
-
Leave enough space at the bottom for the wheels.
-
If you're drawing a sporty or cartoon-style car, you can slightly curve the edges instead of keeping them straight.
This step acts as the foundation, so make sure the proportions feel right before moving on.
Step 2: Add the Wheels
Now, add four evenly spaced circles at the bottom of the rectangle to represent the wheels.
-
Make sure the wheels are aligned for a balanced look.
-
You can use a compass or circular stencil to keep them perfectly round.
-
Add a smaller circle inside each wheel to represent the rims or hubcaps.
For a more playful and stylized look, experiment with bigger wheels or exaggerated shapes!
Step 3: Define the Car's Shape and Body
Time to refine the basic structure of the car.
-
Use curved lines to smooth out the boxy shape and create a sleek, streamlined appearance.
-
Adjust the roofline, making it rounded or flat, depending on the type of car you're drawing.
-
Add a slight slope for the hood and trunk for a more natural look.
-
Extend small fenders over the wheels if you want a classic or race car feel.
Think about the type of car you're drawing—a sports car will have aerodynamic curves, while a cartoon-style toy car might have exaggerated proportions.
Step 4: Add the Windows and Windshield
No car is complete without windows!
-
Draw a slightly curved line across the upper part of the body for the windshield.
-
Add two rectangular shapes on the sides to form the side windows.
-
If you want a rear window, draw a small, curved rectangle at the back of the car.
Pro Tip: If you're drawing a convertible toy car, skip the roof and focus on interior details like seats and a dashboard.
Step 5: Outline the Car's Features
Now, let's add some signature details that will make your toy car unique!
-
Headlights & Taillights – Draw oval or circular shapes on the front and back.
-
Door Handles – Sketch tiny rectangles or curves on the doors.
-
Bumper & Grille ⚙️ – Add a front bumper and horizontal lines to create a grille.
-
Side Mirrors – Small rounded or square shapes near the windows.
-
Exhaust Pipe – A little curved rectangle at the back for extra realism.
This is your chance to get creative—customize your toy car with flames, stripes, or racing numbers!
Step 6: Clean Up the Drawing
Now that you have the full outline, it's time to erase unnecessary guidelines and refine your sketch.
-
Use a kneaded eraser to lightly remove sketchy lines without smudging.
-
Darken the final outline using a darker pencil (4B or 6B) or an ink pen.
-
Make sure your wheels are smooth and symmetrical.
A clean outline makes the coloring and shading process much easier!
Step 7: Add Colors to Your Car (Optional)
If you want to make your toy car pop, grab your colored pencils, markers, or paints and add some color!
-
Use bold colors like red, blue, or yellow for a fun and eye-catching toy car.
-
For a more realistic look, add metallic shades like silver or black.
-
Layer colors gradually to create a smooth, polished finish.
Pro Tip: Use white highlights (with an eraser or white gel pen) to give the car a shiny, reflective appearance!
Step 8: Add Shadows and Highlights for Depth ️
To give your drawing depth and dimension, use shading techniques to create realistic light and shadows.
-
Determine where the light source is coming from (above, from the side, etc.).
-
Darken areas that would be in shadow, such as under the car, around the wheels, and near the fenders.
-
Use a blending tool or tissue paper to create smooth gradients.
-
Highlight shiny areas like the windows, hood, and headlights to enhance realism.
Tip: When drawing a toy car, start by using light, loose lines to sketch the basic shapes—think of rectangles for the body and circles for the wheels. This will allow you to make adjustments easily before committing to darker, more defined lines. Consider using a ruler for straight edges and a compass or round object to trace perfect circles for the wheels. Once you're satisfied with the overall shape, go back and refine the details; add features like headlights, windows, and any unique designs that reflect your personal style. Finally, when coloring, use a mix of colored pencils or markers to achieve a vibrant look, layering colors to create depth and dimension, making your toy car truly pop!
Your Toy Car Drawing is Complete! ✨
Great job! You've just drawn a fun, detailed toy car from start to finish. Whether you keep it as a simple sketch or go all out with color and shading, each drawing you create helps improve your artistic skills.
Try drawing different types of toy cars—from classic models to futuristic race cars—or even add a background like a road, racetrack, or toy shelf!
Keep practicing, have fun, and let your creativity drive you forward!