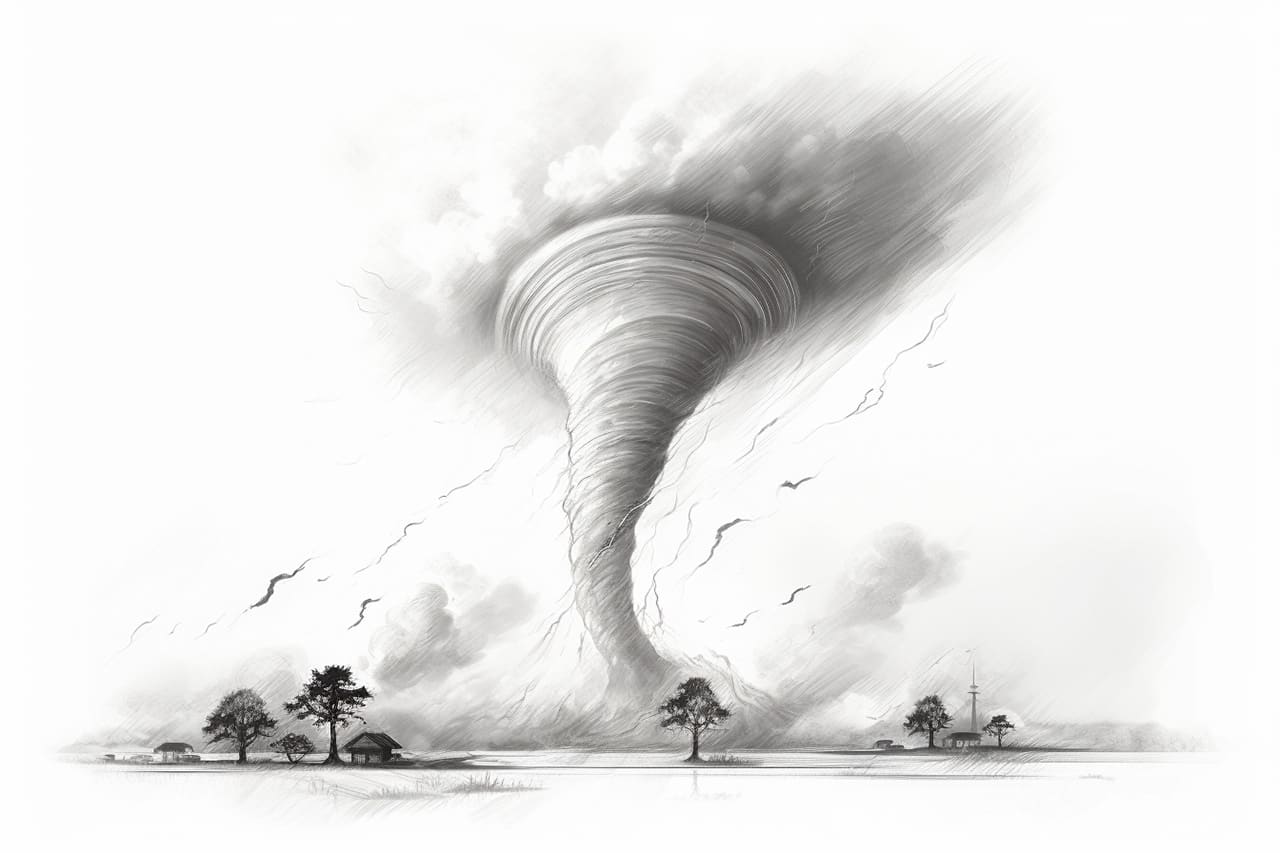
Drawing, much like any other form of art, can be a fun and engaging activity to do in your free time. And when it comes to drawing specific elements of nature such as tornadoes, the process can be a bit challenging, but definitely rewarding. In this article, we will guide you on how to draw a tornado step-by-step, turning a daunting task into a straightforward practice. No matter what your skill level may be, you can definitely create a tornado drawing that is both realistic and visually appealing.
Step 1: Start by sketching out a basic shape for the tornado.
This shape should resemble a long, thin triangle, wider at the top and tapering down to a point. But remember, tornadoes are not perfect shapes, they twist, turn and swirl, so your triangle can have curved, irregular sides to give it more of a natural appearance.
Step 2: Adding the Spiral Lines
Next, you will add the spiral lines that go around the tornado. Draw these lines from the top of the tornado to the bottom, following the shape of the tornado. These lines should be curved and uneven, depicting the rotation and unpredictable movement of the tornado.
Step 3: Drawing the Debris
Tornadoes are known to pick up debris as they move, so you will want to draw pieces of debris like small rectangles and irregular blobs randomly scattered around the base of your tornado. This will give it a sense of action, the impression of the tornado moving and causing destruction.
Step 4: Adding Details to the Tornado
Now, it’s time to add some details to your tornado. Add some curved lines inside the tornado to give it some texture. These lines should give the impression of wind swirling inside the tornado. You can also draw some lines coming out of the tornado to show the wind being pulled in.
Step 5: Shading your Tornado
Finally, you’ll want to shade your tornado to give it a 3D effect. The shading should be darker at the bottom and get lighter as it goes up. This will make your tornado look like it’s actually spinning and help to give it depth.
Step 6: Adding the Final Touches
Lastly, add any final touches to your tornado drawing. You can add more debris if you feel like it needs more chaos or adjust any lines that you’re not happy with. Remember, your tornado doesn’t have to be perfect, it’s a naturally occurring phenomenon that is chaotic and unpredictable.
In conclusion, learning how to draw a tornado doesn’t have to be a difficult process. With these six easy steps, you can create a realistic looking tornado on your drawing pad. As you practice, you will be able to add more details and make it look even more realistic. Remember, in art, practice makes perfect, and every drawing is a step towards becoming a better artist.