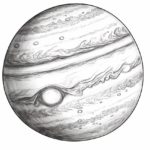
Welcome to this step-by-step guide on how to draw a hurricane. As an expert artist and drawing instructor, I will guide you through the process of creating a realistic and dynamic depiction of a hurricane. Grab your pencils, eraser, paper, and prepare to unleash your creativity!
Materials Required
Before we begin, let’s gather the materials you’ll need for this drawing:
- Drawing paper
- Pencils of varying hardness (HB, 2B, 4B)
- Eraser (preferably kneaded eraser)
- Pencil sharpener
- Blending stump (optional but useful for creating smooth gradients)
- Reference image of a hurricane (for inspiration and guidance)
Now that we have everything ready, let’s jump right in!
Step 1: Basic Shape
Start by lightly sketching a large oval shape in the center of your paper. This will serve as the foundation for your hurricane. Don’t worry about making it perfect at this point; we’ll refine it later.
Step 2: Spiral Arms
Draw several elongated, curved lines extending outward from the main oval shape. These lines will represent the spiral arms of the hurricane. Vary the thickness and curvature of the lines to add depth and movement. Remember, hurricanes are characterized by their swirling motion, so feel free to experiment with the curves.
Step 3: Refining the Shape
Now it’s time to refine the shape of our hurricane. With a darker pencil (2B or 4B), trace over the preliminary lines you drew in Step 2. Add more detail and definition to the spiral arms, making them appear more dynamic and intricate. Pay attention to the reference image, observing how the spiral arms flow and interact with each other.
Step 4: Adding Texture
To give your hurricane drawing a realistic texture, lightly add some small circular strokes within the spiral arms. These strokes will represent the swirling clouds and winds within the storm. Start with a lighter pencil (HB) and gradually add darker strokes with a softer pencil (4B), focusing on areas where the contrast is higher.
Step 5: Outer Bands
Extend the spiral arms further outward, creating additional waves or bands around the hurricane. These outer bands contribute to the overall mass and intensity of the storm. Remember to make these lines uneven and irregular to capture the turbulent nature of a hurricane.
Step 6: Eye of the Storm
At the center of the hurricane, draw a small circular area with calm and clear skies. This is known as the eye of the storm. The eye provides a visual contrast to the rest of the drawing, showcasing the calmness amidst the chaos. Add a few wispy clouds around the edges of the eye for added realism.
Step 7: Shading and Contrast
Now it’s time to enhance the depth and three-dimensionality of your drawing through shading and contrast. Shade the spiral arms and outer bands with a combination of light, medium, and dark tones. Focus on creating smooth transitions between the different shades to make the hurricane appear more realistic. Use your blending stump to blend the shades together for a smoother appearance.
Step 8: Highlights and Details
To make your hurricane drawing pop, add highlights and fine details using an eraser. Lightly erase some areas within the spiral arms to create highlights, suggesting that light is reflecting off the swirling clouds. Pay attention to the light source in your reference image and add highlights accordingly. Additionally, add more depth and definition by adding extra details, such as small clouds or debris being swept up by the storm.
Conclusion
Congratulations! You have successfully learned how to draw a hurricane. By following these step-by-step instructions and using your creativity, you have created a powerful and realistic depiction of a chaotic storm. Remember to practice regularly to improve your artistic skills, and don’t hesitate to experiment and add your personal flair to your drawings.
Now that you know how to draw a hurricane, let your imagination run wild and continue to explore the fascinating world of drawing. Stay tuned for more drawing tutorials and helpful tips on honing your artistic abilities.


