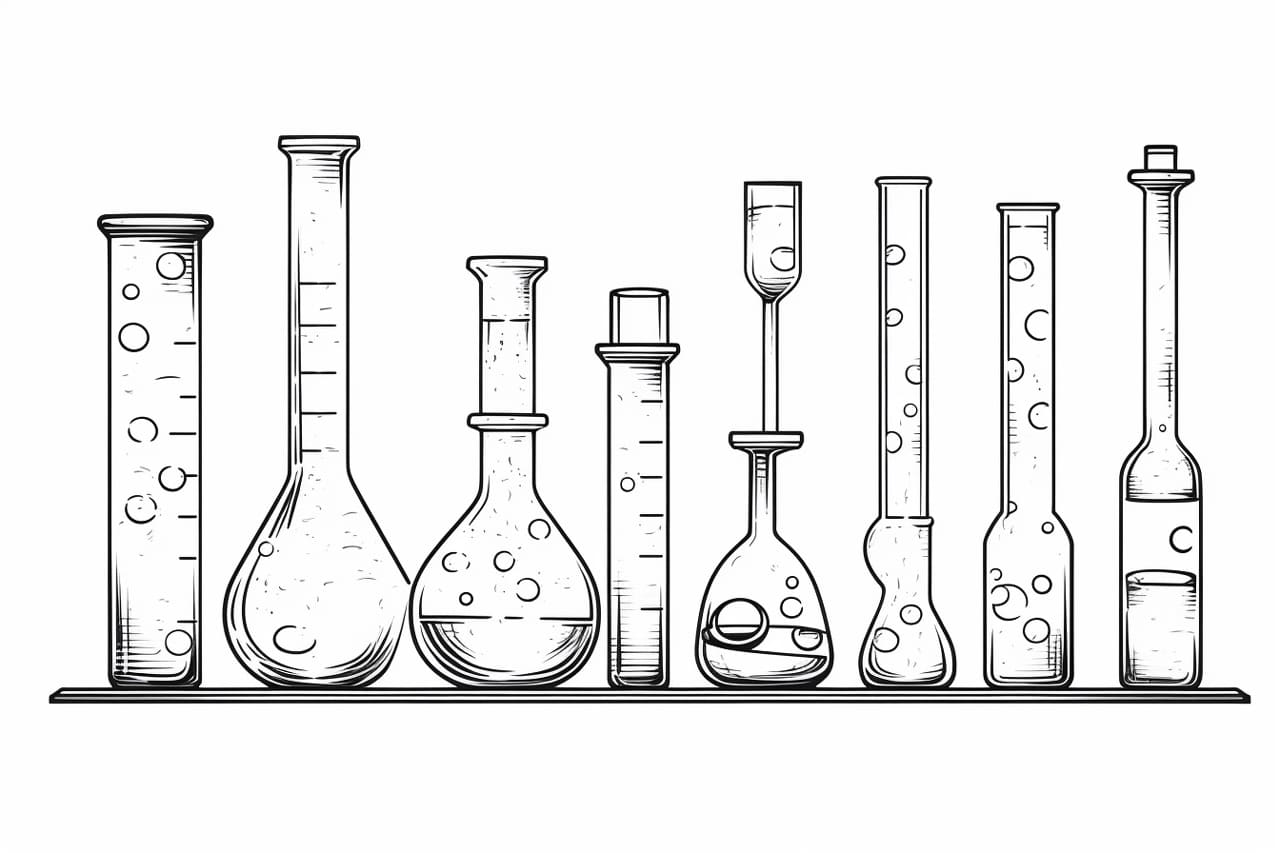
Welcome, aspiring artists! Today, we embark on an exciting journey into the intricate world of how to draw a test tube. These slender vessels hold endless possibilities for creativity and exploration. From capturing the play of light on their glass surfaces to the intriguing contents they may have within, drawing Test Tubes allows us to delve into science, curiosity, and precision. Join me as we uncover the artistry and technique required to bring these unique objects to life on paper. Let’s sharpen our pencils, open our minds, and begin our artistic adventure into the fascinating world of drawing Test Tubes.
Materials Required
To draw a test tube, you will need the following materials:
- Drawing paper or sketchbook
- Pencil (preferably a mechanical pencil for fine details)
- Eraser (for correcting mistakes)
- Ruler (for straight lines and proportions)
- Compass (for drawing circles if needed)
- Drawing pens or fine liners (optional for outlining)
- Colored pencils, markers, or watercolors (optional for adding color)
- Reference image of a test tube for accuracy and inspiration
With these materials, you can create a realistic and detailed test tube drawing.:
How to Draw a Test Tube: a Step-by-step Guide
Step 1: Outline the Shape of the Test Tube
Start by drawing an elongated oval shape for the body of the test tube. Make sure the top and bottom of the oval are slightly flattened to represent the openings of the test tube.
Step 2: Add Thickness to the Test Tube
Draw another curved line parallel to the outline of the oval shape to add thickness to the walls of the test tube. Ensure that the thickness is consistent throughout the shape.
Step 3: Draw the Base of the Test Tube
At the bottom of the test tube, sketch a small oval or circle to represent the base. This should be smaller than the bottom opening of the test tube.
Step 4: Add a Liquid or Substance Inside the Test Tube
Draw a curved line inside the test tube to represent the level of liquid or substance inside. You can add bubbles or other details to make it look more realistic.
Step 5: Add Shadows and Highlights
Add shadows along one side of the test tube and highlights on the opposite side to give your test tube a three-dimensional look. This will create the illusion of light hitting the glass surface.
Step 6: Final Touches
Add details such as labels, measurement markings, or a stand for the test tube to rest in. You can also shade the base to give it a more solid appearance.
Step 7: Refine and Erase
Go over your drawing, refining any lines and shapes as needed. Erase any unnecessary guidelines or overlapping lines to clean up the drawing.
Step 8: Color (Optional)
If you color your drawing, use light blue or transparent shades for the glass part of the test tube. For the liquid inside, you can use colors like green, red, yellow, or any other color you prefer.
Step 9: Finalize
Once satisfied with your drawing, you have successfully drawn a test tube! Feel free to experiment with different styles and details to make your test tube drawing unique.
Conclusion
In conclusion, I commend your excellent work drawing the test tube. Your attention to detail, shading, and perspective truly bring the object to life on the page. Remember that art is a continuous learning and growth journey, so keep exploring new techniques and subjects to further develop your skills. Keep up the great work, and continue to push yourself creatively. Your dedication and passion for art are genuinely inspiring. Well, I am done!
Fun Facts About Test Tubes
- Test tubes are commonly made of borosilicate glass, which is heat-resistant and chemical-resistant, making them suitable for various laboratory applications.
- The first test tubes were developed in the early 19th century and were initially used in chemistry experiments.
- Test tubes come in various sizes, ranging from small tubes holding a few milliliters to larger tubes holding up to 100 milliliters or more.
- Test tubes are often used for mixing, heating, and storing small quantities of liquids or solids in laboratory settings.
- Test tubes are commonly used in scientific research, medical diagnostics, and various industrial applications.
- Test tubes are an essential tool in microbiology for culturing bacteria and other microorganisms.
- Test tubes can also be used in education settings for conducting simple experiments and demonstrations.
- Test tubes are versatile tools that can be used for various experiments, from simple chemical reactions to complex biochemical assays.
- Test tubes are often stored in specially designed racks or holders to keep them organized and prevent breakage.
- Test tubes have become an iconic symbol of scientific research and discovery, often featured in popular culture and media representations of laboratories.
Suggestions for Scenes and Settings for Test Tube Drawings
Certainly! Here are some suggestions for scenes and settings you can draw Test Tube in:
- Test Tube working in a laboratory, surrounded by beakers, test tubes, and scientific equipment.
- Test Tube experimenting in a futuristic, high-tech laboratory with holographic displays.
- Test Tube in a beautiful outdoor setting, collecting samples in a lush forest or botanical garden.
- Test Tube underwater, exploring a colorful coral reef and studying marine life.
- Test Tube in a space station, conducting experiments in zero gravity.
- Test Tube in a post-apocalyptic world, scavenging for resources in a desolate landscape.
- Test Tube in a steampunk laboratory, surrounded by gears, cogs, and intricate machinery.
- Test Tube in a magical fantasy setting, brewing potions and casting spells.
- Test Tube at a science fair, presenting a groundbreaking invention to curious onlookers.
- Test Tube in a retro 1950s-style laboratory, with vintage equipment and a classic sci-fi aesthetic.
Feel free to mix and match these suggestions or develop your creative ideas for drawing Test Tube in various scenes and settings!