Welcome to this step-by-step guide on how to draw a glass bottle. Whether you are an experienced artist or just starting out, drawing a glass bottle can be a fun and challenging project that allows you to practice your observation skills and create a realistic representation of this everyday object. In this tutorial, we will go through each step in detail, providing clear instructions that will help you achieve a lifelike drawing. So grab your drawing materials and let’s get started!
Materials Required:
To draw a glass bottle, you will need the following materials:
- Paper: Use a smooth, sturdy paper that handles different drawing mediums. Bristol board or heavyweight drawing paper are good options.
- Pencil: Opt for a medium to soft graphite pencil that allows for easy shading and erasing.
- Eraser: Choose a good quality eraser that can remove graphite without smudging or damaging the paper.
- Ruler: Use a ruler to help you draw straight lines and measure proportions accurately.
- Blending stump or cotton swabs: These tools are useful for blending and smudging graphite to create smooth shading.
- Drawing medium (optional): If desired, you can use additional drawing mediums such as charcoal, colored pencils, or markers to add color and depth to your drawing.
Now that you have gathered your materials, let’s begin the step-by-step process of drawing a glass bottle.
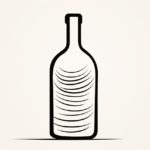
Step 1: Outline the Basic Shape
Start by lightly sketching the basic shape of the glass bottle using simple geometric forms. Observe the overall proportions and contours of the bottle and use your pencil to create an accurate outline. Pay attention to the height, width, and curves of the bottle. Remember to keep your lines light at this stage, as they will be refined and adjusted later.
Step 2: Draw the Neck and Opening
Next, focus on drawing the neck and opening of the glass bottle. Take note of the proportions and angles of these parts, as they can vary depending on the type of bottle you are drawing. Use straight and curved lines to depict the neck, and define the opening at the top. Take your time to ensure that these elements are accurately represented.
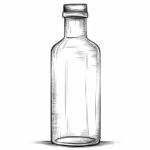
Step 3: Add Details and Contours
Now it’s time to add more details and contours to your drawing. Look closely at the glass bottle and observe any patterns, ridges, or subtle curves that give it its unique appearance. Use your pencil to carefully depict these features, taking into consideration the light and shadow that affect the bottle’s surface. Pay attention to any reflections or distortions caused by the glass as well.
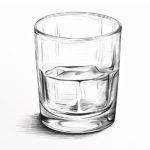
Step 4: Shade and Render the Glass
To create the illusion of transparency in the glass, shading and rendering techniques are crucial. Start by identifying the light source in your drawing, as this will determine where the highlights and shadows fall. Using a range of pencil pressures, create gradual transitions of light and dark values on the glass surface. Remember to keep the shading consistent and consider the shape and form of the bottle.
Step 5: Refine and Adjust
Take a step back and assess your drawing so far. Look for any areas that may need further refinement or adjustment. Pay attention to the overall proportions, shape, and details of the bottle. Make any necessary corrections or enhancements to ensure the accuracy and realism of your drawing.
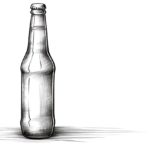
Step 6: Add Background and Final Touches
To complete your drawing, consider adding a background to provide context and depth to the composition. It could be a simple table or surface on which the bottle is placed. Use shading techniques to create a convincing background that doesn’t distract from the main subject. Finally, review your drawing and make any final touches or adjustments as needed.
Congratulations! You have successfully drawn a glass bottle. Remember, practice makes perfect, so don’t be afraid to experiment and try drawing different types of bottles using various techniques and mediums.
Conclusion
Drawing a glass bottle requires careful observation and attention to detail. By following the step-by-step instructions in this guide, you can create a realistic representation of a glass bottle that showcases your artistic skills. Remember to start with a solid outline, add details and contours, master shading techniques for transparency, and refine your drawing for a polished result. With practice and patience, you’ll be able to create stunning drawings of glass bottles that capture their beauty and elegance.
So grab your drawing materials, and start exploring the world of glass bottle drawing today!