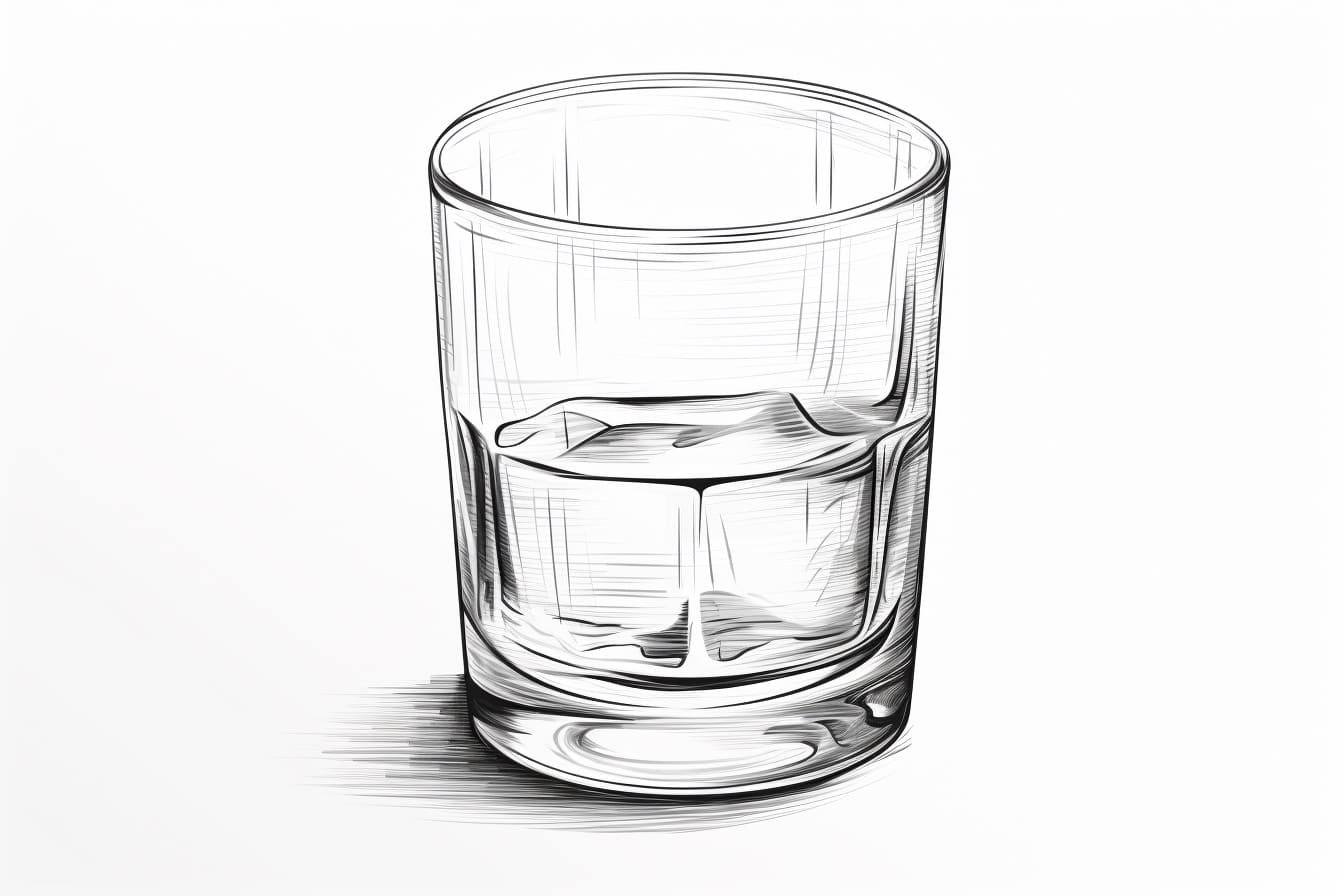
Welcome to this step-by-step guide on how to draw a shot glass! Whether you are a beginner or an experienced artist, this tutorial will provide you with clear instructions on how to create a realistic and visually appealing shot glass drawing. With just a few materials and some patience, you’ll be able to create a masterpiece that you can proudly display or share with others.
Materials Needed
Before we begin, let’s gather all the materials you’ll need to complete this drawing:
- Pencil
- Eraser
- Drawing paper
- Ruler or straight edge
- Fine-tip marker or pen
- Colored pencils or markers (optional)
Make sure you have all these materials handy, as they will help you achieve the best results.
Now let’s dive into the steps!
Step 1: Start with the Base
Begin by drawing a vertical line that will serve as the center of your shot glass. This line will help you maintain symmetry throughout your drawing. Then, draw a small oval shape at the bottom of the line to create the base of the glass.
Step 2: Outline the Glass Shape
Next, draw a curved line above the oval base to outline the shape of the glass. Start from one side of the base and curve it upwards, then bring it back down to the other side of the base. Make sure the two ends of the line meet at a point, creating a smooth and elegant curve.
Step 3: Add the Rim
Now, draw a curved line above the glass shape to create the rim. The rim of a shot glass is usually thicker than the rest of the glass. Make the line slightly thicker and more prominent to depict this. Ensure that the rim is parallel to the base of the glass, emphasizing the symmetry.
Step 4: Draw the Inside of the Glass
Inside the glass shape, draw another curved line parallel to the outer edge. This will represent the inner wall of the glass. To make it more realistic, add some irregularities and imperfections to the line, making it slightly wavy or uneven.
Step 5: Add Details
To make your shot glass drawing more lifelike, it’s important to add some details. Draw a small circular shape at the center of the base, indicating the bottom of the glass. Then, draw a thin line from the bottom of the base to the rim, representing the stem of the glass.
Step 6: Refine the Shape
Take a step back and examine your drawing so far. Use your eraser to make any necessary adjustments and refine the shape of the glass. Pay attention to the curves, proportions, and overall symmetry. This step is crucial to achieve a polished final result.
Step 7: Outline with a Marker
Once you are satisfied with the outline of your shot glass, use a fine-tip marker or pen to go over the pencil lines. This step will make your drawing more defined and professional-looking. Be careful and take your time to ensure clean and confident lines.
Step 8: Erase Excess Lines
After outlining with the marker, let the ink dry for a few minutes. Then, carefully erase any remaining pencil lines, including the base and inner wall lines. This will make your drawing appear cleaner and more polished.
Step 9: Add Shading and Shadows (Optional)
To add depth and dimension to your shot glass drawing, you can choose to add shading and shadows. Use a pencil or colored pencils/markers to carefully shade the areas that would be darker or receive less light. Pay attention to the direction of the light source and create gradients to achieve a three-dimensional effect.
Conclusion
Congratulations! You have successfully learned how to draw a shot glass. By following these step-by-step instructions, you have created a realistic and visually appealing drawing that showcases your artistic skills. Remember to practice and experiment with different techniques to further enhance your drawing abilities.
Drawing a shot glass can be a fun and rewarding exercise for artists of all levels. Whether you’re a beginner or an expert, this tutorial has provided you with the guidance and techniques needed to create an impressive shot glass drawing. So grab your materials, unleash your creativity, and enjoy the process of bringing your artwork to life!