Are you interested in drawing a round table but don’t know where to start? Look no further! In this step-by-step guide, we will walk you through the process of how to draw a round table, whether it’s for a still life drawing, architectural rendering, or simply for fun. So grab your pencils and paper, and let’s get started!
Materials Required
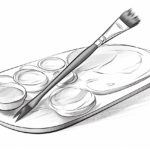
Before we begin, let’s gather the materials you will need to draw a round table:
- Drawing paper
- Pencils (HB, 2B, 4B)
- Eraser
- Ruler
- Compass
- Protractor
- Optional: Colored pencils or markers for adding color to your drawing
Now that we have all our materials ready, let’s move on to the steps!
Step 1: Determine the Size and Position
First, decide on the size and position of your round table on the page. If you’re drawing a specific scene or setting, consider the space available to you and how the table fits into the composition. Use your ruler to lightly draw a horizontal guideline where you want the table to be placed.
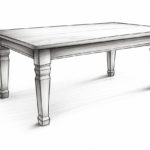
Step 2: Draw the Tabletop
Using your compass, draw a perfect circle for the tabletop. Place the compass at the center of your intended table and then rotate it to create the outline of the circle. Make sure the circle is smooth and evenly shaped. If you’re new to using a compass, it may take a few tries to get it just right, but practice makes perfect!
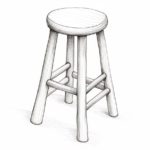
Step 3: Add the Table Legs
To create the illusion of depth, we need to add table legs. Start by drawing two straight lines from the bottom edge of the tabletop, extending downwards. These lines will act as guides for the table legs. Next, draw a rectangle shape at the bottom of each line to represent the table leg. Make sure the legs are evenly spaced and aligned with the tabletop.
Step 4: Refine the Table Legs
Now it’s time to refine the shape of the table legs. Use your ruler to straighten and adjust any uneven lines. Round the edges of the table legs to give them a more polished and realistic look. Remember to maintain perspective by ensuring that the legs on the far side of the table appear slightly shorter than the ones on the near side.
Step 5: Add Details
To make your round table look more realistic, add some details to the tabletop and legs. For the tabletop, draw a smaller circle inside the larger one to represent the table’s edge. You can add texture or patterns to the tabletop if desired. For the legs, you can draw intersecting lines or curves to simulate design elements or joinery.
Step 6: Erase Unnecessary Guidelines
At this point, you should have a well-defined round table. Take your eraser and carefully remove any unnecessary guidelines or construction lines that you no longer need. Be gentle to avoid smudging your drawing, especially if you intend to add color or shading later on.
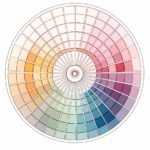
Step 7: Color or Shade Your Drawing (Optional)
If you want to take your drawing to the next level, consider adding color or shading to your round table. Use colored pencils or markers to add depth and dimension to the various elements. Pay attention to the light source and add shadows accordingly, which will further enhance the realism of your drawing.
Conclusion
Drawing a round table may seem challenging at first, but with the right techniques and a little practice, you can achieve impressive results. By following the step-by-step instructions in this guide, you’ll be able to create a realistic round table drawing that can be used in various artistic projects or simply as a fun exercise. So go ahead, grab your pencils, and let your creativity flow!