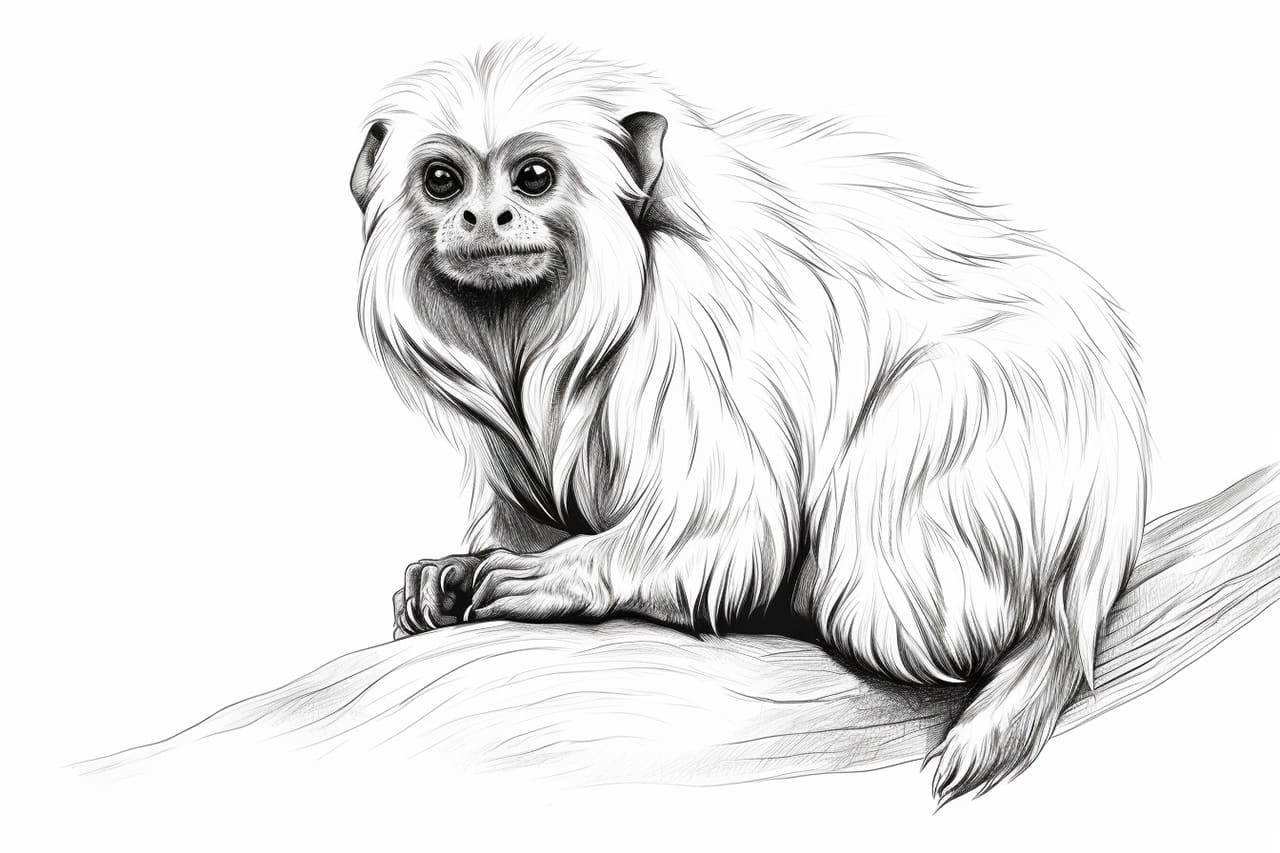
Welcome to this step-by-step tutorial on how to draw a tamarin! Whether you’re an experienced artist or just starting out, this guide will help you capture the charm and beauty of this adorable little monkey in your artwork. Tamarins are known for their small size, big eyes, and long tails, making them a fascinating subject to draw. So let’s grab our pencils and get started!
Materials Required
Before we begin, let’s gather the materials you’ll need for this drawing tutorial:
- Drawing paper: Use a smooth and heavyweight paper that is suitable for sketching or drawing.
- Pencils: Have a range of graphite pencils, including HB, 2B, 4B, and 6B. These different grades of pencils will allow you to achieve varying shades and depths in your drawing.
- Eraser: Get a good quality eraser that can easily remove pencil marks without smudging.
- Pencil sharpener: Keep your pencils sharp for precise lines by using a pencil sharpener.
- Blending stump or tortillon: A blending stump or tortillon will help you create smooth and seamless shading in your drawing.
Now that we have everything we need, let’s move on to the step-by-step process of drawing a tamarin.
Step 1: Basic Shapes
To start, sketch the basic shapes that form the body of the tamarin. Begin with a large oval for the head and a smaller oval for the body. Connect these two ovals with a curved line to create the neck. Add a smaller oval below the body for the hind legs.
Step 2: Facial Features
Now that we have the basic structure, let’s focus on the tamarin’s facial features. Sketch two circles within the head oval for the eyes. Add a smaller circle overlapping the eye circle for the snout. Draw a curved line below the snout for the mouth.
Step 3: Ears and Tail
Next, draw the tamarin’s ears on top of the head. These ears are usually large and pointed. Extend a curved line from the back of the tamarin’s body for the tail. Tamarins have long tails that are often longer than their bodies, so be sure to make it sufficiently long and thin.
Step 4: Limbs and Hands
Now, let’s add the limbs and hands to our tamarin. Sketch two curved lines extending from the body for the front legs. At the end of each leg, draw a small oval for the hands. These hands have long and slender fingers, so keep that in mind while drawing them. Repeat the same process for the hind legs.
Step 5: Refining the Details
It’s time to refine the details of our tamarin drawing. Start by defining the shape of the tamarin’s face by adding a curved line for the forehead. Sketch a small curve at the inner corner of each eye to represent the tamarin’s nose. Add two small circles within each eye to depict the pupils.
Step 6: Shading and Texture
To give our tamarin drawing depth and realism, let’s add shading and texture. Start by using a light pencil to lightly shade the entire body of the tamarin. Gradually build up the shadows by layering darker pencil strokes in areas that would naturally be darker, such as the back, under the chin, and around the eyes.
Step 7: Blending and Smoothing
Once you’ve added shading, use a blending stump or tortillon to blend the pencil strokes together. This will create a smooth and seamless appearance, enhancing the three-dimensional effect of your drawing. Be cautious not to overblend, as it can lead to a loss of detail.
Step 8: Final Touches
For the final touches of our tamarin drawing, refine the details by adding finer lines and textures. Pay attention to the direction of the fur and add thin lines to mimic its texture. Darken any areas that require more depth or definition.
Congratulations! You have successfully drawn a tamarin. With practice, you can experiment with different poses and expressions to bring your tamarin drawings to life.
Conclusion
Drawing a tamarin can be a delightful experience, allowing you to explore the intricate details of these fascinating creatures. By following the step-by-step instructions in this tutorial, you have learned how to capture the unique charm of tamarins in your artwork. Remember to be patient, practice regularly, and most importantly, have fun!