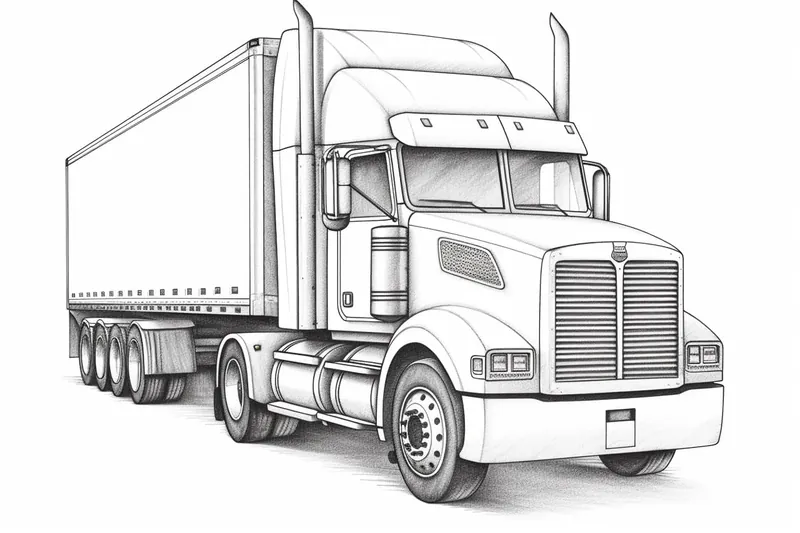
How to Draw a Semi Truck
Learn how to draw a semi truck with this step-by-step drawing tutorial. Capture the power and beauty of these mighty vehicles on paper with these simple instructions.
Materials You'll Need
- Pencil
- Paper
- Eraser
Drawing a semi truck is an exciting artistic challenge that offers a great opportunity to practice perspective, proportion, and detail work. Semi trucks are iconic vehicles known for their massive size, intricate mechanical features, and dynamic shapes. Whether you're a fan of big rigs, interested in automotive illustration, or simply looking to improve your drawing skills, learning how to draw a semi truck can be both rewarding and fun. This tutorial will help you break down the complexity of this vehicle into manageable steps, making the process approachable even if you're a beginner.
Understanding the structure of a semi truck involves capturing its distinctive cab, trailer, wheels, and other elements like exhaust pipes and headlights. This tutorial will guide you through sketching basic shapes, refining outlines, and adding details that bring your drawing to life. While some familiarity with drawing techniques such as shading, line work, and perspective will be helpful, this step-by-step guide is designed to accommodate various skill levels. By following along, you'll enhance your observation skills and gain confidence in depicting complex machinery.
So, if you're ready to expand your artistic repertoire and create a striking piece of vehicle art, grab your pencil, eraser, and paper. Join me as we explore how to draw a semi truck with clear instructions and helpful tips. Remember, practice is key, and each stroke brings you closer to mastering this impressive subject. Let's get started on this creative journey together!
Materials Required
To draw a semi truck, you will need the following materials:
- Pencil
- Eraser
- Drawing paper
- Ruler
- Colored pencils or markers (optional)
Now that you have your materials ready, let's begin!
Step 1: Outline the Basic Shape
Start by lightly sketching a rectangle on your drawing paper. This will serve as the main body of the semi truck. Make sure the proportions are accurate and the lines are straight. Use a ruler if needed to achieve clean and straight lines.
Step 2: Add the Cabin
Next, draw a smaller rectangle on top of the main body, slightly tilted towards the front. This will be the cabin of the semi truck. It should be about half the height of the main body. Connect the cabin to the main body using two straight lines, one on each side.
Step 3: Draw the Windows and Windshield
Inside the cabin, draw a large rectangle for the windshield. Add two smaller rectangles on both sides for the windows. Make sure they are evenly spaced and aligned.
Step 4: Create the Wheels
Now it's time to draw the wheels. Add four circles underneath the main body of the truck to represent the tires. Make sure they are equal in size and aligned with each other. You can use a compass or trace circular objects to help you achieve uniformity.
Step 5: Add Details to the Wheels
Tip: To enhance your semi truck drawing, consider using reference images to study the details and unique features of different truck models. This will not only provide inspiration for adding realistic elements like logos and specific body shapes but also help you understand proportions and mechanical components better. Keep these images handy as you progress through each step to ensure accuracy and creativity in your artwork.
Inside each tire, draw a smaller circle to represent the rim. Then, add a series of curved lines to indicate the spokes. You can make the spokes as simple or as detailed as you like.
Step 6: Sketch the Front Bumper and Grill
Below the cabin, draw a curved line to create the front bumper. Then, add a rectangular shape in the center of the bumper to represent the grill of the truck. Don't forget to include any additional details or patterns on the grill if your reference image shows them.
Step 7: Define the Headlights and Logo
At the front of the cabin, draw two small circles to represent the headlights. Add smaller circles inside them to depict the bulbs. Above the grill, draw the logo or emblem of your chosen truck brand. Research the specific logo you want to draw and recreate it as accurately as possible.
Step 8: Draw the Side Mirrors and Door Handles
On both sides of the cabin, draw elongated rectangles to represent the side mirrors. Then, add small rectangles near the bottom of the cabin to depict the door handles.
Step 9: Add Details to the Main Body
Sketch additional details such as air vents, fuel tanks, and any other distinctive features of the particular semi truck you are drawing. These details will vary depending on the model and style of the truck.
Step 10: Refine the Drawing
Now that you have the basic structure and details in place, go over your drawing and refine the lines. Use a darker pencil or pen to trace over the final lines, erasing any unnecessary guidelines as you go. Pay close attention to the proportions and make any necessary adjustments to ensure accuracy.
Step 11: Color (Optional)
If you prefer to add color to your drawing, now is the time to do so. Use colored pencils or markers to bring your semi truck to life. Research the colors and patterns of the truck you are drawing to achieve a realistic representation.
Conclusion
Drawing a semi truck may seem daunting at first, but by breaking it down into simple steps, you can create an impressive piece of artwork. Remember to practice regularly and be patient with yourself as you refine your skills. So grab your drawing materials and give it a try! With time and practice, you'll be drawing stunning semi trucks in no time.
Now that you know how to draw a semi truck, you can unleash your creativity and capture the power and beauty of these mighty vehicles on paper. So grab your pencil, follow the steps above, and let your artistic skills shine!
Fun Facts About Semi Truck
- The first semi truck was invented by Alexander Winton in 1898, revolutionizing freight transport.
- Semi trucks can haul loads weighing up to 80,000 pounds on U.S. highways, making them essential for commerce.
- The average semi truck engine produces between 400 and 600 horsepower to move heavy loads efficiently.
- Semi trucks typically have 18 wheels, which is why they are often called "18-wheelers."
- Modern semi trucks use aerodynamic designs to improve fuel efficiency and reduce emissions.
- Many semi trucks are equipped with advanced safety features like collision mitigation and lane departure warnings.
- The longest semi truck convoy on record consisted of 312 trucks, demonstrating the scale of trucking logistics.
- Semi trucks play a critical role in the economy, transporting nearly all goods at some point in the supply chain. Federal Highway Administration
Suggestions for Scenes and Settings for Semi Truck Drawings
- A semi truck driving through a mountainous landscape with winding roads and towering cliffs.
- A close-up view of a semi truck's front grill and headlights under dramatic lighting at dusk.
- A semi truck parked at a busy highway rest stop, surrounded by fueling stations and other trucks.
- A vintage semi truck hauling cargo across a dusty desert highway with cacti and tumbleweeds.
- A futuristic semi truck on a high-tech highway with neon lights and sleek, aerodynamic design elements.
- A semi truck navigating a snowy winter road with snow-covered trees and icy patches.
- A semi truck crossing a massive bridge over a river or canyon, emphasizing scale and perspective.
- A semi truck in an industrial loading dock setting with cranes, containers, and workers.
- A semi truck depicted during a thunderstorm, with rain streaks and reflections on wet pavement.
- A semi truck convoy traveling at sunset on an open highway with vibrant sky colors and long shadows.