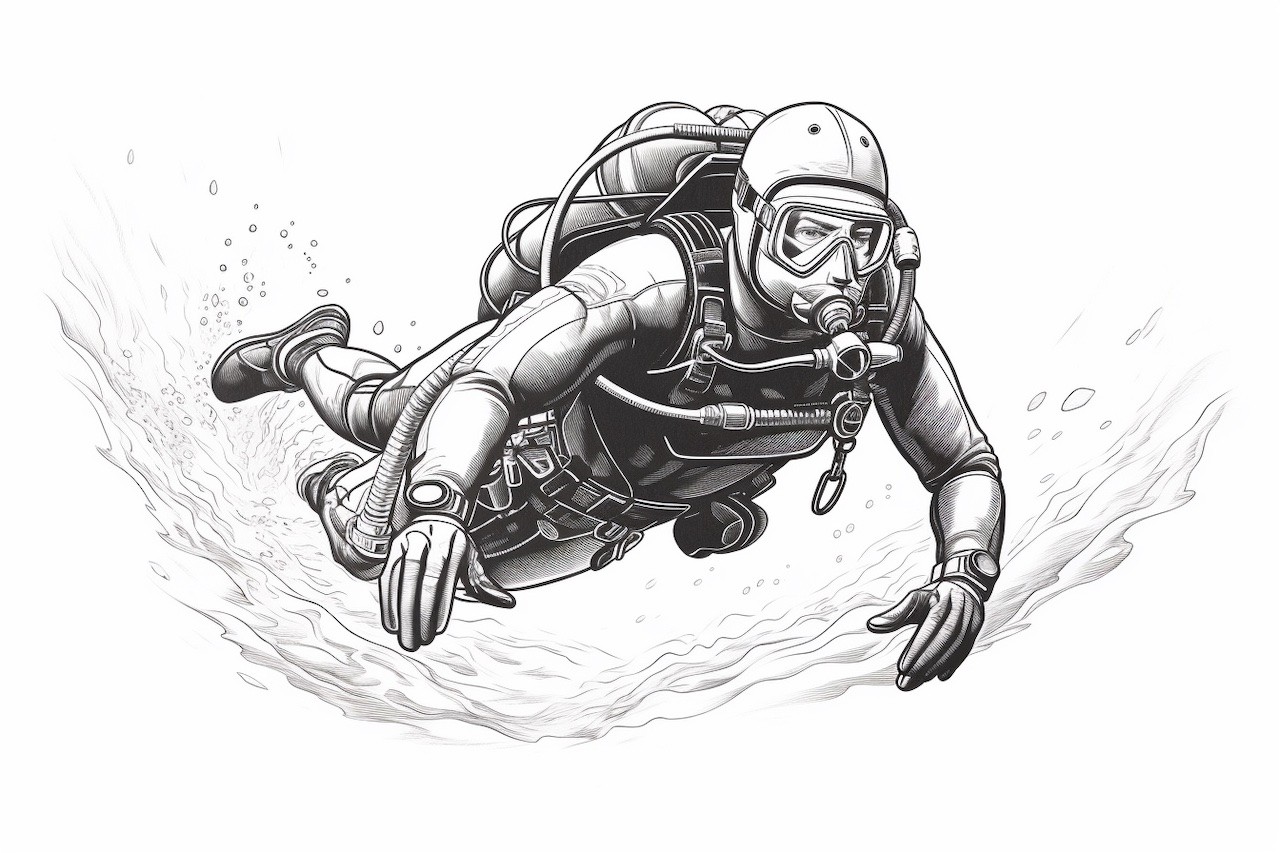
Scuba diving is a fascinating activity that allows people to explore the underwater world. If you’re a fan of scuba diving or simply interested in the subject, why not learn how to draw a scuba diver? In this step-by-step guide, I’ll walk you through the process of creating your very own scuba diver artwork. So grab your pencils and let’s get started!
Materials Required:
Before we begin, let’s gather the materials you’ll need to draw a scuba diver:
- Drawing paper: A smooth, heavyweight paper is ideal for this project.
- Pencils: A range of pencils in different hardness levels (HB, 2B, 4B) will give you more control over your shading.
- Eraser: A kneaded eraser or a soft eraser will help you make corrections and remove any unwanted lines.
- Fine-tip marker or pen: This will be useful for outlining and adding details to your drawing.
- Colored pencils or markers (optional): If you’d like to add color to your drawing, have some colored pencils or markers on hand.
Now that you have your materials ready, let’s dive into the step-by-step process of drawing a scuba diver!
Step 1: Sketch the Outline
Start by sketching a basic outline of the scuba diver’s body. Use light and loose strokes to create a rough shape. Begin with an oval for the head and then add an elongated oval for the body. Include the arms and legs as simple lines for now. Don’t worry about adding any details at this stage; we’ll refine the drawing later.
Step 2: Define the Body Shape
Refine the scuba diver’s body shape by adding more details. Start by shaping the head with facial features such as the eyes, nose, and mouth. Then, continue to outline the body, making sure to define the chest, waist, and hips. Add the arms and legs using more confident lines, and indicate the hands and feet with simple shapes.
Step 3: Add Scuba Gear
Now it’s time to add the scuba gear that will make your drawing unmistakably a scuba diver. Begin by sketching the diving mask, which is usually a large oval shape with tempered glass for the front window. Then, add the snorkel emerging from the mouth and curving towards the back of the head. Next, draw the scuba tank on the diver’s back, extending it down to the waist. Connect the tank to the mask with a series of curved lines to form the air hose.
Step 4: Define the Details
In this step, we’ll add more details to bring our scuba diver to life. Start by refining the facial features, paying attention to the eyes, mouth, and any additional details on the mask. Then, focus on the scuba gear by adding straps to the mask and tank, as well as valves and gauges on the tank. Don’t forget to include the fins on the diver’s feet as well.
Step 5: Shade and Texture
Now that the basic outline and details are complete, let’s add shading and texture to our scuba diver drawing. Begin by identifying the main light source in your artwork. This will help you determine where shadows should fall. Use your pencils to lightly shade the areas that are away from the light source, gradually building up the values to create a three-dimensional effect. Pay attention to the curves and folds of the scuba gear, adding texture and depth to your drawing.
Step 6: Finalize the Drawing
In this final step, take a moment to review your drawing and make any necessary adjustments. Clean up any stray lines or erase any guidelines that are no longer needed. Use a fine-tip marker or pen to outline the entire drawing, making the lines more defined and bold. This will give your scuba diver artwork a polished look. If you’d like to add color, now is the time to grab your colored pencils or markers and bring your drawing to life!
Conclusion
Congratulations! You’ve successfully learned how to draw a scuba diver. By following these step-by-step instructions, you’ve created your very own scuba diver artwork from scratch. Feel free to experiment with different poses, accessories, and backgrounds to make your drawings unique. Keep practicing, and soon you’ll be able to create even more intricate and detailed scuba diver illustrations. Enjoy the process and happy drawing!