Drawing a scream is a fascinating artistic challenge that allows you to explore the depths of human emotion and expression. The image of a scream—whether inspired by Edvard Munch’s iconic painting or by your own imagination—captures a moment of raw, intense feeling. Screams are often associated with powerful states such as fear, surprise, anger, or even joy, making them a compelling subject for artists who want to convey strong emotion through their work. By learning how to draw a scream, you can push the boundaries of your portrait skills and delve into the dramatic side of human expression.
Artists are often drawn to subjects that evoke emotion, and a scream is one of the most dynamic and expressive gestures to depict. It challenges you to pay close attention to the subtle details of facial anatomy: the wide-open mouth, tensed muscles, strained neck, and expressive eyes. This makes the process not only an excellent exercise in observation but also a valuable opportunity to practice rendering complex emotions. Whether you’re creating a piece for a horror-themed project, exploring psychological states, or simply looking to enhance your ability to portray feelings, learning how to draw a scream opens up new artistic possibilities.
This tutorial is designed for artists of all skill levels, from beginners looking to tackle expressive faces for the first time, to more advanced artists seeking to fine-tune their technique. You’ll learn foundational techniques such as sketching basic facial proportions, mapping out the key features that define a scream, and adding shading and detail to create depth and drama. Along the way, we’ll discuss tips for exaggerating certain features to heighten the emotional impact and how to use value and contrast to draw the viewer’s eye to the most important parts of your drawing.
By the end of this guide, you’ll have a clearer understanding of not just how to draw a scream, but also how to infuse your artwork with energy and feeling. Don’t worry if your first attempt doesn’t look exactly as you imagined—capturing emotion takes practice, and every sketch brings you one step closer to mastering expressive art. So gather your drawing tools, embrace the creative challenge ahead, and get ready to bring a powerful scream to life on your page!
Materials Required
Before we dive into the steps, let’s gather the materials you will need:
- Sketchpad or drawing paper
- Pencils (HB, 2B, and 4B)
- Eraser (preferably kneaded eraser)
- Fine-tip pen or marker
- Color pencils or markers (optional)
- Reference images (if desired)
Now that you have everything ready, let’s move on to the steps!
Step 1: Basic Guidelines
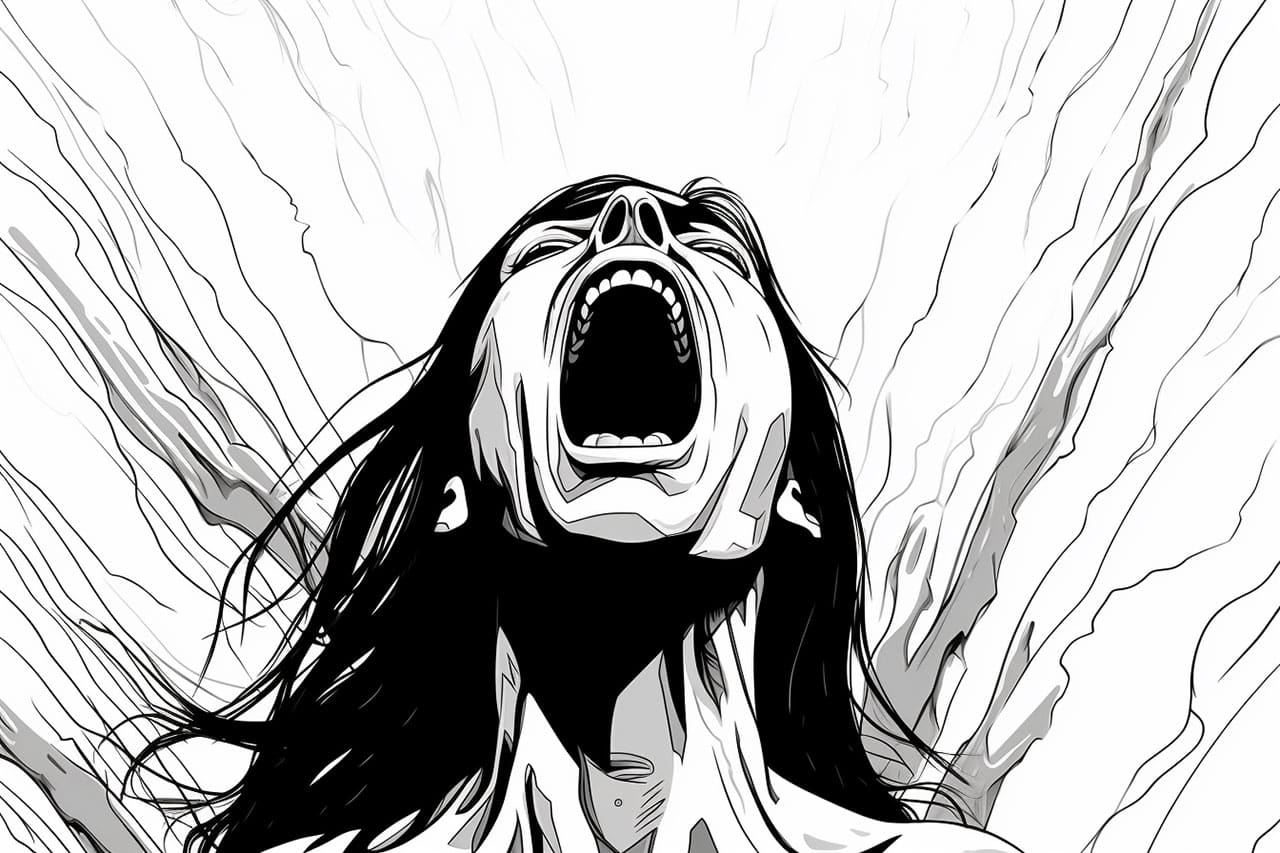
Start by lightly sketching the basic guidelines for the head and open mouth. This will help you establish the overall shape and ensure proper proportions. Using an HB pencil, draw a circular shape for the head, slightly tilted to one side. Then, add a vertical line down the center of the head and a horizontal line across to mark the eye level. Finally, sketch a wide open mouth beneath the horizontal line, placing it towards the lower part of the circle.
Step 2: Facial Features
Now, let’s focus on the facial features that will convey the scream. Begin by adding the eyes, which should be wide open and filled with fear or intensity. Draw the eyebrows raised and furrowed to add to the intensity of the expression.
Next, draw the nose slightly distorted, with flared nostrils, to enhance the sense of urgency. For the mouth, add sharp, angled lines to create the teeth and a curved line for the tongue. Remember to keep the lines rough and sketchy at this stage, as we will refine them later.
Step 3: Detailing the Face
To give the scream drawing more depth and character, it’s time to add some finer details. Begin by refining the facial features, giving them more defined shapes and adding any necessary wrinkles or lines that add to the expression. Pay close attention to the intensity of the eyes and the wrinkles around the mouth and forehead.
Step 4: Shadows and Highlights
Now, let’s add some shading to bring our scream drawing to life. Start by identifying the light source in your reference image or your own imagination. With that in mind, use a 2B pencil to lightly shade the areas of the face that would be in shadow. This includes the areas around the eyes, underneath the nose, and along the edges of the mouth.
Next, use a 4B pencil to darken the shadowed areas, gradually building up the value to create a sense of dimension. Leave the areas that catch the light, such as the forehead and cheeks, as well as the highlights on the teeth and tongue, untouched for now.
Step 5: Refining the Details
Now that we have a solid foundation with shading, it’s time to refine the details further. Use a sharp pencil or a fine-tip pen to carefully outline the eyes, nose, and mouth. Add more depth to the teeth by adding individual lines for each tooth. Take your time with this step, ensuring that each line is intentional and adds to the overall expression of the scream.
Step 6: Adding Color (Optional)
If you want to take your scream drawing to the next level, try adding color with color pencils or markers. Choose colors that amplify the intensity of the scream, such as vibrant reds, oranges, or purples. Apply the colors lightly at first, gradually building up layers to achieve the desired effect. Blend the colors smoothly using a blending stump or a cotton swab for a more realistic look.
Conclusion
Congratulations! You have successfully learned how to draw a scream! Through careful observation of facial features, shading techniques, and adding color if desired, you have created a dynamic and expressive artwork that captures the essence of a scream. Remember to practice regularly and experiment with different styles to further refine your skills. So grab your sketchpad and keep exploring the world of art!
Fun Facts About The Scream
- The iconic painting The Scream was created by Norwegian artist Edvard Munch in 1893.
- Munch made several versions of The Scream using different media, including oil, tempera, and pastel.
- The wavy sky in The Scream was inspired by a real sunset Munch witnessed in Oslo, Norway.
- The Scream may have been influenced by the atmospheric effects of the 1883 Krakatoa volcanic eruption.
- The figure in The Scream is often interpreted as a symbol of modern existential angst.
- One version of The Scream sold at auction for nearly $120 million in 2012, making it one of the most expensive paintings ever sold.
- The painting has been referenced and parodied in countless films, TV shows, and cartoons, including the Scream movie franchise.
- A hidden message written by Munch on the painting reads, “Could only have been painted by a madman.”
Suggestions for Scenes and Settings for Scream Drawings
- A figure screaming on a windswept cliff at sunset, the sky swirling with dramatic colors.
- An expressive close-up of someone screaming underwater, bubbles and distorted features enhancing the emotion.
- A person screaming in a crowded city street, their face the only one showing emotion while others remain oblivious.
- A shadowy silhouette screaming in the rain, illuminated by a flash of lightning.
- A scream echoing in a haunted forest, with twisted trees and glowing eyes in the background.
- A surreal scene of a face screaming as it dissolves into a storm of abstract shapes and colors.
- A child screaming in awe or fear at a fantastical creature emerging from a magical portal.
- A split-portrait: half the face is calm, the other half is caught mid-scream, showing contrasting emotions.
- A group of figures all screaming in unison, their faces merging together in a wave of emotion.
- An astronaut screaming inside a helmet, with the vast emptiness of space reflected in the visor.