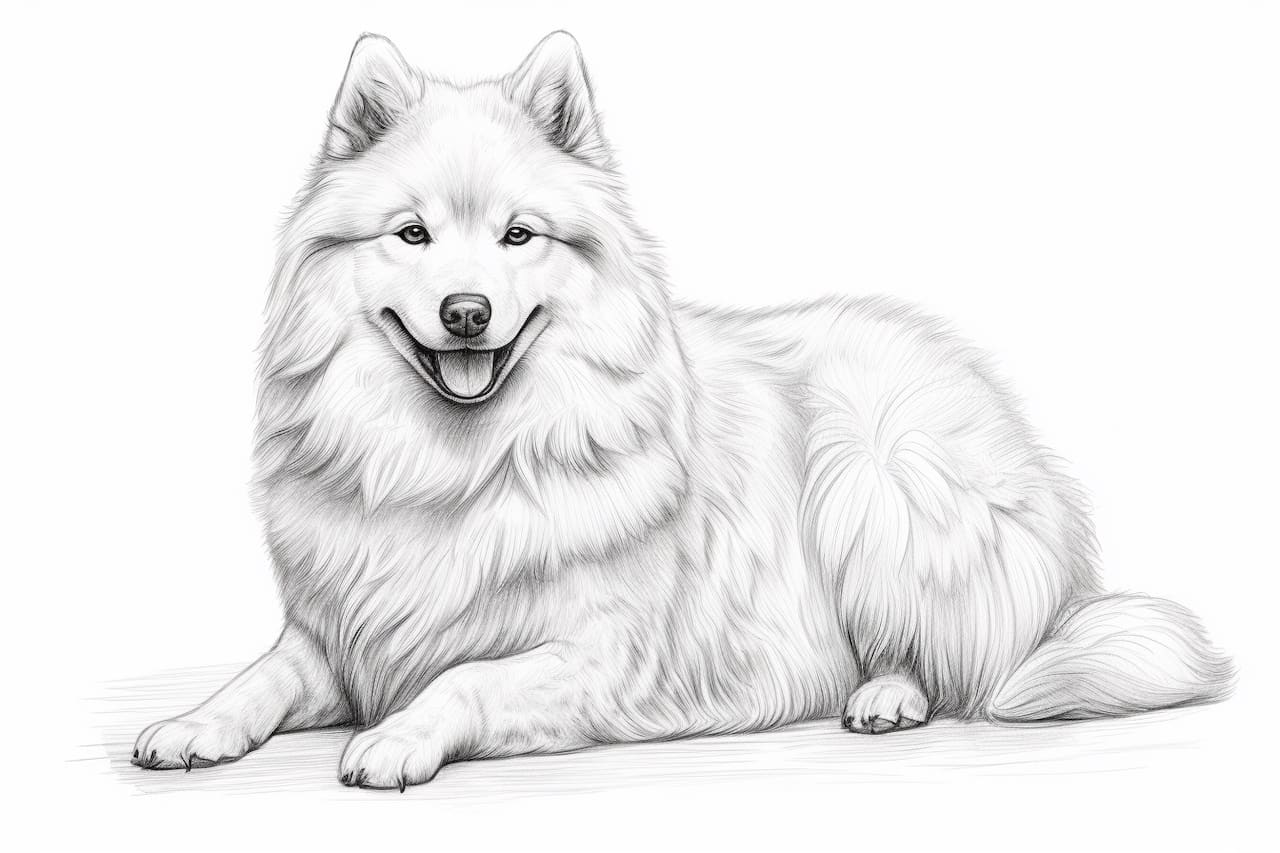
Welcome to this step-by-step guide on how to draw a Samoyed! Whether you are an experienced artist or just starting out, this tutorial will provide the necessary guidance to create a beautiful and lifelike representation of this adorable dog breed. So grab your drawing supplies, and let’s get started!
Materials Required
To complete this drawing, you will need the following materials:
- Pencil (preferably an HB or 2B)
- Drawing paper or sketchbook
- Eraser
- Fine-tip markers or pens (optional, for inking)
Now that you have gathered your materials, let’s dive into the steps involved in drawing a Samoyed.
Step 1: Basic Shapes
Start by sketching the basic shapes that will form the foundation of your Samoyed drawing. Begin with an oval shape for the head, followed by a larger oval under it for the body. Add two circles on the sides of the head for the ears and a smaller oval at the bottom for the snout.
Step 2: Refine the Head
Refine the shape of the head by adding a slight curve to connect the snout to the head. Sketch a vertical line down the center of the face to divide it in half. Next, draw two almond-shaped eyes along this line and a small triangular shape for the nose just below it. Remember to add a curved line for the mouth.
Step 3: Add Ears and Fur
Outline the ears using the basic circles as a guide. Samoyeds have triangular-shaped ears that are slightly rounded at the tips. Add some fur detail to the head by drawing short, curved lines around the face, leaving some areas smooth for a fluffy appearance.
Step 4: Define the Body
Refine the body shape by adding more curves and contours. Samoyeds have a robust and muscular build, so capture that in your drawing. Add a fluffy tail at the back by sketching a long, curved line.
Step 5: Facial Details
To bring your Samoyed to life, add more details to the face. Draw the eyebrows using two small curved lines above each eye. Add pupils to the eyes by shading in two small ovals. Samoyeds have a distinct smiling expression, so draw a curved line under the nose to represent the mouth. Remember to add a small tongue!
Step 6: Fur Texture
Now it’s time to add texture and details to the fur. Start by lightly sketching short, curved lines toward the fur growth. Gradually build up the density of these lines to create a fluffy appearance. Pay attention to the areas where light and shadow fall to give your drawing depth and dimension.
Step 7: Refine and Ink
Once satisfied with the overall shape and details, go over your pencil lines with a fine-tip marker or pen. This will give your drawing a clean, finished look. Let the ink dry completely before erasing any remaining pencil marks.
Conclusion
Congratulations on completing your Samoyed drawing! By following these step-by-step instructions, you have learned how to capture this delightful dog breed’s unique features and charm. Remember, practice makes perfect, so don’t be discouraged if your first attempt isn’t exactly what you envisioned. Keep refining your skills, experiment with different techniques, and, most importantly, enjoy creating art. Happy drawing!