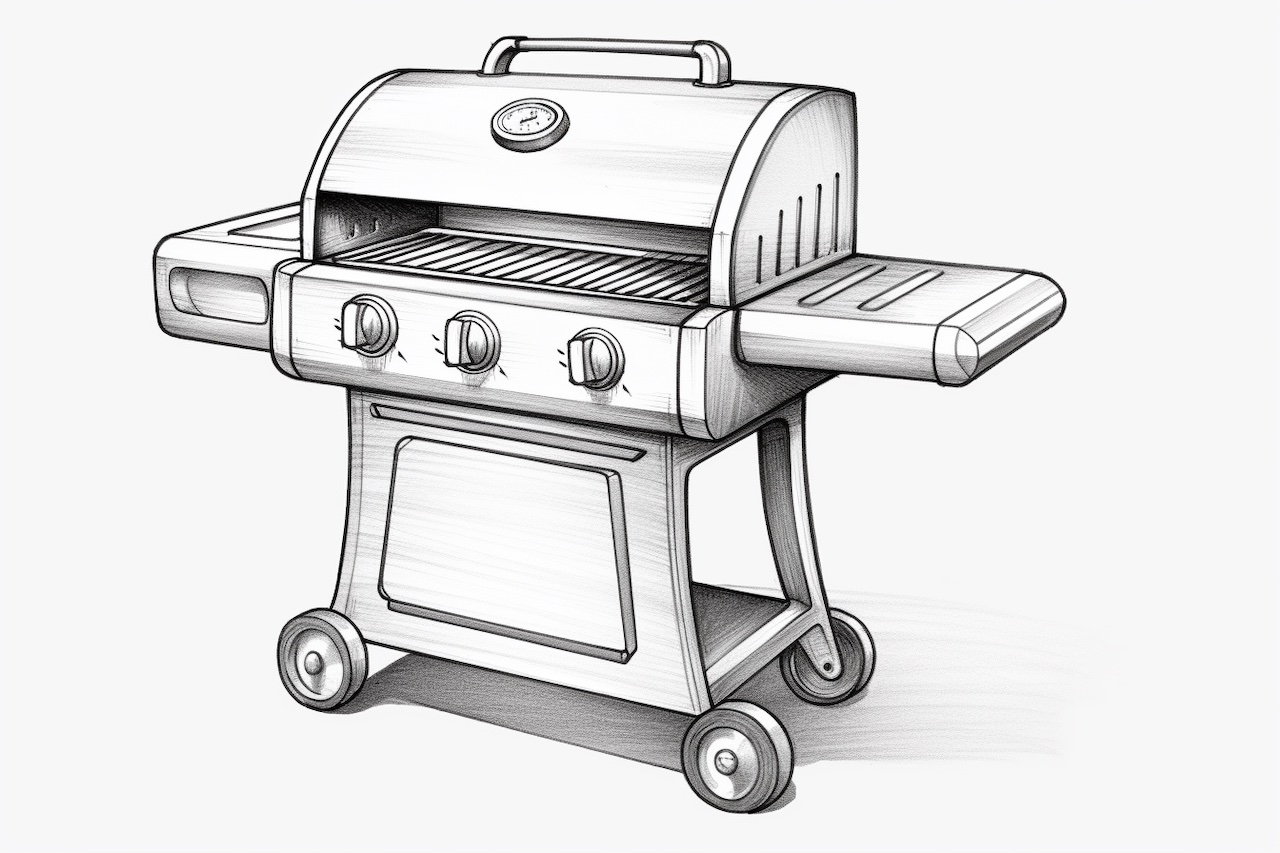
Grills are a popular subject for artists due to their intricate patterns and reflective surfaces. Whether you are a beginner or an experienced artist, learning how to draw a grill can be a fun and rewarding experience. In this step-by-step tutorial, I will guide you through the process of drawing a grill, using simple shapes and lines. So grab your drawing materials and let’s get started!
Materials Required
Before we begin, let’s make sure you have all the necessary materials to draw a grill. Here’s what you’ll need:
- Pencil: Start with a sharp pencil for sketching and outlining. You can use a regular graphite pencil or a mechanical pencil with a thin lead for more precision.
- Paper: Choose a smooth, high-quality paper to ensure your lines and shading come out clean and crisp. A sketch pad or drawing paper would work well.
- Eraser: Have a good eraser handy to correct any mistakes or to lighten areas as needed.
- Ruler: A straight ruler will help you maintain clean, straight lines. Make sure it’s transparent or has a non-reflective surface to avoid distractions.
- Fine-Liner or Pen: A fine-liner or a pen with a thin point will be useful for adding details and refining your drawing.
Now that you have your materials ready, let’s dive into the steps of drawing a grill!
Step 1: Start with Basic Shapes
Begin by lightly sketching the basic outline of the grill using simple shapes. Start with a rectangle as the main body of the grill. Then, add two smaller rectangles on both sides for the side panels. These panels will give depth to your drawing. Remember to keep your lines light and easily erasable.
Step 2: Add the Grates
Inside the main body of the grill, draw a series of evenly spaced horizontal lines to represent the grates. These lines should be parallel to each other and extend from one side of the grill to the other. Make sure the lines are evenly spaced for a realistic look.
Step 3: Draw the Lid and Handle
On top of the main body of the grill, draw a slightly curved rectangle to represent the lid. Add a small rectangle on the front of the lid to create the handle. Make the lid slightly taller than the main body to show that it is raised.
Step 4: Add the Legs and Wheels
Draw two pairs of rectangles extending down from the main body of the grill to create the legs. These rectangles should be slightly slanted inward to give stability to the grill. Add two circles to each leg to represent the wheels. Make sure the wheels are evenly spaced and aligned.
Step 5: Refine the Details
Now that you have the basic structure of the grill in place, it’s time to add more details. Use your ruler and fine-liner to define the edges of the grates, lid, and side panels. Add screws or bolts along the edges for a more realistic look. Don’t forget to add a hinge on one side of the lid to connect it to the main body of the grill.
Step 6: Shade and Add Texture
To create a sense of depth and realism, add shading and texture to your drawing. Identify the light source and imagine where the shadows would fall. Use light, even strokes to shade the areas that would be in shadow, such as the underside of the lid and the inner parts of the grill. Add subtle texture to the grates and other metal surfaces by lightly cross-hatching or using small, circular strokes.
Step 7: Final Touches
At this point, your grill drawing is almost complete. Take a step back and assess your work. Add any final details or adjustments that you feel are necessary. Darken some areas to create more contrast and depth, and erase any remaining sketch lines that are no longer needed. Remember, it’s okay to make mistakes along the way – they can be corrected or incorporated into the final piece!
Conclusion
Drawing a grill can be a challenging yet rewarding exercise for artists of all skill levels. By following these step-by-step instructions, you have learned how to draw a grill using basic shapes, lines, and shading techniques. Remember to have fun and experiment with different textures and details to make your drawing unique. With practice, you will improve your skills and create stunning artworks that capture the beauty and complexity of the world around us.
Now go ahead and grab your materials, start drawing, and enjoy the process of bringing a grill to life on paper!