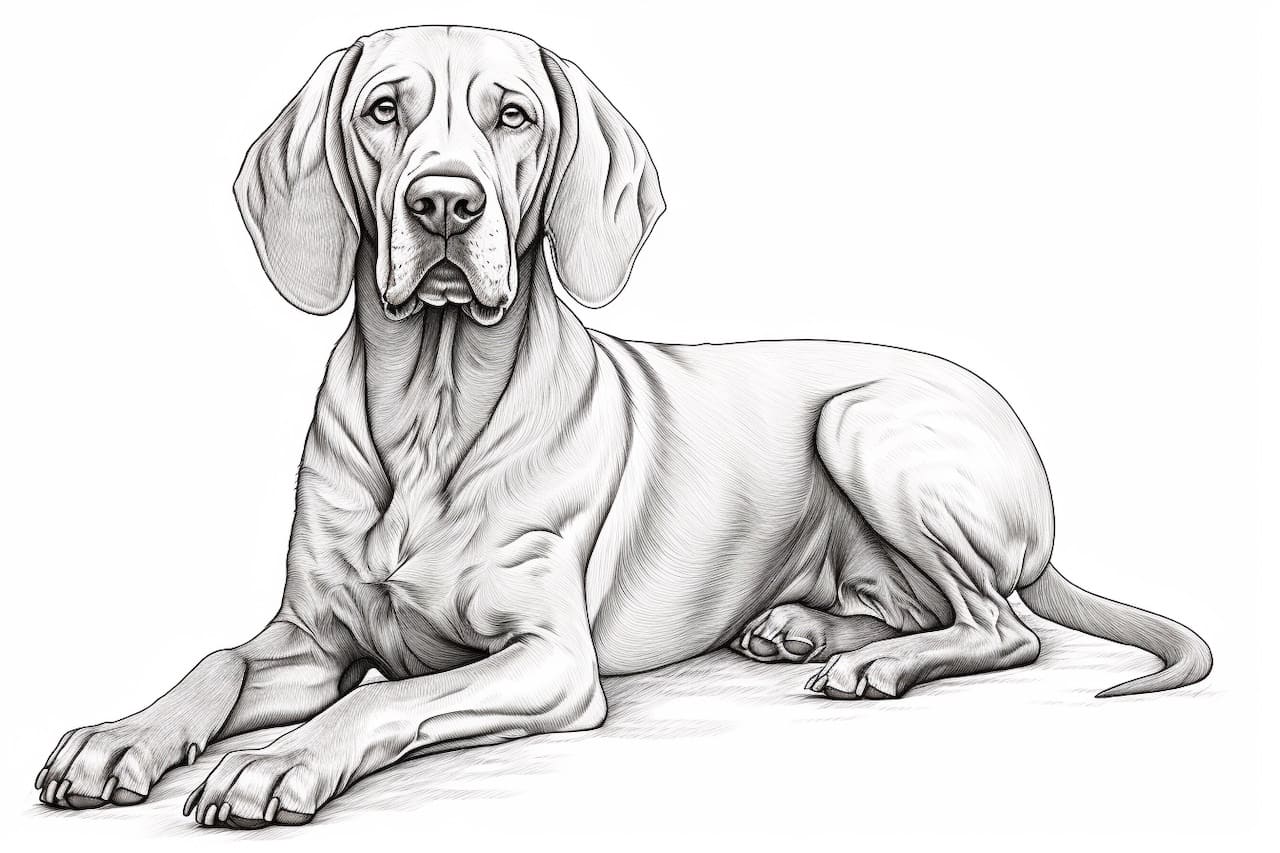
Welcome to the world of art! In this step-by-step tutorial, we’ll explore the process of drawing a Redbone Coonhound. With its sleek and muscular build, this breed of hound is an excellent subject for practicing your drawing skills.
Before we start, let’s gather the materials you’ll need:
- Drawing paper
- Pencil
- Eraser
- Fine-tipped black marker
- Colored pencils or markers (optional)
Now that we have everything ready, let’s begin our artistic journey!
Step 1: Sketch the Basic Shapes
Start by lightly sketching the basic shapes that make up the Redbone Coonhound’s body. Begin with a large oval shape for the main body, followed by a smaller circle for the head. Add two lines to indicate the neck and spine, and a couple of circles for the shoulders and hips.
Step 2: Refine the Head and Face
Refine the head shape by adding details such as the snout, ears, and eyes. The Redbone Coonhound has a long, narrow snout, so pay attention to this feature. Add almond-shaped eyes and triangular ears on top of the head. Use reference images or pictures of the breed for accuracy.
Step 3: Outline the Body
Now it’s time to outline the body of the Redbone Coonhound. Use long, flowing lines to depict the muscular form of the dog. Start from the neck and move towards the back, gradually adding the chest, back, and hindquarters. Pay attention to the dog’s posture, as Redbone Coonhounds typically have a proud and alert stance.
Step 4: Add the Legs and Tail
Draw the legs by adding curved lines from the body towards the ground. Redbone Coonhounds have strong and sturdy legs, so ensure that your lines reflect this characteristic. Don’t forget to add the paws at the end of each leg. Finally, depict the tail with a long, sweeping line that curls slightly at the end.
Step 5: Refine the Features
Now that we have the basic structure in place, it’s time to refine the features of the Redbone Coonhound. Add details to the face, such as the nose, mouth, and eyebrows. Enhance the eyes by adding pupils and highlights to make them more expressive. Pay attention to the shape and texture of the ears, as they are an important characteristic of the breed.
Step 6: Erase Unnecessary Lines
Carefully go over your drawing and erase any unnecessary lines that you no longer need. Use your eraser to clean up the sketch and make it look more polished.
Step 7: Define the Outline
With the sketch refined, use a fine-tipped black marker to define the outline of the Redbone Coonhound. Start from the head and work your way downwards, outlining the body, legs, and tail. Use confident and smooth strokes to create a clean and professional look.
Step 8: Add Fur Texture (optional)
If you want to add more realism to your drawing, consider adding fur texture. Use short, overlapping strokes to mimic the texture of the Redbone Coonhound’s coat. You can achieve this effect using either colored pencils or markers.
Step 9: Color Your Drawing (optional)
To bring your drawing to life, you can add color using colored pencils or markers. Redbone Coonhounds have a distinctive red coat, so use shades of brown and red to color the body. Add some black for the nose and eyes, and use lighter colors for the chest and paws. Remember to use smooth and even strokes for a polished finish.
Conclusion
Congratulations! You have successfully learned how to draw a Redbone Coonhound. By following these step-by-step instructions and using your creativity, you can now create beautiful drawings of this majestic breed. Remember to practice regularly and have fun exploring the world of art.