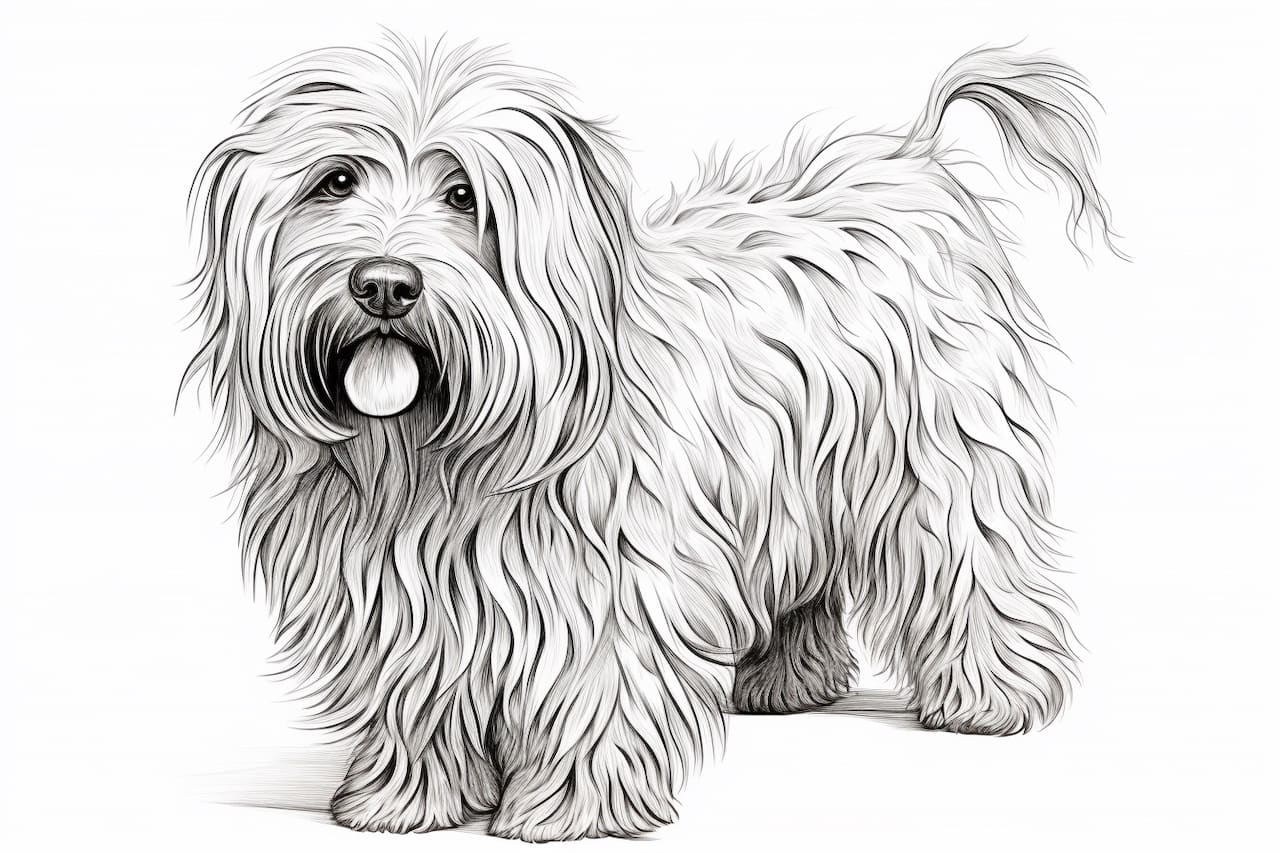
Welcome to this step-by-step guide on how to draw a Puli. Whether you’re an experienced artist looking to improve your skills or a beginner who wants to learn the basics, this tutorial will help you create a realistic and detailed drawing of this unique dog breed. The Puli is known for its distinctive corded coat and lively personality, making it an interesting subject to draw. So, grab your pencils and let’s get started!
Materials Required
Before we begin, let’s gather the materials you’ll need to create your Puli drawing:
- Drawing paper: Choose a high-quality paper that is suitable for your preferred drawing medium.
- Pencils: Get a range of pencils with different lead hardness, such as 2H, HB, 2B, and 4B.
- Eraser: A kneaded eraser is ideal for easily correcting mistakes without leaving residue.
- Blending tools: You can use blending stumps, tortillons, or even a tissue for smudging and blending.
- Reference photo: Find a clear, high-resolution image of a Puli to guide your drawing.
Now that we have our materials ready, let’s dive into the step-by-step process of drawing a Puli.
Step 1: Basic Outline
Start by lightly sketching the basic outline of the Puli’s body using a harder pencil, such as the 2H. Pay attention to the proportions and shape of the head, body, and legs. Use simple geometric shapes as guides, such as circles for the head and body, and lines for the legs.
Step 2: Facial Features
Focus on the Puli’s face in this step. Observe the reference photo closely to capture the unique characteristics of the breed. Add the eyes, nose, and mouth, paying attention to their placement and shape. Use the reference lines you drew in the previous step as a guide.
Step 3: Add Details to the Face
Refine the facial features by adding more details. Add fur around the eyes, define the shape of the ears, and add texture to the nose. Use short, light strokes to suggest the Puli’s curly coat, and vary the pressure on your pencil to create depth and dimension.
Step 4: Draw the Body and Legs
Now it’s time to tackle the Puli’s body and legs. Use the reference lines as a guide to sketch the shape of the body, adding volume and muscle definition. Pay attention to the unique shape of the Puli’s chest and back. Add the legs, making sure they are properly proportioned and positioned.
Step 5: Add Texture and Detail to the Coat
The Puli’s corded coat is one of its most distinctive features. Take your time to add the texture and details of the coat, using short, curved lines to represent the cords. Vary the thickness and darkness of the lines to create a realistic texture. Use a combination of the 2B and 4B pencils for this step.
Step 6: Refine and Shade
Once you have the basic outline and details in place, it’s time to refine your drawing and add shading. Use a softer pencil, like the 2B or 4B, to darken the areas that need more depth and shadow. Pay attention to the reference photo to understand where the light is coming from and how it affects the Puli’s form.
Step 7: Final Details and Highlights
In this step, add the final details to your Puli drawing. Enhance the facial features, refine the fur texture, and add any additional details that will bring your drawing to life. Use an eraser to create highlights and add a touch of realism to the eyes, nose, and fur.
Conclusion
Congratulations on completing your Puli drawing! By following these step-by-step instructions and paying attention to the unique features of this breed, you have created a realistic and detailed representation of a Puli. Don’t be afraid to experiment with different techniques and add your personal touch to make your drawing truly unique. With practice and patience, your drawing skills will continue to improve. Remember to have fun throughout the process and enjoy the journey of capturing the beauty of the Puli on paper.