Welcome to this step-by-step guide on how to draw a realistic snake! Whether you are an aspiring artist or just looking to improve your drawing skills, this tutorial will provide you with easy-to-follow instructions to create a lifelike snake illustration. By following these steps, you will learn how to capture the intricate details and textures of a snake, resulting in a stunning and realistic final drawing. So, let’s get started!
Materials Required
Before we begin, gather the following materials:
- Drawing paper
- Pencils (preferably a range of graphite pencils, such as 2B, 4B, and 6B)
- Eraser
- Blending stump or cotton swabs
- Reference photo of a snake (optional but recommended)
Now that you have your materials ready, let’s dive into the step-by-step process of drawing a realistic snake.
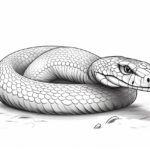
Step 1: Sketch the Basic Shape
Start by lightly sketching the basic shape of the snake using a light pencil. Begin with a curved line that represents the snake’s body. Keep in mind that snakes can have various body shapes, so choose one that you find interesting. Remember, this is just the initial sketch, so don’t worry about getting it perfect. Focus on capturing the overall form and posture of the snake.
Step 2: Add the Head and Tail
Next, add the head and tail to the basic shape you sketched in the previous step. Observe the proportions of the snake’s head and tail in relation to its body. Pay attention to the angle and position of these features, as they can vary depending on the snake species. Take your time to ensure the head and tail accurately reflect the anatomy of a snake.
Step 3: Refine the Outline
Once you are satisfied with the basic shape, start refining the outline of the snake’s body, head, and tail. Use a darker pencil to create more defined lines, erasing any unnecessary guidelines as you go along. This step is crucial for achieving a realistic look, so pay close attention to the details. Focus on the curves, scales, and contours that make up the snake’s unique appearance.
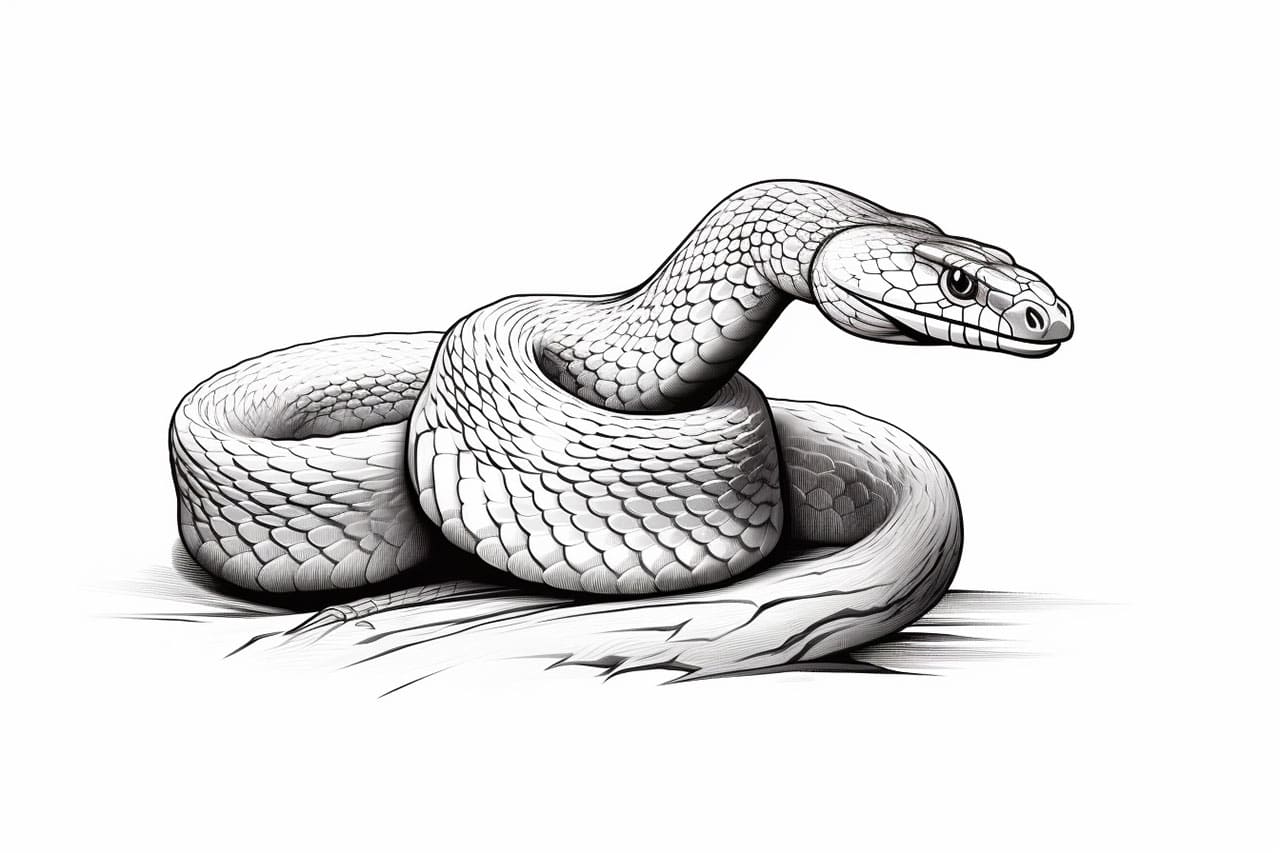
Step 4: Add Details to the Head
Now, let’s focus on the intricate details of the snake’s head. Study your reference photo or a real-life snake to capture the specific characteristics of the species you are drawing. Pay attention to the shape and position of the eyes, nostrils, and mouth. Take your time to carefully render the textures and scales of the snake’s skin. Use your blending stump or a cotton swab to create smooth transitions and shading.
Step 5: Outline the Scales
One of the defining features of a snake is its scales. To create a realistic snake drawing, carefully outline the scales along the body, head, and tail. Observe the patterns and texture of the scales, ensuring that they follow the contours of the snake’s body. Take your time to render the scales realistically, alternating between lighter and darker shading to create depth and dimension.
Step 6: Shade the Body
Now that the outline and scales are in place, it’s time to add shading to the body of the snake. Start with a mid-tone shading and gradually build up the darker areas. Pay attention to the overall lighting and shadowing of your reference or imagination. Use varying pressure on your pencil to create smooth transitions and depth. Remember, snakes have sleek bodies, so aim for a glossy and reflective appearance.
Step 7: Add Highlights and Details
To enhance the realism of your snake drawing, add highlights and fine details. Use an eraser to carefully lift off graphite and create bright spots where light hits the snake’s body. Pay attention to the direction and intensity of the light source. Add subtle textures and tiny details, like individual scales or small imperfections in the skin. These tiny touches will bring your snake drawing to life.
Step 8: Finalize the Drawing
Take a step back and evaluate your drawing. Make any necessary adjustments to the proportions, shapes, or shading. Use your eraser to clean up any stray lines or smudges. If you’re satisfied with the result, you can darken the shadows and refine the highlights to create a more polished look. Take your time and don’t rush the final touches. Remember, practice makes perfect, so keep drawing snakes to further refine your skills.
Conclusion
Congratulations on completing this step-by-step guide on how to draw a realistic snake! Drawing a lifelike snake requires patience, attention to detail, and practice. With each attempt, you will gain a deeper understanding of the unique anatomy and textures of snakes. Remember to have fun and enjoy the process of bringing a snake to life on paper.
We hope this tutorial has provided you with valuable insights and techniques to enhance your drawing abilities. By following the steps outlined in this guide, you can create impressive and realistic snake illustrations. So grab your pencils, get inspired, and let your creativity slither onto the paper!
Want more snakes? Learn how to draw a rattlesnake.