Welcome to this step-by-step guide on how to draw a python! Whether you’re an experienced artist or a beginner, this tutorial will show you how to create a realistic representation of this fascinating snake. By following these simple instructions, you’ll be able to capture the beauty and grace of a python on paper. So grab your drawing supplies and let’s get started!
Materials Required
Before we begin, make sure you have the following materials ready:
- Drawing paper: Choose a smooth, heavyweight paper that is suitable for your preferred drawing medium.
- Pencils: We recommend using a range of graphite pencils, such as HB, 2B, and 4B, to achieve different tones and shading effects.
- Eraser: Have a good quality eraser on hand to correct any mistakes and make necessary adjustments to your drawing.
- Blending tools: You can use a blending stump, cotton swabs, or even your fingers to blend shading and create smooth transitions.
- Reference image: Find a clear and detailed reference image of a python to help you accurately depict its features.
Now that you have everything you need, let’s dive into the step-by-step process of drawing a python.
Step 1: Sketch the Basic Shape
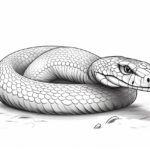
Start by lightly sketching the basic shape of the python using a HB pencil. Begin with a large oval in the middle of the page to represent the python’s body. Then, add a slightly smaller oval on one end of the larger oval to form the head. Finally, sketch a curvy line connecting the two ovals to create the snake’s neck.
Step 2: Outline the Body
Now, using a darker pencil, such as a 2B, carefully outline the body of the python. Start at the head and follow the curves of the initial sketch to define the body shape. Pay attention to the contours and proportions, keeping in mind the gentle curves of the snake’s muscular body.
Step 3: Add the Details
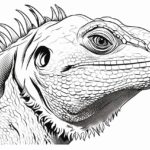
Next, it’s time to add the details that will bring your python drawing to life. Start by sketching the eyes of the snake. Pay close attention to the reference image to capture the shape and placement of the eyes accurately. Then, add the nostrils, mouth, and tongue, carefully observing their positions in relation to the head.
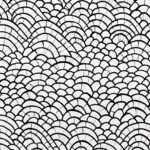
Once you have the facial features in place, move on to adding the scales. Start from the head and work your way down the body, sketching small, overlapping shapes to represent the python’s scales. Remember to vary the sizes and angles of the scales for a more natural look.
Step 4: Refine the Contours
With the basic details in place, go back over your drawing and refine the contours of the python’s body. Use your darker pencil to add more depth and definition to the body shape, emphasizing the curves and highlights. Pay attention to the light source in your reference image and use it as a guide for shading and adding depth to your drawing.
Step 5: Shading and Textures
To add realism and depth to your python drawing, it’s time to focus on shading and textures. Begin by shading the areas of the snake’s body that are in shadow. Use a darker pencil, such as a 4B, and gradually build up the tone by layering soft, hatched lines. Remember to follow the contours of the snake’s body to create a three-dimensional effect.
For the lighter areas, use a lighter pencil or an eraser to create highlights and to blend and smooth the transitions between light and shadow. Python scales have an intricate pattern, so take your time to add these details to your drawing. You can use a sharp pencil or a fine-tip pen to carefully draw the individual scales.
Step 6: Final Touches
Now that you’ve added shading and textures, take a step back and evaluate your drawing. Look for any areas that need refinement or adjustment. Use your eraser to make any necessary corrections or to lighten certain areas. Pay attention to the overall balance and proportions of your drawing.
Conclusion
Congratulations on completing your python drawing! By following these step-by-step instructions, you’ve learned how to capture the beauty and essence of a python on paper. Remember, practice is key to improving your drawing skills, so don’t be afraid to experiment and try different techniques. With time and dedication, you’ll be able to create stunning snake drawings and explore various subjects in the world of art.