How to Draw a Python
Learn how to draw a python in this step-by-step tutorial. This clear and concise guide will help you create a realistic and detailed python drawing.
Materials You'll Need
- Pencil
- Paper
- Eraser
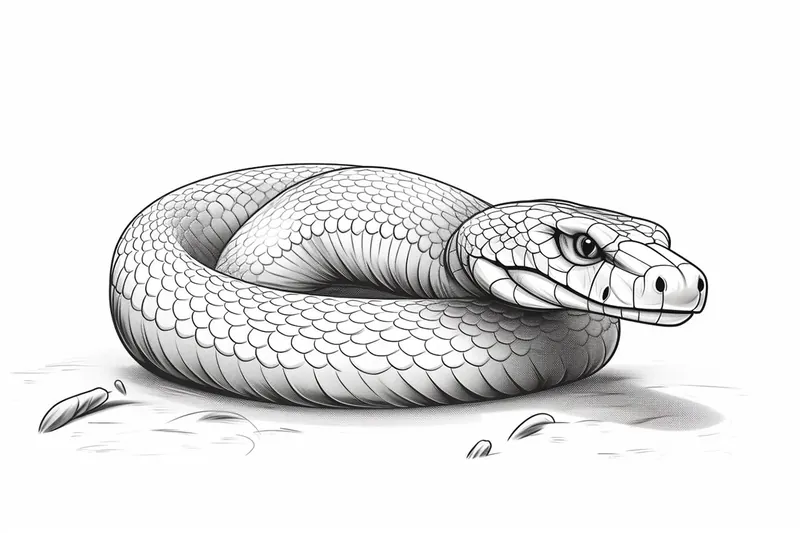
![]() Welcome to this detailed step-by-step guide on how to draw a python! Drawing can be a deeply fulfilling and creative outlet, whether you're an experienced artist or just venturing into the world of art for the first time. In this tutorial, we will break down the drawing process into manageable steps, ensuring that you can produce a stunning and lifelike representation of a python.
Welcome to this detailed step-by-step guide on how to draw a python! Drawing can be a deeply fulfilling and creative outlet, whether you're an experienced artist or just venturing into the world of art for the first time. In this tutorial, we will break down the drawing process into manageable steps, ensuring that you can produce a stunning and lifelike representation of a python.
Before we dive into the exciting world of pencil strokes and shading, it's essential to gather the right materials. Having your supplies handy will make your drawing experience smooth and enjoyable, allowing you to focus on refining your skills. So, grab your drawing tools and get ready to unleash your inner artist!
Drawing a python is not just about replicating its form; it's also about capturing its unique essence and character. We'll guide you through each phase of the drawing, from the initial sketch to adding the final touches, giving you the confidence to create a beautiful piece. Whether you're hoping to impress your friends or simply want to explore drawing as a hobby, this guide is here to help every step of the way. Let's get started!
Materials Required:
Before we dive into the drawing process, make sure you have the following materials on hand:
- Drawing paper
- Pencil
- Eraser
- Fine-tip markers or pens
- Colored pencils or markers (optional)
- Reference photo of a python (recommended)
Having these materials ready will ensure that you have everything you need to create your python drawing.
Step 1: Sketching the Basic Shapes
Start by lightly sketching the basic shapes that make up the body of the python. Begin with an oval shape for the head, followed by a long and curvy shape for the body. Remember to keep your pencil lines light, as these are just guidelines and will be erased later.
Step 2: Adding Details to the Head
Now, let's add some details to the head of our python. Draw a smaller oval within the larger head shape to represent the eye, and another small oval for the nostril. Next, add a curved line for the mouth, and draw a few small lines to indicate scales on the skin. Take your time with this step to capture the unique characteristics of a python's head.
Step 3: Outlining the Body
Using the guidelines you sketched in step 1, start outlining the body of the python. Work your way from the head to the tail, following the curvy shape you initially drew. Pay attention to the thickness and tapering of the body as you go along. Once you have the basic outline, you can erase the guidelines.
Step 4: Adding Scales and Texture
Now it's time to add some texture and detail to the python's body. Start by drawing a series of curved lines across the body to represent the scales. These lines should follow the contours of the body, giving it a three-dimensional appearance. Vary the size and shape of the scales to create a realistic effect.
Step 5: Drawing Patterns and Markings
Many pythons have distinctive patterns and markings on their skin. Take a look at your reference photo or get creative and come up with your own unique pattern. Use your fine-tip markers or pens to carefully draw these patterns on the body of your python. Make sure to let the ink dry before erasing any pencil lines underneath.
Step 6: Filling in the Details
To add depth and dimension to your python drawing, focus on filling in the details. Pay attention to the shading and highlights to create a more realistic and three-dimensional appearance. You can use colored pencils or markers to add color to your drawing if you prefer. Experiment with different techniques and colors to bring your python to life.
Step 7: Final Touches and Cleanup
Take a step back and examine your drawing. Are there any areas that need refinement or additional details? Now is the time to make any necessary adjustments. Use your eraser to clean up any stray pencil marks and make your drawing look polished.
Tip: To effectively capture the essence of a python in your drawing, start with a light pencil sketch to outline its distinctive curves and patterns. Pay close attention to the head shape, which is often triangular, and the body that gracefully tapers as it moves. Use a blending stump or your fingers to create smooth transitions between shades when adding texture, mimicking the python's scales. For added depth, try layering your colors with colored pencils or markers, focusing on the darker tones near the spine and lighter shades on the belly. Remember to observe reference images closely to understand the unique color variations and patterns that make each python special; this will greatly enhance the realism of your artwork.
Conclusion
Congratulations on completing your python drawing! By following these step-by-step instructions, you have learned how to create a realistic and detailed representation of a python. Remember to practice regularly and have fun with your artwork. With time and dedication, your drawing skills will continue to improve. So keep sketching, and who knows what amazing creations you'll be able to bring to life next!