How to Draw a Raisin
Learn how to draw a raisin step-by-step with this helpful guide. Enhance your drawing skills and create a realistic representation of this dried fruit.
Materials You'll Need
- Pencil
- Paper
- Eraser
Welcome to this detailed tutorial on how to draw a raisin! Drawing a raisin may seem simple at first glance, but capturing its unique texture, irregular shape, and subtle shading offers a wonderful opportunity to develop your observational skills and attention to detail. Raisins have a rich surface with wrinkles and folds that create an interesting challenge for artists looking to enhance their ability to render organic textures realistically. Whether you're a beginner eager to build foundational skills or an intermediate artist aiming to refine your technique, this guide will help you bring a lifelike raisin to paper.Learning how to draw a raisin not only improves your proficiency with shading and contouring but also teaches you how to depict light and shadow on uneven surfaces. This tutorial breaks down the process into manageable steps, focusing on sketching the overall shape, adding intricate details, and applying gradual shading to convey depth. By following along, you'll gain confidence in using various pencil grades to create texture and volume, making this a rewarding exercise for anyone wanting to explore still life drawing or improve their realism skills.So, gather your pencils and paper, and prepare to dive into the fascinating world of drawing natural textures. With patience and practice, you'll soon be able to create a raisin that looks almost tangible right on your page. Let's get started and enjoy the creative journey of how to draw a raisin!
Materials Required
Before we begin, let's gather the materials you'll need for this drawing:
- Paper: A smooth surface is recommended, such as drawing paper or sketchbook paper.
- Pencils: You'll need a range of pencils in different grades, such as HB, 2B, 4B, and 6B. These will help you achieve different shades and textures.
- Eraser: A kneaded eraser is ideal for removing any mistakes or lightening the pencil marks.
- Blending Stump or Tortillon: This tool can be used to blend and smooth out the pencil marks, giving your drawing a more polished look.
Now that we have everything we need, let's dive into the step-by-step process of drawing a raisin!
Step 1: Outline the Basic Shape
Start by lightly sketching the basic outline of the raisin. Raisins are generally irregularly shaped, so don't worry about making it perfectly symmetrical. Use light, short strokes to create the rough shape and size of the raisin.
Step 2: Add Texture to the Raisin
Next, we'll add some texture to make the raisin look more realistic. Raisins have a wrinkled and shriveled appearance. To achieve this, lightly draw small, curved lines all over the surface of the raisin. These lines should follow the contour of the shape and vary in length and direction.
Step 3: Darken the Shadows
To create depth and dimension, we'll darken the shadows on the raisin. Take a softer pencil, such as a 4B or 6B, and carefully shade in the areas that would be in shadow. These areas are typically found on the bottom and sides of the raisin where the light doesn't reach as easily. Use light, circular motions to build up the layers of shading gradually, ensuring a smooth transition from light to dark.
Step 4: Add Highlights
Now, let's add some highlights to make the raisin appear more three-dimensional. Identify the areas where the light would hit the raisin and use your eraser to gently lift off some of the pencil marks. This will create the illusion of light reflecting off the surface. Be subtle with this step, as raisins have a matte appearance and won't have very intense highlights.
Step 5: Refine the Details
At this point, your raisin should already have a realistic shape and texture. Now, it's time to refine the details. Pay attention to any irregularities, folds, or cracks present on the surface of the raisin. Use a sharp pencil to carefully add these finer details, making sure to keep your strokes light and precise.
Step 6: Add Final Touches
Take a step back and evaluate your drawing. Are there any areas that need further adjustments or enhancements? Use your eraser or pencil to make any necessary refinements. This is also a good time to add any additional shading or texture if you feel it's needed. Remember, the goal is to capture the essence of a raisin, so don't be too concerned with achieving perfection.
Conclusion
Congratulations! You have successfully learned how to draw a raisin. By following these step-by-step instructions and using the right materials, you can create a realistic and detailed representation of this dried fruit. Drawing is a skill that improves with practice, so don't hesitate to keep exploring and experimenting with different techniques.
Remember, the key to drawing is observation. Take the time to study and appreciate the unique characteristics of the objects you're drawing. With time and patience, you'll be amazed at the progress you can make.
I hope you enjoyed this guide on how to draw a raisin. Happy drawing!
Fun Facts About Raisins
- Raisins are dried grapes, and drying them concentrates their natural sugars, making them a sweet snack.
- California produces about 99% of the raisins grown in the United States, making it the largest raisin producer in the world.
- Raisins have been found in ancient Egyptian tombs, showing they have been enjoyed for thousands of years.
- Eating raisins can help improve digestion due to their high fiber content.
- Raisins contain antioxidants that may help protect cells from damage and reduce inflammation.
- There are different types of raisins, including golden, sultana, and currants, each made from different grape varieties or drying methods.
- Raisins are often used in baking and cooking, adding natural sweetness and texture to dishes like bread, cookies, and salads.
- Because they are dried, raisins have a much longer shelf life than fresh grapes, making them a convenient pantry staple.
Suggestions for Scenes and Settings for Raisin Drawings
- A close-up study of a single raisin resting on a textured wooden table, highlighting the contrast between the raisin's wrinkles and the grain of the wood.
- A cluster of raisins spilling out of a rustic burlap sack, with soft shadows to emphasize their varied shapes and textures.
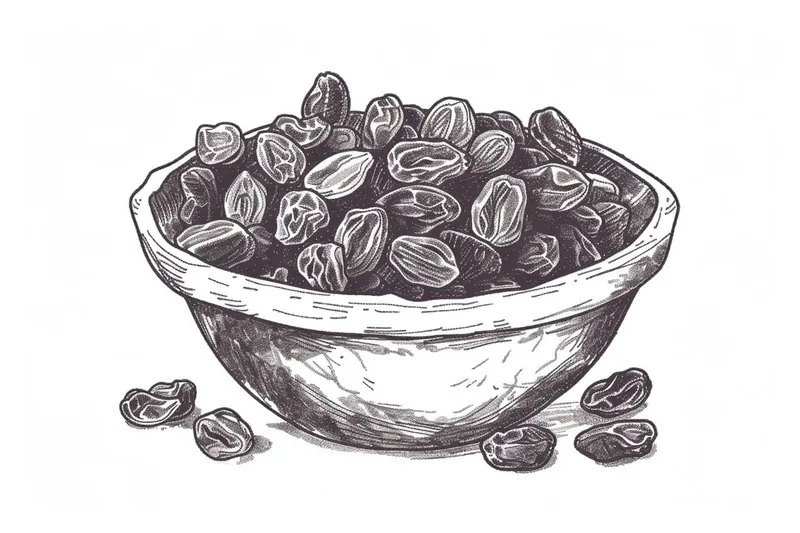
- A still life composition featuring a bowl filled with raisins, surrounded by other dried fruits and nuts, focusing on the interplay of light and shadow.
- A magnified section of a raisin surface, showcasing the intricate folds and crevices as an abstract pattern study.
- A playful scene of anthropomorphic raisins with subtle facial features, expressing different emotions through their wrinkled surfaces.
- A natural setting with raisins scattered among grapevine leaves and tendrils, connecting the dried fruit to its origin.
- A scientific illustration style drawing of a raisin sliced in half, revealing the inside texture and seed placement.
- A monochromatic study of raisins arranged in a gradient from light to dark, demonstrating shading techniques and pencil grades.
- An imaginative scene where a raisin is depicted as a tiny planet, complete with miniature landscapes formed by its folds and crevices.
- A sequential drawing series showing the transformation of a grape into a raisin, exploring changes in texture and form.