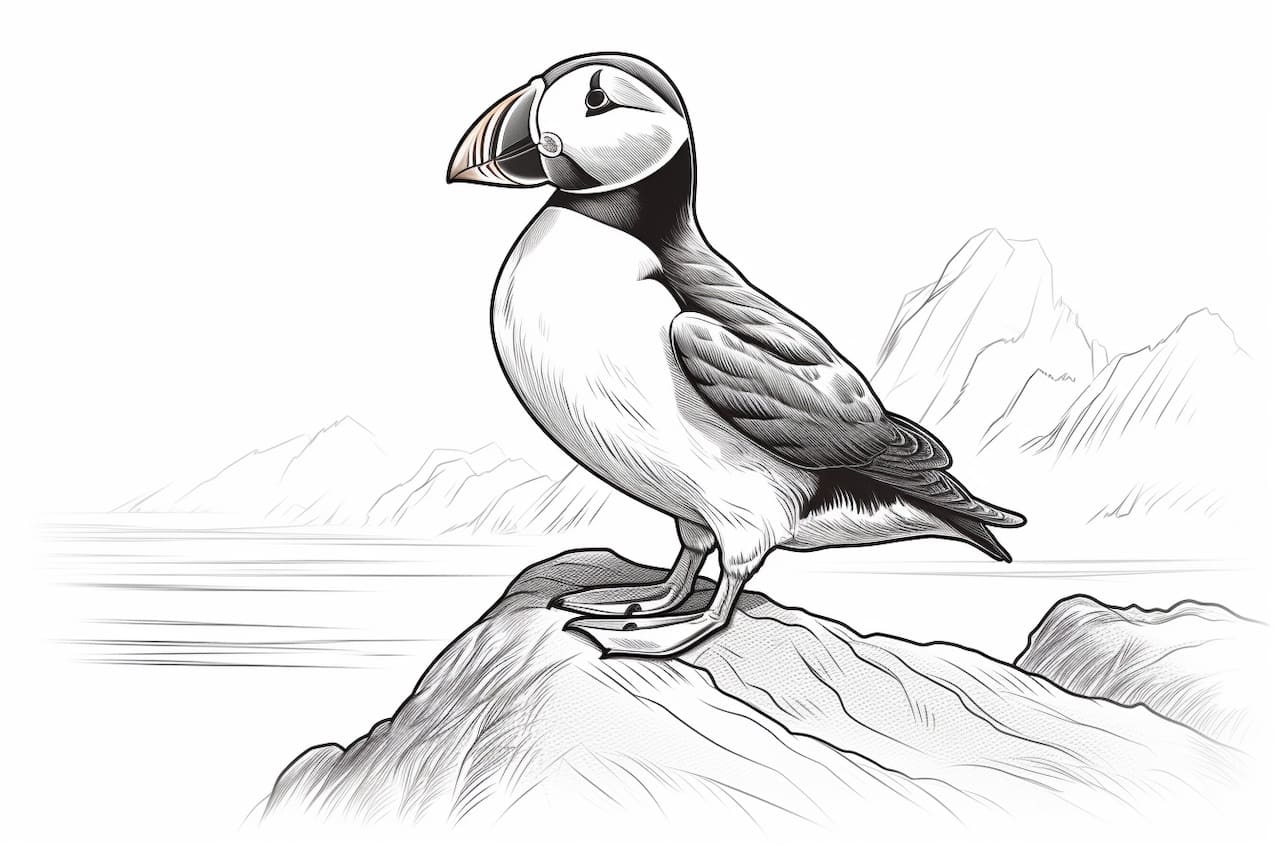
Welcome to this step-by-step guide on how to draw a puffin! In this tutorial, we will break down the process into easy-to-follow steps so that even beginners can create a realistic and detailed drawing of this fascinating bird. So grab your drawing materials and let’s get started!
Materials Required
Before we begin, make sure you have the following materials at hand:
- Drawing paper: You can use any type of paper suitable for drawing, but using a thicker paper like bristol board or sketch paper is recommended.
- Pencils: It’s best to have a range of pencils with different hardness ratings, such as a 2H, HB, 2B, and 4B. These will give you a variety of shading options.
- Eraser: A kneaded eraser or a white vinyl eraser is ideal for removing pencil marks without damaging the paper.
- Fine-tip black pen: This will be used for adding final details and outlines to your drawing.
- Colored pencils or markers (optional): If you want to add color to your puffin drawing, colored pencils or markers can be a great addition.
Now that you have all the necessary materials, let’s dive into the step-by-step process of drawing a puffin!
Step 1: Basic Shape and Proportions
To begin, lightly sketch a simple oval shape for the body of the puffin. This will serve as a guide to getting the proportions right. Next, add a smaller oval on top of the body for the head. Remember, at this stage, it’s important to keep your lines light so that you can easily erase and adjust them later.
Step 2: Outline the Beak
The puffin is well-known for its unique and colorful beak. To draw the beak, start by sketching a triangular shape that extends from the head. Make sure the tip of the beak is slightly curved. Add a line down the center of the beak to give it depth.
Step 3: Draw the Eye and Facial Features
Now it’s time to add the eye and other facial features. Start by sketching a small circle for the eye, leaving a small white highlight at the top left-side of the eye. Next, draw a curved line above the eye to represent the eyebrow. Then, add a short, curved line below the eye to indicate the lower lid. Finally, sketch a small dot on either side of the head to represent the nostrils.
Step 4: Outline the Puffin’s Body and Wing
Using the basic shapes as a guide, start to outline the puffin’s body and wing. Begin by drawing a curved line from the head to the back of the body. Then, draw a slightly curved line from the head to the beak, creating the neck. Connect the body to the beak with a curved line to form the chest. Next, draw a wing extending from the back of the body, making sure to add some feather-like details.
Step 5: Add Feet and Tail
Puffins have unique and distinctive feet. Draw two curved lines extending from the bottom of the body to create the feet. Each foot should have three toes, so draw three short, curved lines at the end of each foot. For the tail, sketch a small, fan-like shape at the back of the body.
Step 6: Refine the Puffin’s Shape and Add Details
Now that you have the basic outline, it’s time to refine the puffin’s shape and add more details. Start by erasing any unnecessary lines and smoothening out the shapes. Then, add feather-like textures to the body, wing, and head using short, curved lines. Pay close attention to the direction of the feathers, as they can give the puffin a more realistic appearance.
Step 7: Shading and Texturing
To bring your puffin drawing to life, it’s important to add shading and texture. Begin by identifying the light source in your drawing, then use a lighter pencil (e.g., 2H) to add subtle shading to the areas that would be in shadow. Gradually build up the shading with darker pencils (e.g., 2B, 4B) to create depth and dimension. Use hatching or cross-hatching techniques to add texture to the feathers and other areas of the puffin.
Step 8: Finalize and Enhance
In this final step, add any finishing touches to your puffin drawing. Use a fine-tip black pen to carefully outline the main features and details, such as the beak, eyes, and feathers. This will give your drawing a polished look. If you wish to add color, use colored pencils or markers to bring the puffin’s vibrant plumage to life.
Conclusion
Congratulations on completing your puffin drawing! By following these step-by-step instructions and using your creativity, you have created a stunning representation of this unique bird. Remember, practice makes perfect, so don’t hesitate to try drawing puffins from different angles or in various poses. Keep honing your skills, and soon you’ll master the art of drawing puffins like a pro!