Welcome to this step-by-step guide on how to draw a potion! Whether you are an aspiring artist or simply enjoy the art of drawing, creating your own potion illustration can be a fun and rewarding experience. In this tutorial, we will walk through the process of sketching and detailing a potion, using simple shapes and lines. So grab your pencils and let’s get started!
Materials Required
Before we begin, let’s gather the materials you will need for this drawing tutorial:
- Drawing paper
- Pencils (HB and 2B recommended)
- Eraser
- Fine-tip pens or markers (optional)
- Coloring tools (colored pencils, markers, or watercolors) (optional)
Now that we have our materials ready let’s dive into the step-by-step process of drawing a potion.
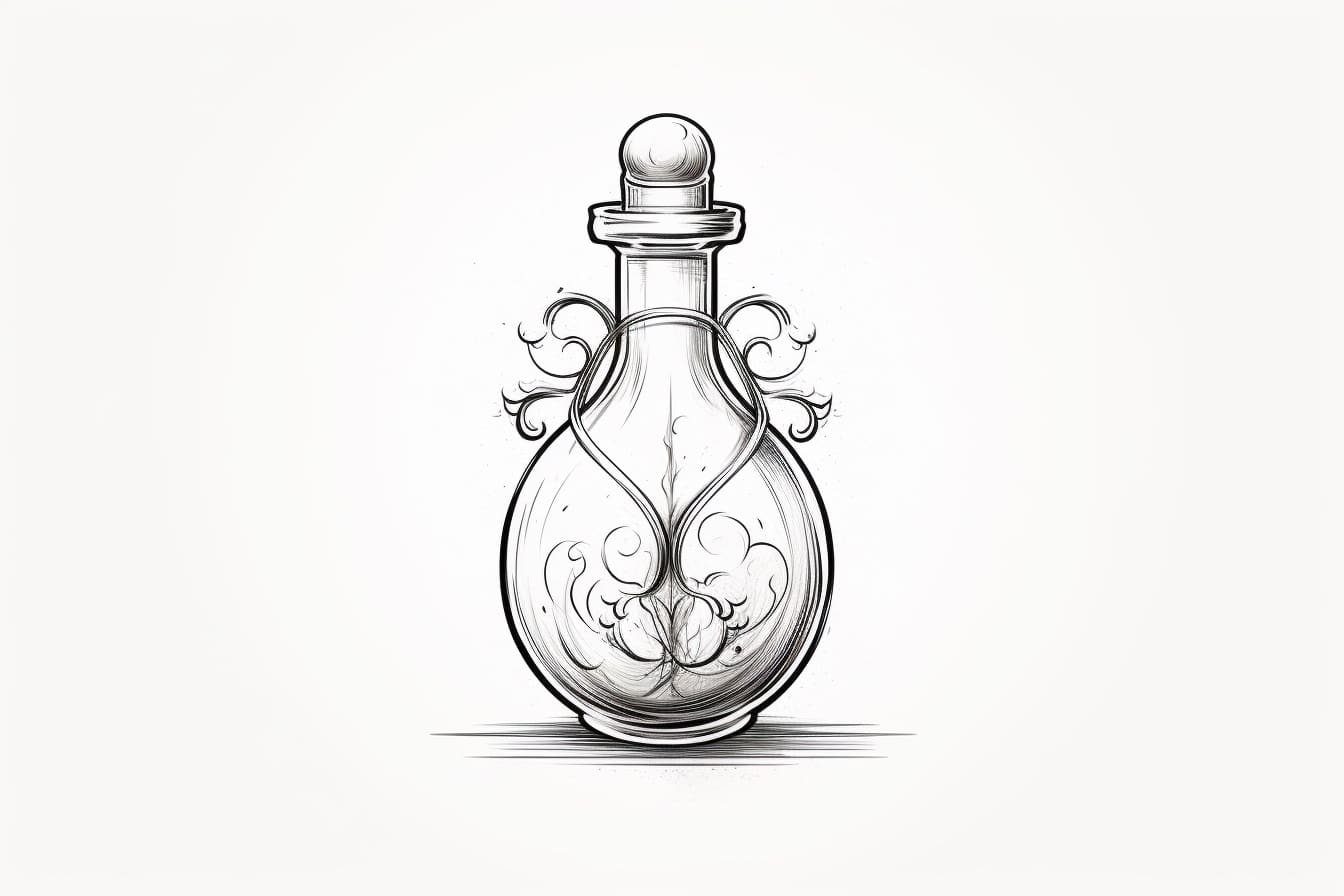
Step 1: Sketch the Outline
Start by lightly sketching a rough outline of the shape you want your potion to have. Potions can come in various forms, so feel free to get creative here! You could go for a classic round bottle shape or experiment with more unique designs. Remember, this is just the initial sketch, so don’t worry about making it perfect just yet.
Step 2: Add Details
Now, let’s start adding some details to your potion. Start by drawing the neck of the bottle, making it slightly narrower than the body. Next, draw a cork or stopper at the top of the neck. You can add texture to the stopper by sketching diagonal lines or crosshatching.
Step 3: Draw the Liquid
Inside the bottle, draw the liquid of your potion. You can make it clear or choose a color of your liking. Start by drawing a curved line to represent the level of the liquid. Then, add some ripples or bubbles to give it a more realistic look. You can achieve this by sketching small curved lines or circles within the liquid.
Step 4: Create Labels or Patterns
To add more character to your potion, you can create labels or patterns on the bottle. Draw a label shape of your choice and add some text or symbols to it. You can also draw intricate patterns or symbols directly on the bottle. Don’t be afraid to get creative and experiment with different designs.
Step 5: Add Shadows and Highlights
To make your potion drawing more three-dimensional, it’s important to add shadows and highlights. Identify the light source in your drawing and imagine where the shadows would fall. Darken those areas with your pencil, gradually building up the shading. Similarly, use your eraser to create highlights on the edges or curves of the potion, where the light would catch.
Step 6: Refine and Detail
Take a step back and assess your drawing so far. This is the stage where you can refine your lines and add any additional details. You can use a finer pencil or a fine-tip pen to go over the main lines and make them more defined. You can also add smaller details, such as embellishments on the bottle or additional texture to the liquid.
Step 7: Color (optional)
If you prefer to add color to your potion drawing, now is the time to do so. You can use colored pencils, markers, or even watercolors to bring your drawing to life. Consider the color of the liquid, the label, and any patterns or designs you have added. Experiment with different color schemes to find the one that suits your vision best.
Conclusion
Drawing a potion can be a delightful and imaginative exercise that allows you to explore your creativity. By following these steps and adding your own personal touch, you can create a unique and visually appealing artwork. Remember to practice and have fun along the way. Happy drawing!