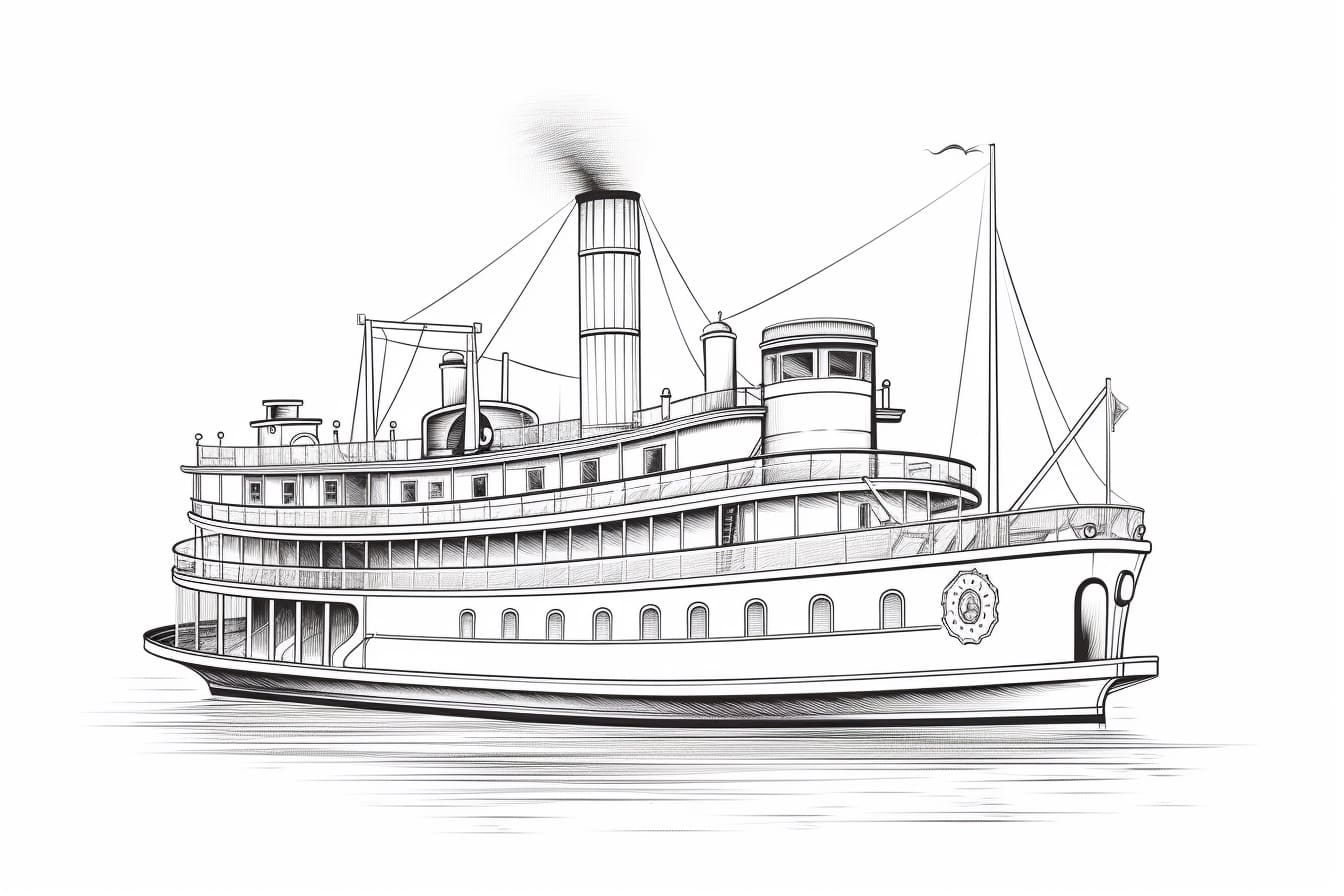
Drawing is a great way to express your creativity and imagination. In this tutorial, we will learn how to draw a steamboat step by step. Steamboats have a unique and charming aesthetic, making them an interesting subject to draw. So grab your pencils and paper, and let’s get started!
Materials Required:
- Drawing paper
- Pencils (HB, 2B, 4B)
- Eraser
- Sharpener
- Ruler
- Compass (optional)
Step 1: Outline the Basic Shapes
Start by lightly sketching the basic shapes that will form the foundation of your steamboat drawing. Begin with a long, curved vertical line for the central structure of the boat. Then, draw a horizontally elongated oval shape at the top for the wheelhouse. Connect the wheelhouse to the main structure with two diagonal lines.
Step 2: Add the Upper Deck
From the main structure, draw a horizontal line towards the front of the steamboat. This line represents the upper deck. Make sure it is parallel to the top of the main structure.
Step 3: Sketch the Chimney
Now, draw a rectangular shape towards the back of the steamboat. This will be the chimney. Make it slightly slanted to add a dynamic touch to your drawing.
Step 4: Detail the Wheelhouse
Add some detail to the wheelhouse by drawing two small, circular windows on the front-facing wall. Then, draw a rectangular door shape in the center. You can also add some lines to depict the window frames and door handle.
Step 5: Draw the Windows
For the main structure, sketch a series of evenly spaced rectangular shapes along the upper deck. These will represent the windows. Make sure they are slightly curved to match the shape of the boat.
Step 6: Define the Steamboat’s Body
Use the basic shapes as guidelines to create a more defined outline for the steamboat’s body. Start by adding curves to the main structure to give it a rounded appearance. Then, follow the outline of the upper deck and chimney, making them appear more solid and three-dimensional. Erase any unnecessary lines from the previous steps.
Step 7: Add Details to the Wheelhouse
To enhance the wheelhouse, draw a curved roof shape above the windows. Add some lines to indicate the planks on the walls and roof. You can also draw a small flag on top of the wheelhouse for an extra touch of authenticity.
Step 8: Refine the Windows
Carefully refine the shape of the windows. Make them appear more realistic by adding a few diagonal lines to represent reflections. Also, add a shaded area beneath each window to create the illusion of depth.
Step 9: Detail the Chimney
Give the chimney some texture by drawing vertical lines along its surface. Add a curved line at the top to depict the opening where the smoke emerges.
Step 10: Define the Upper Deck
Draw a series of horizontal lines across the upper deck to represent the planks. Add some shading to create a sense of depth and dimension.
Step 11: Finalize the Steamboat
Now that you have the basic structure and details in place, it’s time to finalize your drawing. Go over the lines with a darker pencil or pen, emphasizing the main outlines and important details. Erase any remaining guidelines to clean up your drawing.
Conclusion
Drawing a steamboat is a fun and rewarding exercise that allows you to practice your observation and sketching skills. By following these step-by-step instructions and using your creativity, you can create a beautiful steamboat drawing. Remember to take your time, have fun, and don’t be afraid to experiment with different techniques. Happy drawing!