Welcome to this engaging and informative tutorial on how to draw a pillow! Drawing can be a delightful way to express your creativity, and what better subject to begin with than the humble yet charming pillow? Whether you’re an experienced artist or simply someone looking to pick up a new hobby, this step-by-step guide aims to make your drawing experience enjoyable and accessible.
In this article, you will find easy-to-follow instructions that will allow you to craft a realistic and detailed pillow illustration. From basic shapes to the nuances of shading and texture, we’ll cover every aspect necessary for bringing your drawing to life. All you need to do is gather your materials and get inspired!
So, take a moment to relax and immerse yourself in the artistry of drawing. Grab your pencil, paper, and any other tools you’d like to use, and let’s dive headfirst into creating a cozy, inviting pillow illustration!
Materials Required
Before we begin, make sure you have the following materials:
- Paper: Choose a smooth and sturdy paper that can handle different drawing techniques.
- Pencil: Use a mechanical or regular pencil with a range of softness, such as HB, 2B, or 4B.
- Eraser: Have a kneaded eraser or a regular eraser on hand for necessary adjustments.
- Blending tool: You can use a blending stump, tortillon, or even a cotton swab to create smooth shading.
- Coloring materials (optional): Colored pencils, markers, or pastels can add an extra touch to your drawing.
Now that you have everything you need, let’s start drawing!
Step 1: Outline the Shape of the Pillow
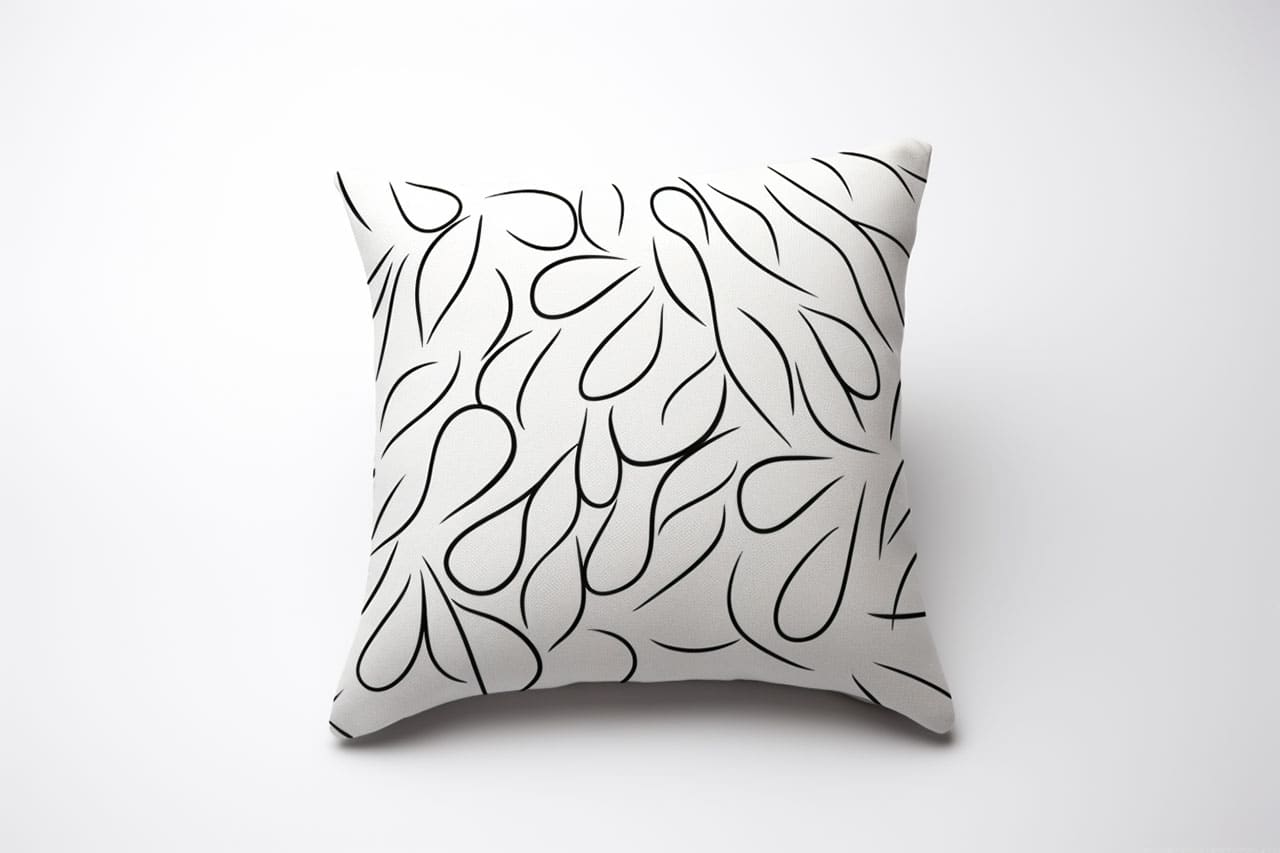
Begin by lightly sketching an elongated oval shape on your paper. This will serve as the basic outline of the pillow. Take your time to ensure the proportions and curves are to your liking.
Step 2: Add the Details of the Pillow
Next, draw the details of the pillow such as the seams and any decorative elements. Pillows often have stitched lines that give them texture and shape. Use light, short strokes to capture the appearance of these details.
Step 3: Develop the Pillow’s Thickness
To make the pillow look three-dimensional, add thickness to the outline by drawing another line parallel to the initial outline. Make sure the new line is slightly inside the first one and follows the general shape of the pillow. This will give the impression of depth.
Step 4: Shade the Pillow’s Surface
Start shading the pillow’s surface by using light, even strokes. Begin with the areas that receive less light, such as the sections between the seams. Gradually build up the shading to create a smooth transition from light to dark areas.
Step 5: Create Highlights and Shadows
To add depth to the pillow, identify the light source in your drawing. Determine where the light hits the pillow and where the shadows fall. Use your pencil to carefully add highlights to the areas directly facing the light source and darken the areas that would be in shadow.
Step 6: Blend the Shading
To create a more realistic texture, use a blending tool to smooth out the shading. Gently rub the tool over the shaded areas to blend the pencil strokes together. This will help create a soft and velvety appearance for the pillow’s surface.
Step 7: Refine and Adjust
Take a step back and observe your drawing. Are there any areas that need adjustments? Use your eraser to lighten or correct any lines or shading that aren’t quite right. Don’t be afraid to make changes as needed to achieve the desired result.
Step 8: Add Extra Details (Optional)
If you want to add extra details to your pillow drawing, you can experiment with different materials. Colored pencils, markers, or pastels can be used to add texture or patterns to the pillow’s fabric. Use these additional materials sparingly to enhance your drawing without overwhelming it.
Conclusion
Congratulations! You’ve successfully drawn a realistic and detailed representation of a pillow. By following these step-by-step instructions, you’ve learned how to create the basic shape, add details, shade, and refine your drawing. Remember to practice regularly to improve your skills and develop your own unique style.
We hope you found this tutorial helpful and inspiring. Drawing pillows can be a fun and rewarding experience, allowing you to capture the comfort and coziness they bring to our lives. So, grab your materials and start sketching your own beautiful pillows today!
Fun Facts About Pillows
- Pillows have been used since ancient Mesopotamian times, primarily to keep bugs and insects away from people’s faces during sleep.
- The ancient Chinese believed that hard pillows made of wood or stone could bring wisdom and health, unlike today’s soft pillows.
- Pillows come in a wide array of sizes and shapes, including bolsters, European squares, and the popular standard or queen sizes.
- Decorative pillows, also known as throw pillows, have no practical sleep function but are used to add a splash of color or style to a room.
- The largest pillow fight on record included over 6,000 participants in Saint Paul, Minnesota, USA.
- Memory foam pillows were first developed by NASA to provide better cushioning and crash protection for astronauts.
- Pillow filling materials vary widely, including options like feathers, down, foam, latex, and even buckwheat hulls.
- Some pillows are designed specifically for support, like cervical pillows for neck support or wedge pillows for sleep posture improvements.
- In the 16th century, having too many pillows meant that you were wealthy, as most people could not afford the luxury of multiple pillows.
- Pillow fights are a popular scene in movies and TV shows, often symbolizing playful or intimate moments.
Suggestions for Scenes and Settings for Pillow Drawings
- Slumber Party Pillow Mountain: Illustrate a room filled to the brim with pillows of all shapes and sizes, where kids are jumping and playing.
- Pillow Fort City: Imagine a sprawling, imaginative fort constructed entirely from different pillows, with tunnels and secret nooks.
- Pillow Cloud Landscape: Create a dreamlike scene where fluffy pillows form clouds in a vibrant sky, with people lounging on top.
- Beach Pillow Lounge: Visualize a sunny beach where people relax on giant pillows, soaking up the sun under a pillow umbrella.
- Pillow Battle Royale: Draw a dynamic action scene where youngsters (or young at heart) are engaged in a friendly pillow fight.
- Pillow Forest: Envision a magical forest where all the trees are pillows, with soft pathways and pillowy creatures roaming the land.
- Medieval Pillow Tournament: Create a humorous depiction of knights jousting with oversized pillows on a grand field.
- Space Pillow Station: Picture an astronaut navigating through zero gravity within a space shuttle filled with floating pillows.
- Pillow Island Paradise: Design an exotic island where every comfort is crafted from pillows, from hammocks to huts.
- Pillow Meditation Retreat: Imagine a serene setting in the mountains where individuals meditate on towering piles of pillows.