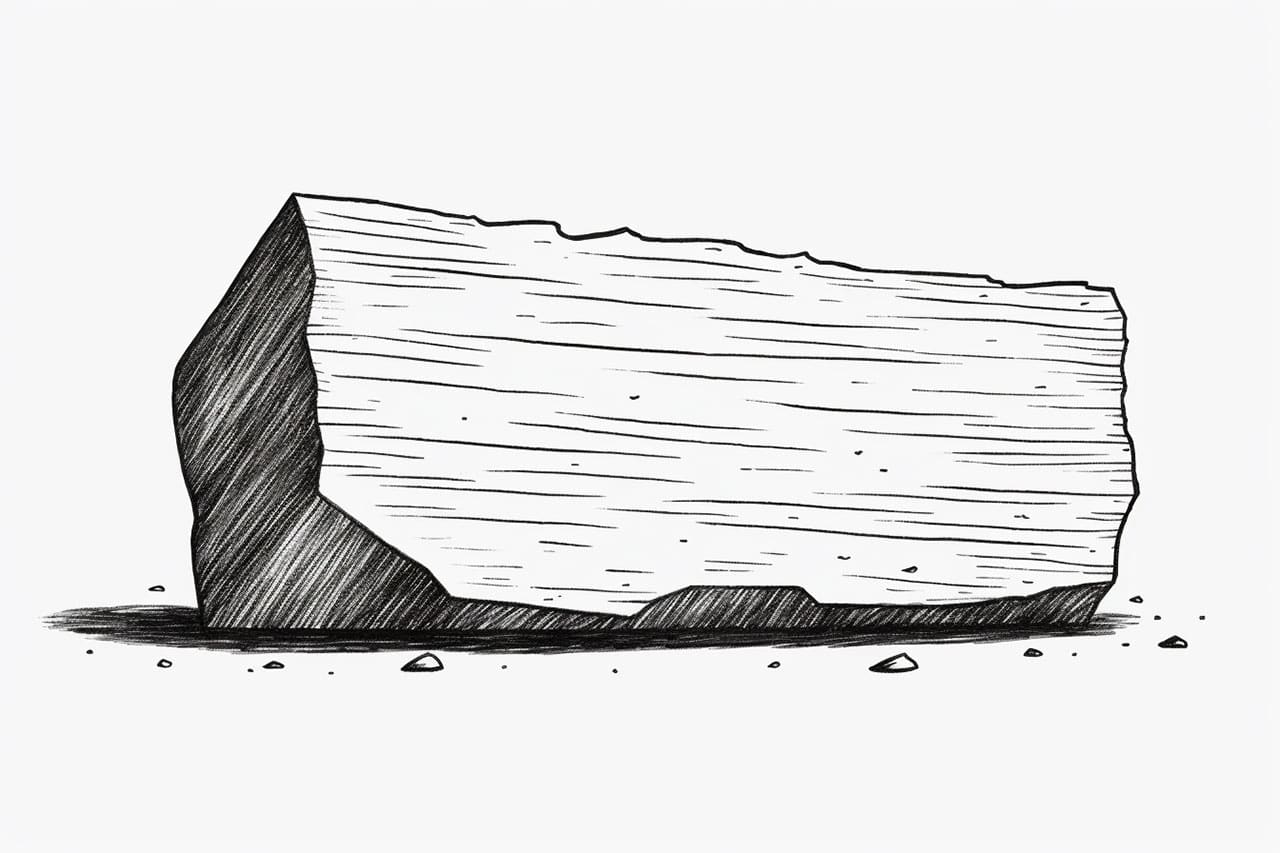
Are you interested in learning how to draw a realistic rock? Rocks may seem simple to draw, but capturing their texture and form can be a fun and rewarding challenge. In this step-by-step guide, I will walk you through the process of how to draw a rock from start to finish. By following along with these instructions, you’ll be able to create a stunning rock drawing that showcases your artistic skills. So let’s get started and bring these fascinating geological formations to life on paper!
Materials Required
To begin drawing a rock, you’ll need the following materials:
- Pencils: A range of graphite pencils with different hardness levels (such as 2H, HB, and 4B) will allow you to achieve various shades and textures in your drawing.
- Drawing Paper: Choose a sturdy and smooth paper that can handle shading and erasing without tearing easily. A good quality sketchbook or drawing pad works well.
- Eraser: A kneaded eraser is ideal for removing and lightening graphite lines without damaging the paper.
- Blending Tool: You can use a blending stump, tortillon, or even a cotton swab to blend and soften the graphite lines in your drawing.
- Reference Image: Find a clear and detailed reference photo of a rock to help you understand its structure and texture as you draw.
Step 1: Sketch the Basic Shape
Start by lightly sketching the basic shape of your rock using an HB pencil. Observe the reference image closely to understand the overall form. Rocks can come in various shapes, such as round, rectangular, or irregular. Use simple geometric shapes as a foundation for your sketch, and pay attention to any distinct features or angles.
Step 2: Add Texture
Once you have the basic shape in place, it’s time to add texture to your rock. Use a 2H pencil to lightly shade areas where you see shadows or highlights in the reference image. Start by laying down a light layer of graphite, gradually building up the darkness as you go. Remember, rocks often have rough surfaces, so use short, irregular strokes to create the illusion of texture.
Step 3: Define the Contours
Next, use a 2H or HB pencil to define the contours of your rock. Pay close attention to the edges and curves of the rock, as these details will help give it a three-dimensional appearance. Use light, confident strokes to outline the rock, adjusting the thickness of your lines based on the shadows and highlights you observe.
Step 4: Shade the Rock
Now it’s time to add depth and volume to your rock by shading it. Use different hardness levels of pencils to achieve a range of values, from light to dark. Start by shading the areas where the shadows are the deepest, gradually working your way towards the lighter areas. Observe the reference image carefully to replicate the shading accurately. Focus on creating smooth transitions between light and dark areas to make your rock drawing look more realistic.
Step 5: Refine the Details
Once you have shaded the main areas of your rock, take some time to refine the details. Use a sharp pencil or a finer point mechanical pencil to add smaller textures like cracks, crevices, or rough patches. Pay attention to how these details interact with the overall shading and form of the rock. Remember, rocks can have a variety of textures, so take your time to capture the unique qualities of the rock you’re drawing.
Step 6: Blend and Soften
To achieve a more polished look, use a blending tool such as a blending stump or tortillon to blend and soften the graphite lines in your drawing. This technique helps to create a smoother and more realistic texture. Be careful not to over-blend, as you still want to maintain some of the roughness and texture of the rock. Use the blending tool selectively, focusing on areas where the light hits the rock or where the shadows are softer.
Conclusion
Congratulations! You have successfully learned how to draw a rock from start to finish. By following these step-by-step instructions, you should now have a realistic and detailed representation of a rock. Remember to practice regularly and experiment with different techniques to improve your skills as an artist. Drawing rocks can be a wonderful way to enhance your understanding of texture, form, and shading. So grab your pencils, find an interesting rock, and start exploring the fascinating world of rock drawing!