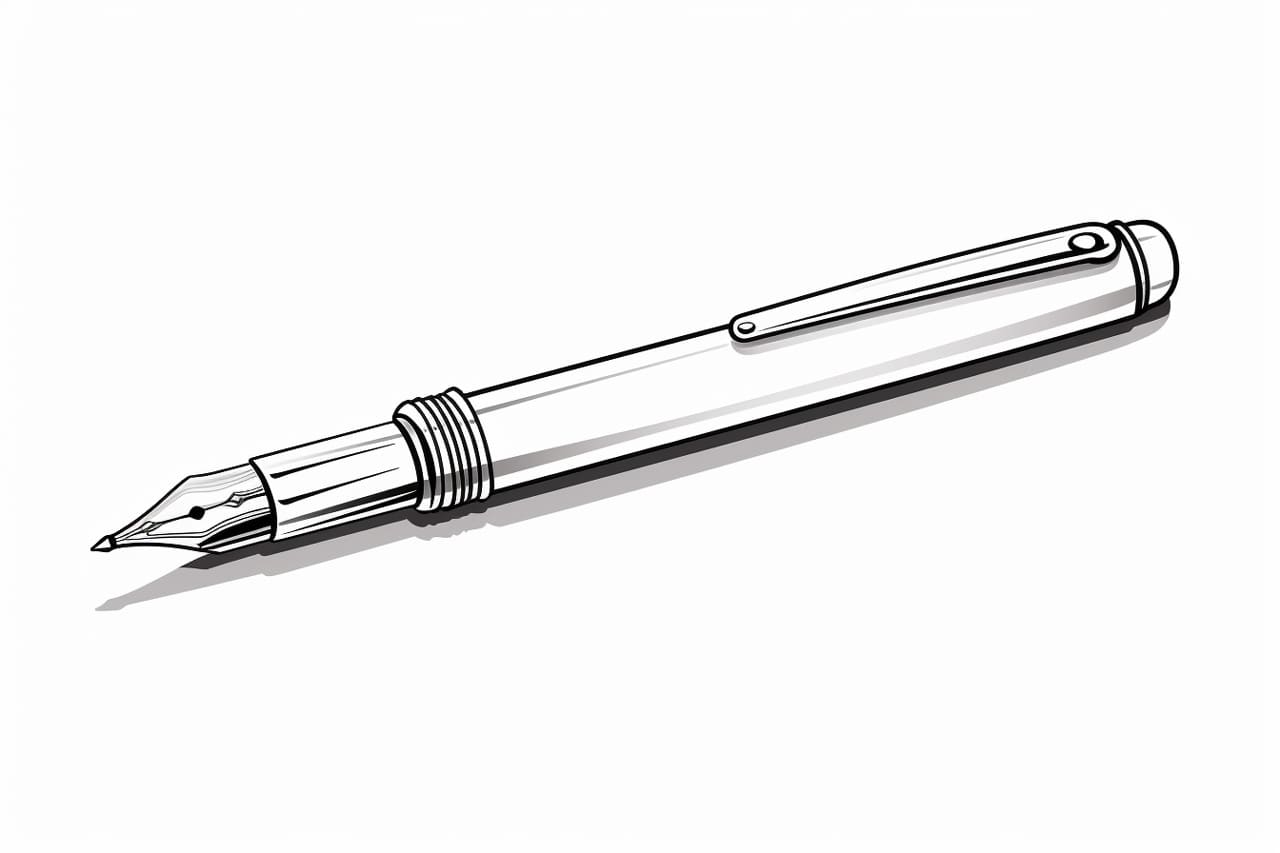
Welcome to this step-by-step guide on how to draw a pen. Whether you are an aspiring artist or want to improve your drawing skills, this tutorial will help you create a realistic representation of a pen on paper. So grab your sketchbook, and let’s get started!
Materials Required
Before we dive into the drawing process, let’s gather the materials you will need:
- Pencil (preferably HB or 2B for a darker line)
- Eraser
- Smooth paper (such as drawing paper or bristol board)
- Fine-liner or pen (for adding details, optional)
- Ruler (for measuring and creating straight lines, optional)
Now that you have your materials ready, let’s begin the journey of drawing a pen!
Step 1: Sketch the Basic Shape of the Pen
Start by lightly sketching an elongated rectangle in the center of your paper. This will serve as the main body of the pen. Remember, the outline should be proportional and aligned with the edges of your paper.
Step 2: Add Details to the Cap
Next, draw a smaller rectangle at the top of the pen’s body, representing the cap. Make sure it overlaps slightly with the main body. Within the cap, sketch a circular shape to depict the part where the cap clicks onto the pen.
Step 3: Illustrate the Clip
Now, it’s time to add the clip that attaches the pen to your shirt pocket. At the top of the pen’s body, draw a small rectangle, slightly tilted. Connect the bottom corners of the rectangle to the main body using curved lines, forming the clip.
Step 4: Draw the Pen’s Writing End
Moving towards the bottom of the pen, sketch a small cylindrical shape, slightly wider than the rest of the body. This represents the part where the ink cartridge or ballpoint tip would be. Make sure to align it with the center of the pen.
Step 5: Outline the Pen’s Grip
Around the middle of the pen’s body, add a cylindrical shape with a slightly thicker circumference. This indicates the grip, helping you hold the pen comfortably while writing. It should be positioned slightly above the pen’s center.
Step 6: Refine the Shape and Add Texture
Now it’s time to refine the shape of your pen. Go over the sketch with darker lines, emphasizing the edges and curves. Erase any unnecessary guidelines from the initial sketch to clean up the drawing.
To make your pen look more realistic, you can add texture. Observe your own pen or reference images to identify any patterns or texture details on the body. Depict these details by lightly adding strokes or crosshatching with your pencil.
Step 7: Finalize the Details
In this step, you can add the finer details that make your pen drawing stand out. Observe the pen you are drawing and add any additional features like a branding logo, model name, or other small elements that might be present.
If you have a fine-liner or pen, you can use it to trace over the important lines of your drawing. This will make them more defined and help highlight certain areas of the pen.
Conclusion
Congratulations on completing your pen drawing! By following these step-by-step instructions, you have learned how to depict the shape, details, and texture of a pen. Remember, practice is key to improving your drawing skills, so keep experimenting and trying new subjects.
Drawing everyday objects like a pen helps develop your observation skills and attention to detail. It’s a fun way to enhance your artistic abilities, whether you’re a beginner or an experienced artist.
So grab your sketchbook and continue exploring the world of art through drawing!