Do you want to learn how to draw a nest? Drawing a nest can be a fun and challenging task for any artist. Whether you are a beginner or an experienced artist looking to expand your skills, this step-by-step guide will help you create a beautiful nest drawing. In this article, you will find detailed instructions along with a list of materials needed. So let’s get started and unleash your creativity!
Materials Required
To draw a nest, you will need the following materials:
- Paper: Choose a high-quality drawing paper that is suitable for your preferred drawing medium.
- Pencils: A set of graphite pencils ranging from 2H to 6B will be ideal for shading and adding detail.
- Eraser: Have a good quality eraser handy to correct any mistakes or lighten areas.
- Sharpener: Keep a sharpener nearby to maintain a fine point on your pencils.
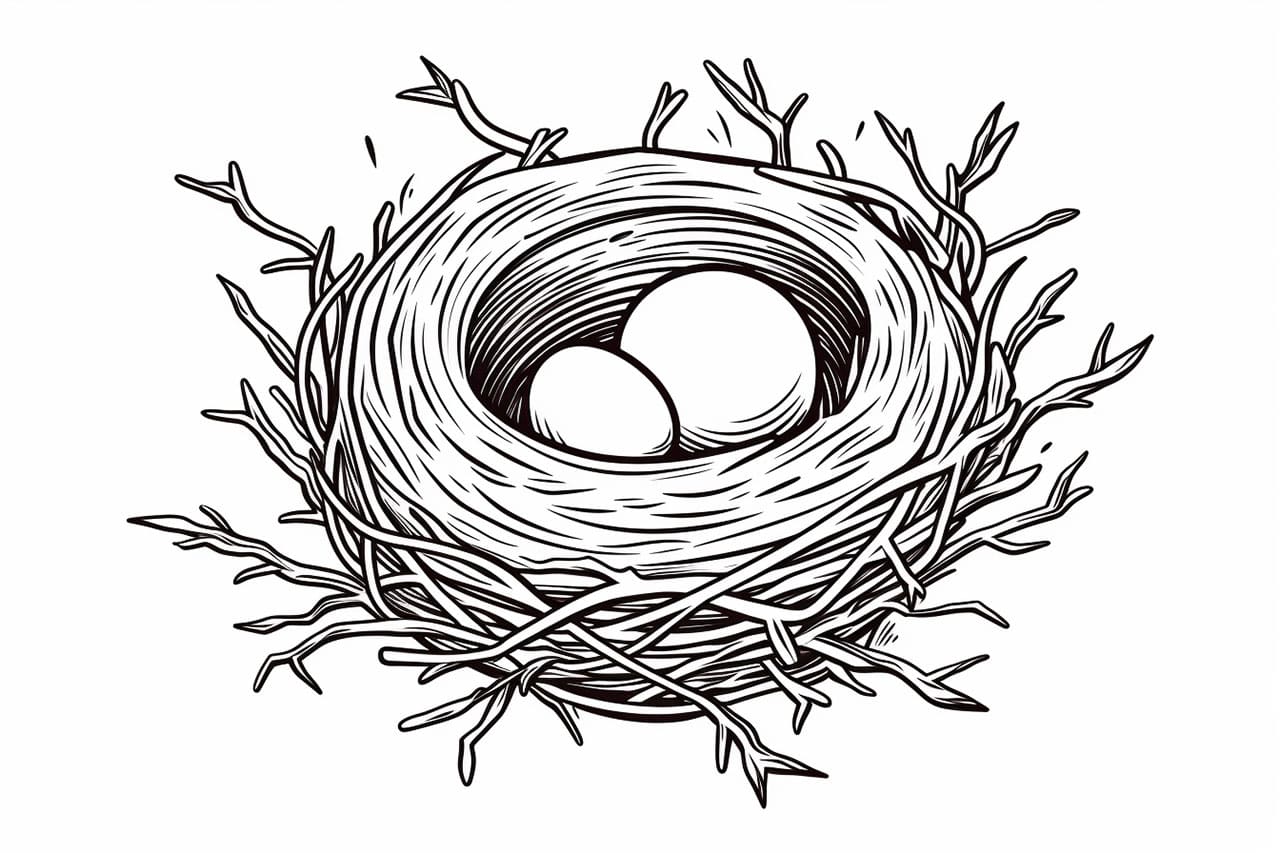
- Reference Image: Find a clear image of a nest for inspiration and guidance.
- Optional: Colored pencils or watercolors if you wish to add color to your drawing.
Now that you have gathered your materials, let’s begin the step-by-step process of drawing a nest.
Step 1: Basic Outline
Start by lightly sketching a circular shape on your paper to represent the base of the nest. Nests are rarely perfectly circular, so don’t worry about creating a perfect shape. Add a couple of curved lines around the circle to indicate the inner structure of the nest.
Step 2: Weaving the Nest
Next, start adding crisscrossing lines within the circular shape to create a woven texture. These lines should follow the curve of the circle, as nests are usually built in a rounded shape. Vary the thickness of the lines to make the nest look more realistic. Keep the lines loose and uneven, as nests are not perfectly symmetrical.
Step 3: Adding Depth
To give your nest drawing depth, darken the areas where the lines overlap or cross over each other. This will create shadows and make the nesting material stand out. Use a softer pencil, such as a 4B or 6B, to achieve a richer tone.
Step 4: Texture and Details
Nests are made from various natural materials such as twigs, leaves, and grass. Add these details by sketching small, irregular shapes to represent twigs and other materials. Pay attention to the placement and direction of these elements to create a realistic texture. Vary the size and angle of the twigs to add interest to your drawing.
Step 5: Inner Structure
Inside the nest, birds often line the interior with softer materials such as feathers, moss, or fur. Depict this inner structure by adding a few curved lines representing the softer materials. Use a lighter touch and a softer pencil to create a contrast with the outer structure of the nest.
Step 6: Nesting Material
To make your nest drawing appear more realistic, add shading and texture to the nesting materials. Use hatching and cross-hatching techniques with your pencil to create the illusion of different textures. Darken areas where the materials overlap to create depth and shadows. Take your time with this step, as the details will enhance the overall realism of your drawing.
Step 7: Final Touches
Review your drawing and make any necessary adjustments or refinements. Clean up any stray lines or smudges with an eraser. If you wish to add color to your nest, use colored pencils or watercolors to bring your drawing to life. Experiment with different color combinations to achieve the desired effect.
Conclusion
Congratulations! You have successfully learned how to draw a nest. By following these step-by-step instructions and adding your own creative touches, you have created a beautiful artwork. Drawing nests can be challenging but also incredibly rewarding. Practice regularly and experiment with different techniques to further develop your artistic skills.
Remember, every artist’s journey starts with a simple step. So grab your pencils, paper, and reference image, and start creating your nest drawing today!